The Tenant Access page is the front door for workspace access. What it shows depends on who you are: a guest is pointed to account creation, a signed-in user with no workspace can submit an access request for review, and a platform admin gets a create-tenant wizard.
/tenant-signup.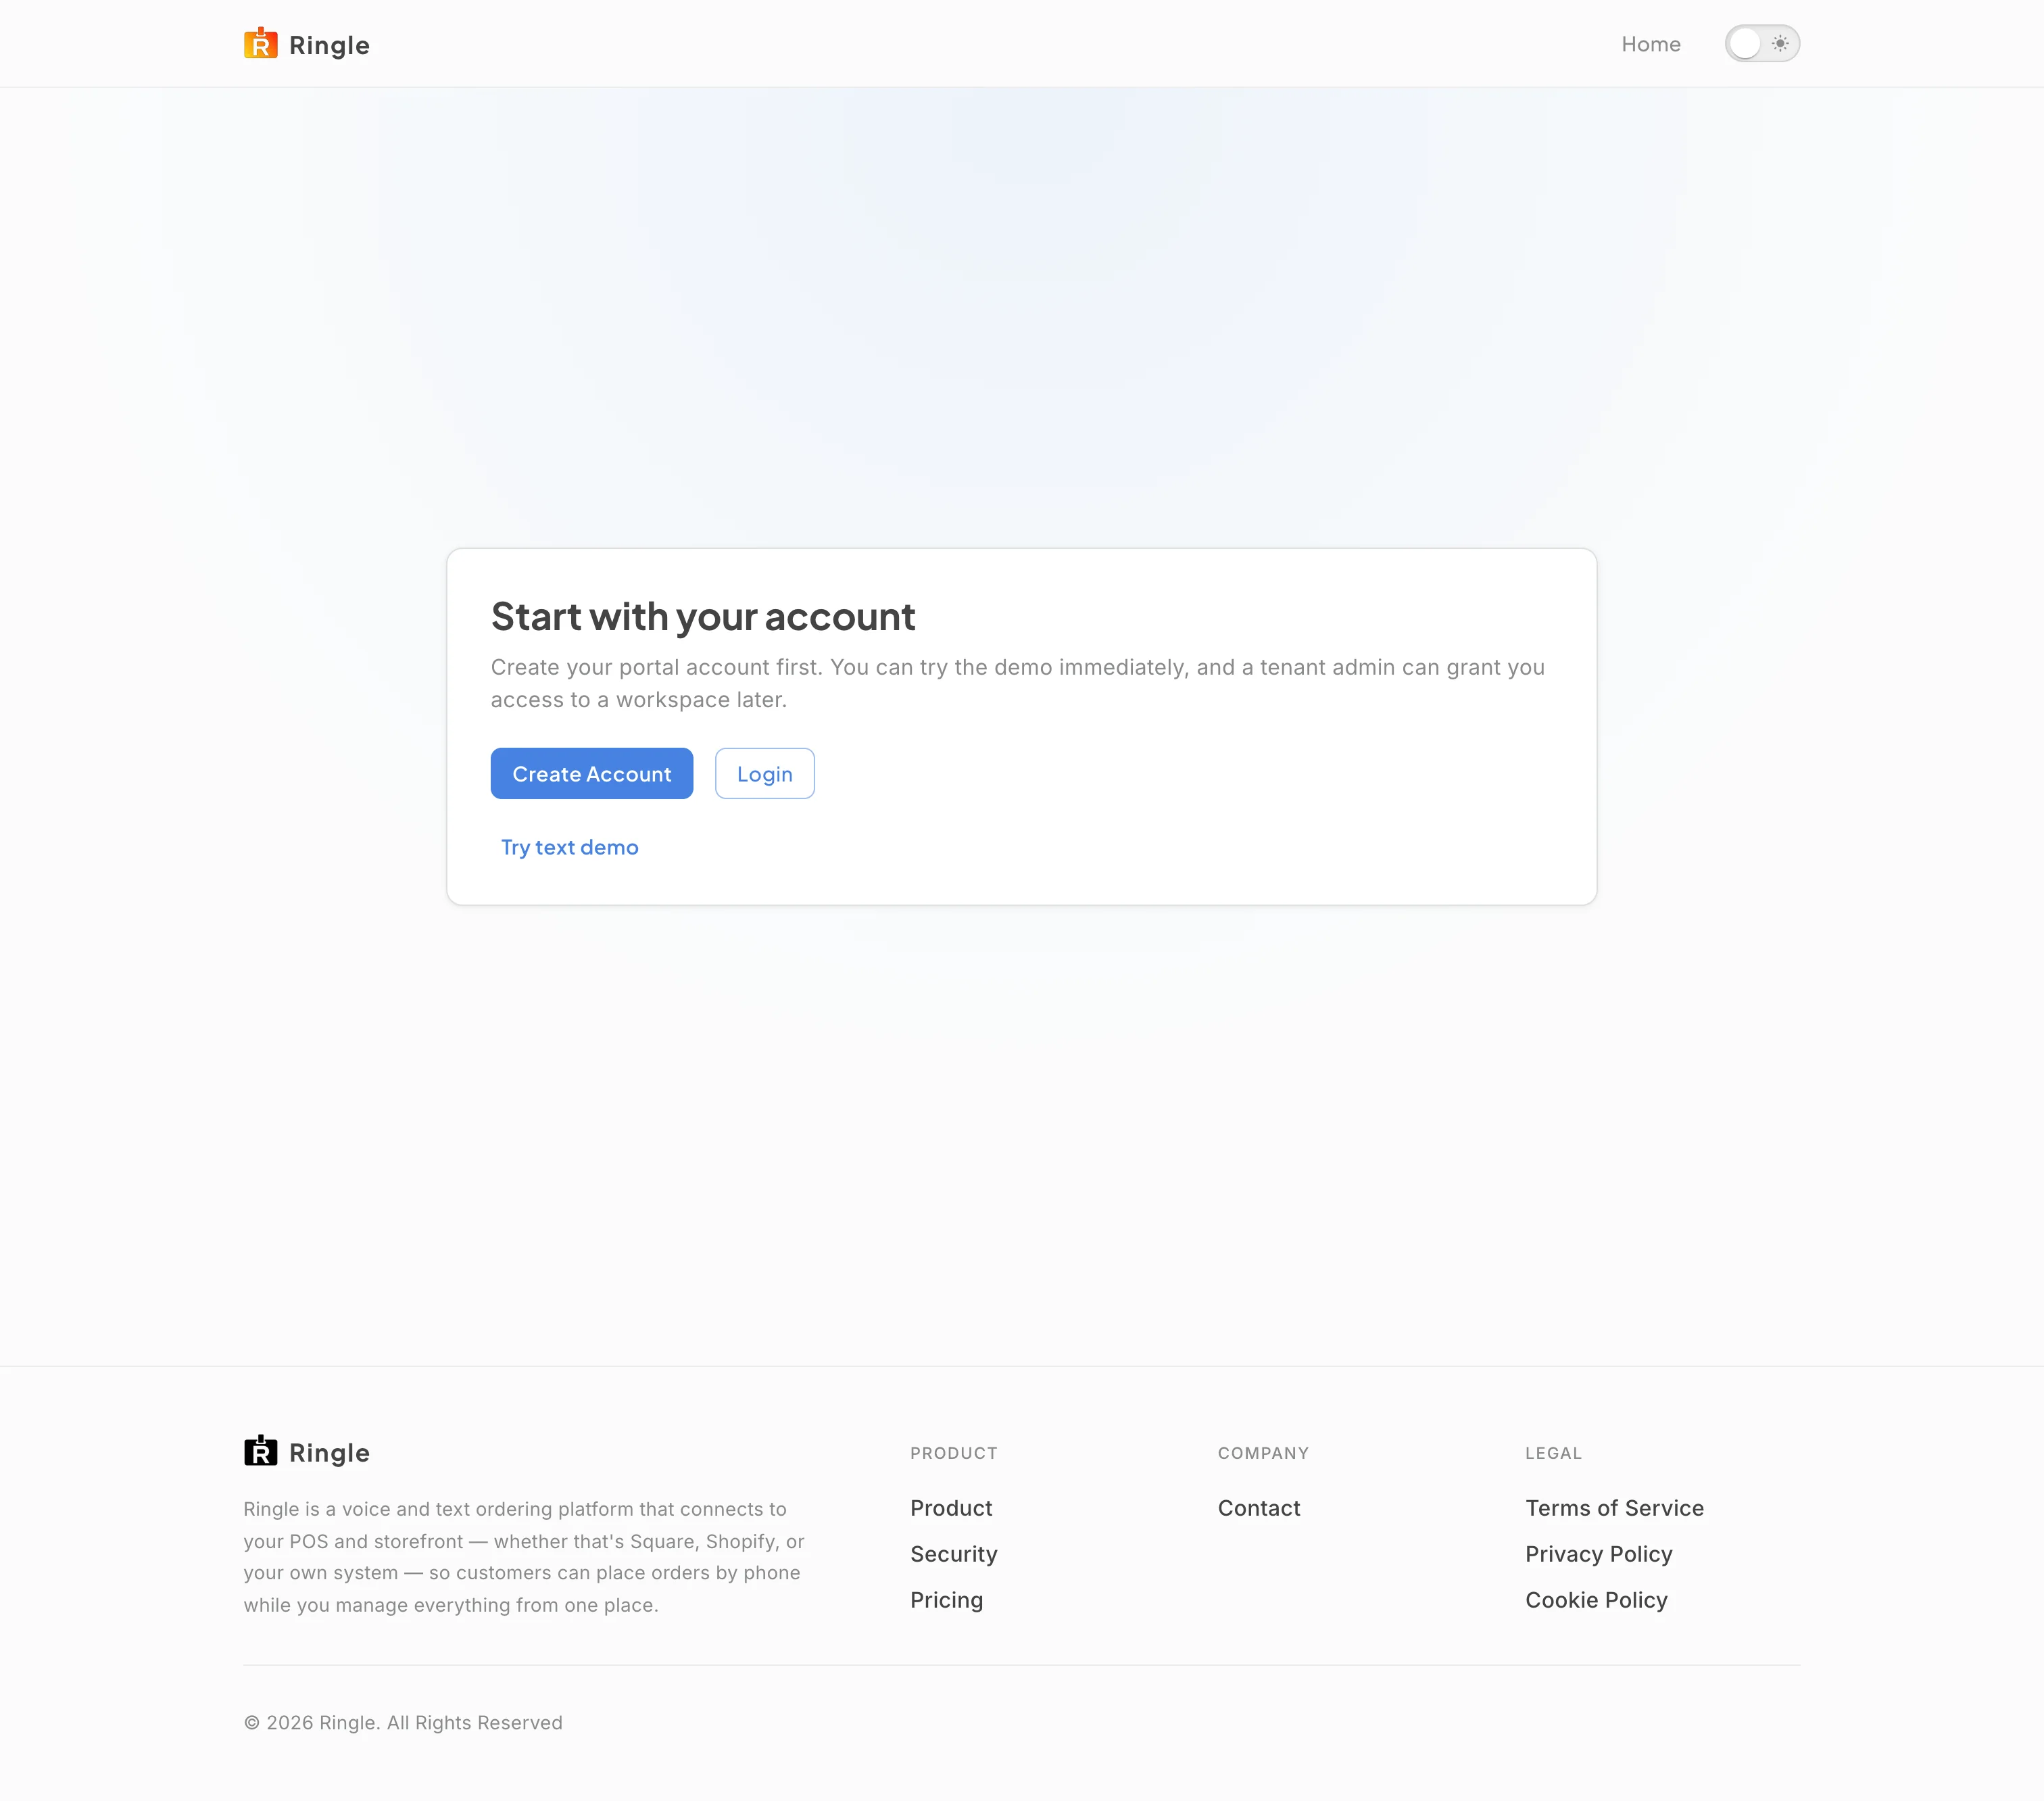
Action: While logged out, open
portal.getringle.com/tenant-signup.
What you should see: A card titled “Start with your account” appears. It explains that you should create a portal account first: you can try the demo immediately, and a tenant admin can grant workspace access later. It has a Create Account button, a Login button, and a “Try text demo” link that opens the text test drive without any workspace.
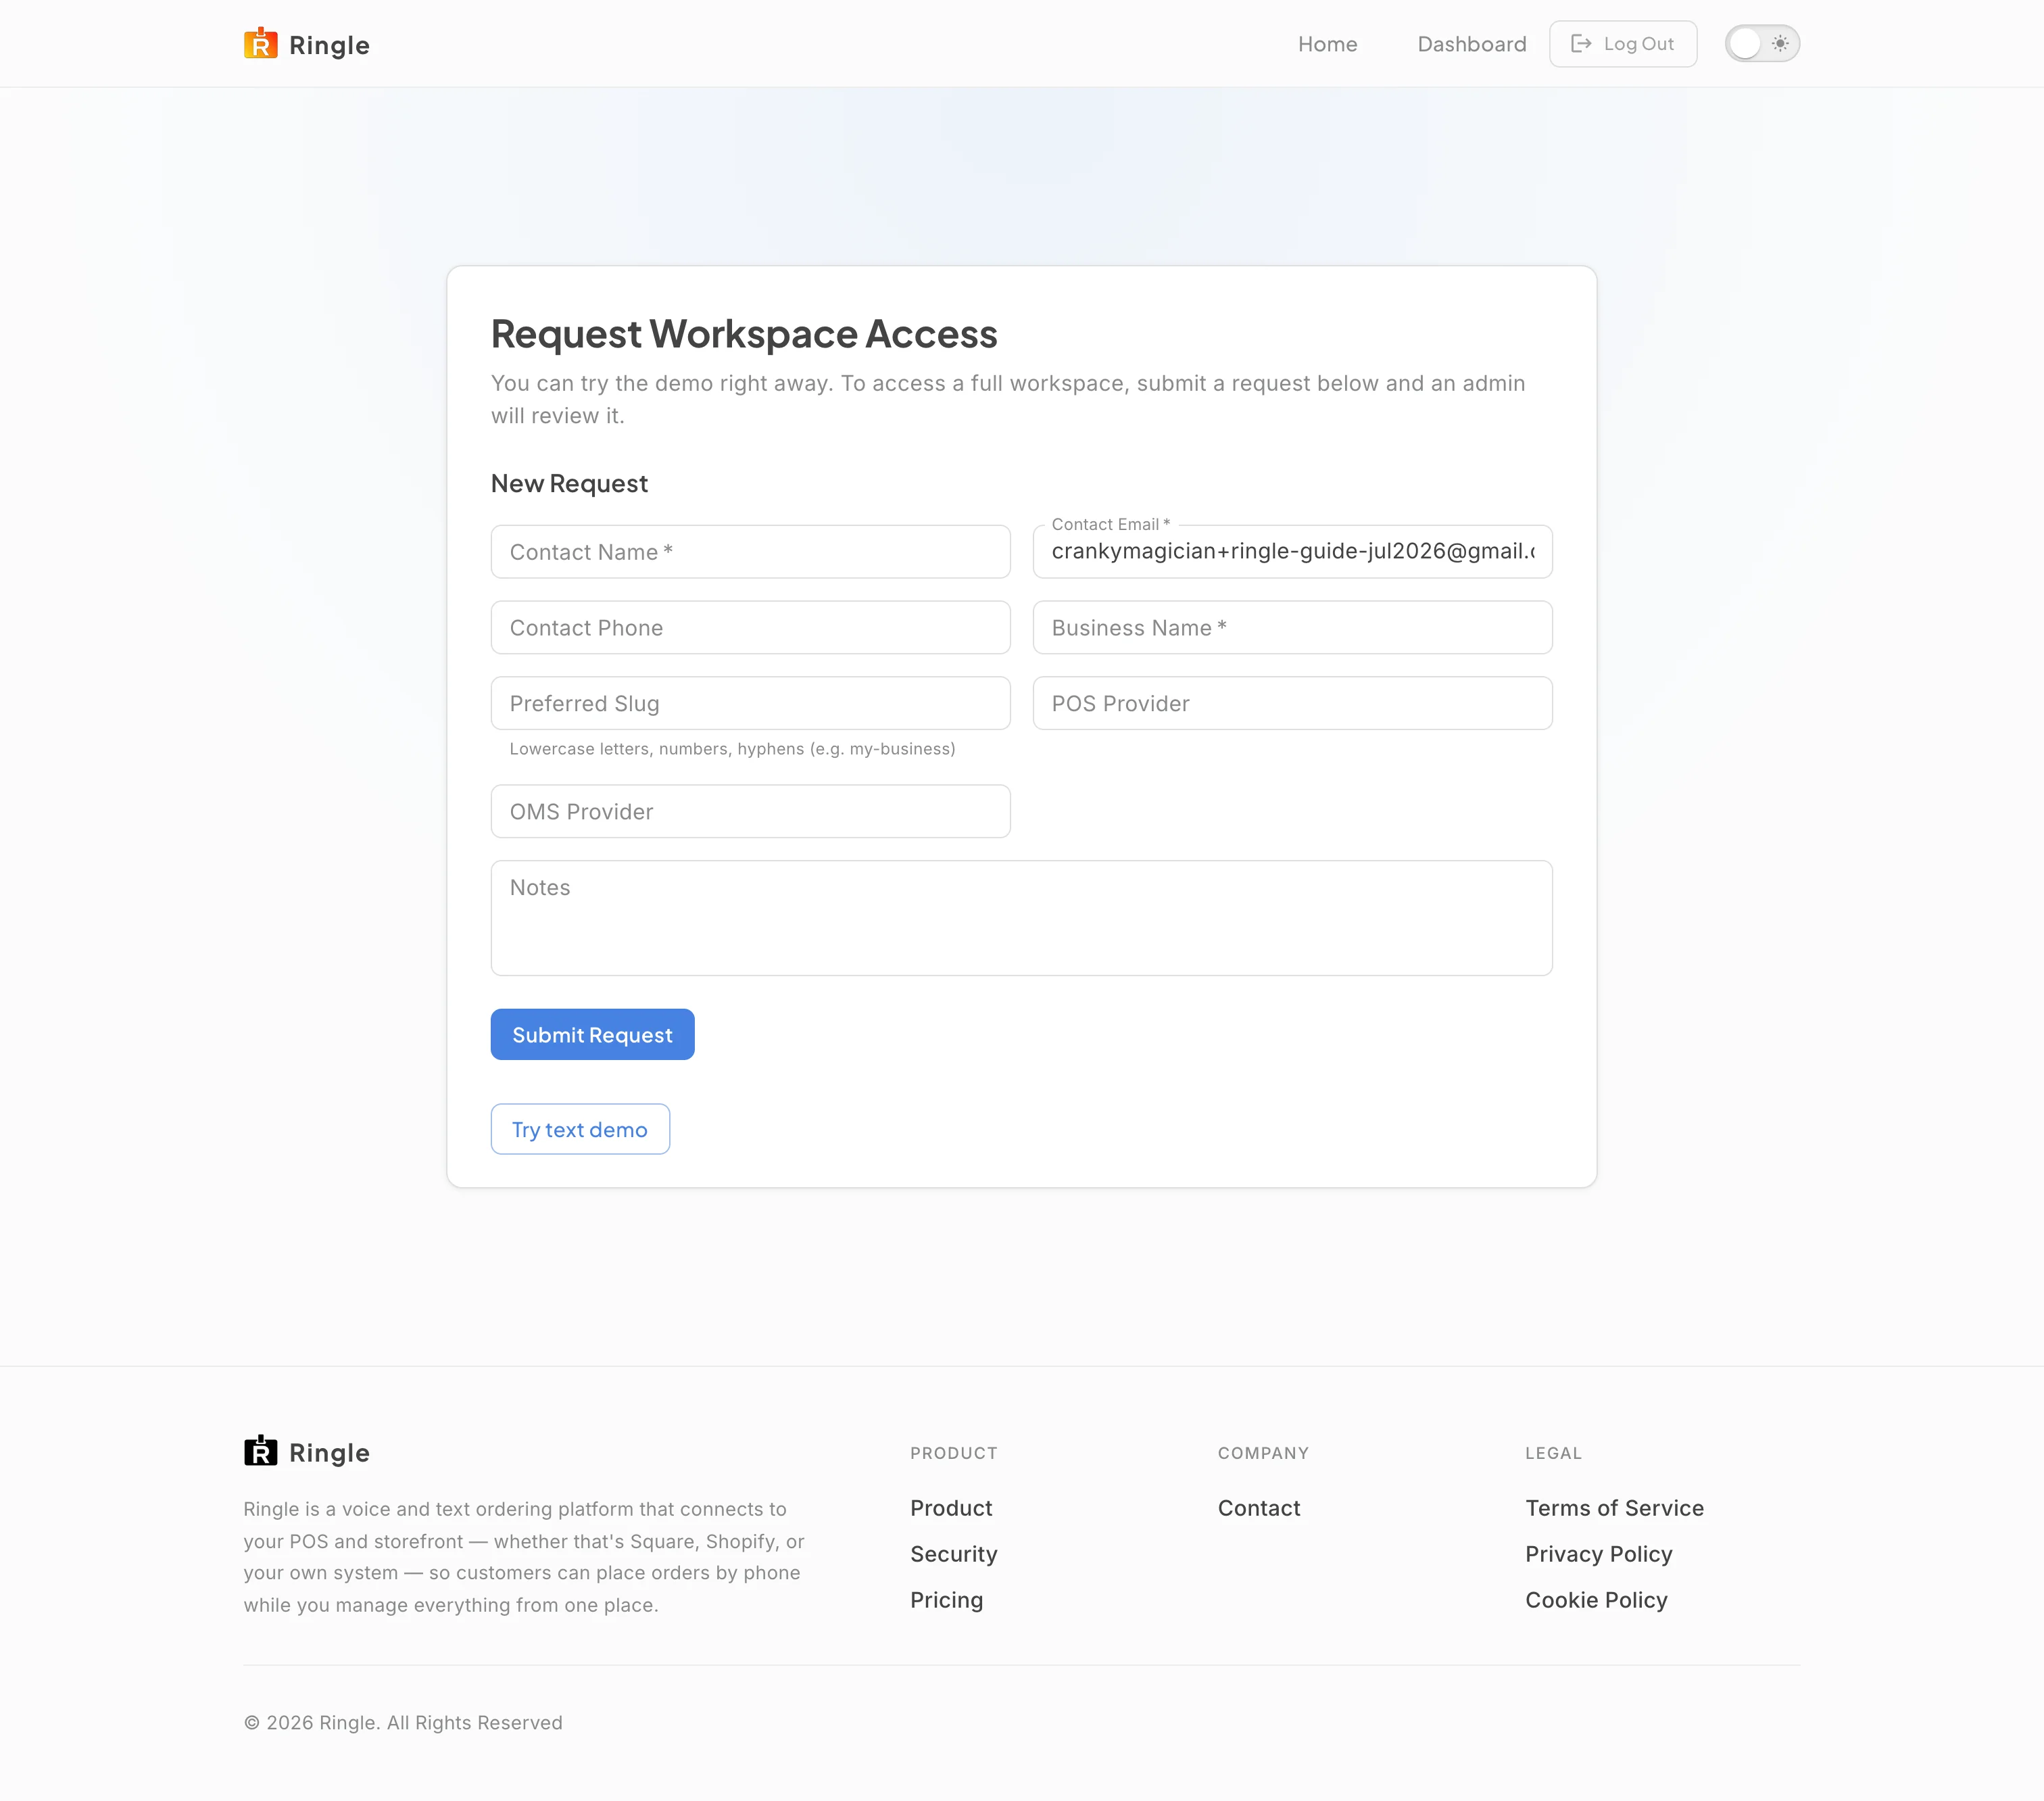
Action: Sign in with an account that has no workspace membership. You land on this page automatically. Trying to open a members-only page such as the dashboard also redirects here.
What you should see: The card now reads “Request Workspace Access”. If you arrived by trying to open a specific page, the subtitle names it (for example “To open dashboard, your account needs access to a workspace.”). Otherwise it says you can try the demo right away and submit a request for a full workspace. Below is a New Request form with Contact Name (required), Contact Email (required, prefilled from your account), Contact Phone, Business Name (required), Preferred Slug, POS Provider, OMS Provider, and Notes.
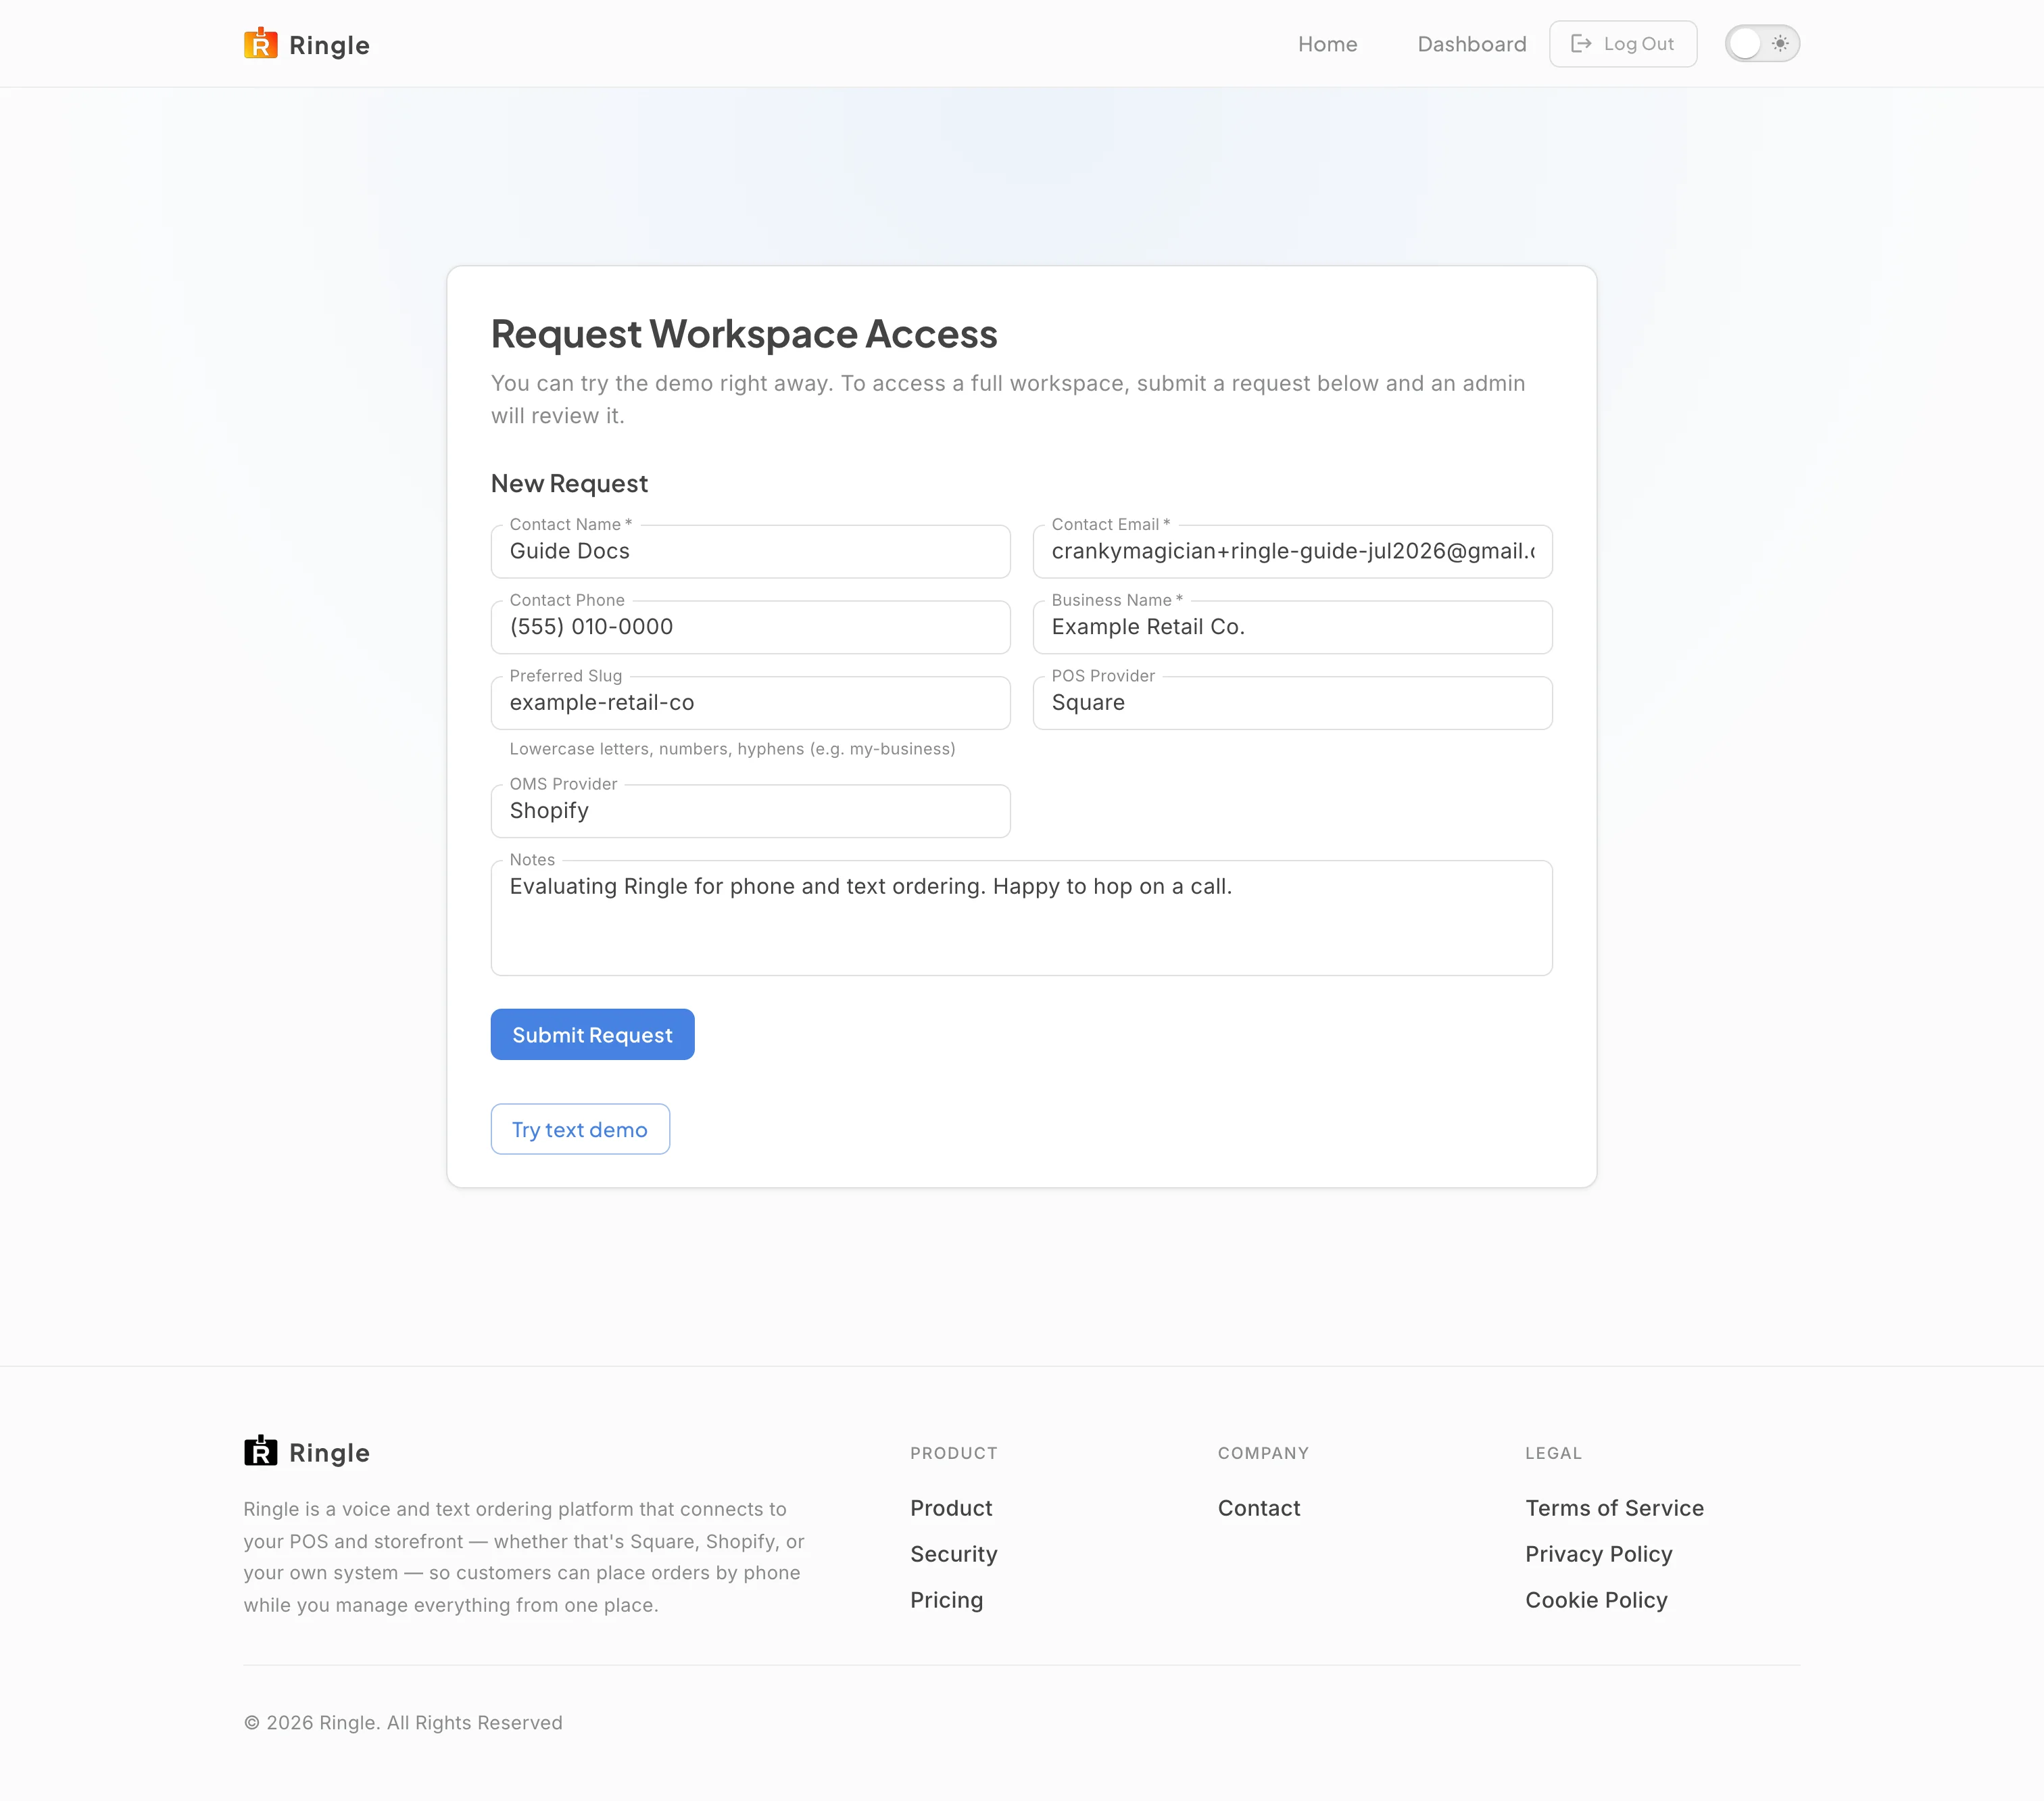
Action: Fill in the form: your name, phone, the
business name, a slug suggestion (lowercase letters, numbers, hyphens,
like my-business), the POS and OMS systems you run, and
anything else the reviewer should know. Click Submit Request when you
are ready.
What you should see: The form accepts the values. Submit Request sends them for review. Name, email, and business name are the minimum; everything else is optional but speeds up the review. On success, a green banner confirms “Your request has been submitted. We’ll review it shortly.”
Screenshot not available (submitting from the documentation account would place a live request in the review queue)
Action: Return to this page later to track your request.
What you should see: Submitted requests are listed above the form. Each shows the business name, a status chip (Pending in orange, Approved in green, Rejected in red, Cancelled in grey), and the submission date. A pending request has a Cancel Request button if you change your mind. An approved request shows “Your request was approved!” with a Go to Dashboard button. A rejected request shows the reviewer’s reason.
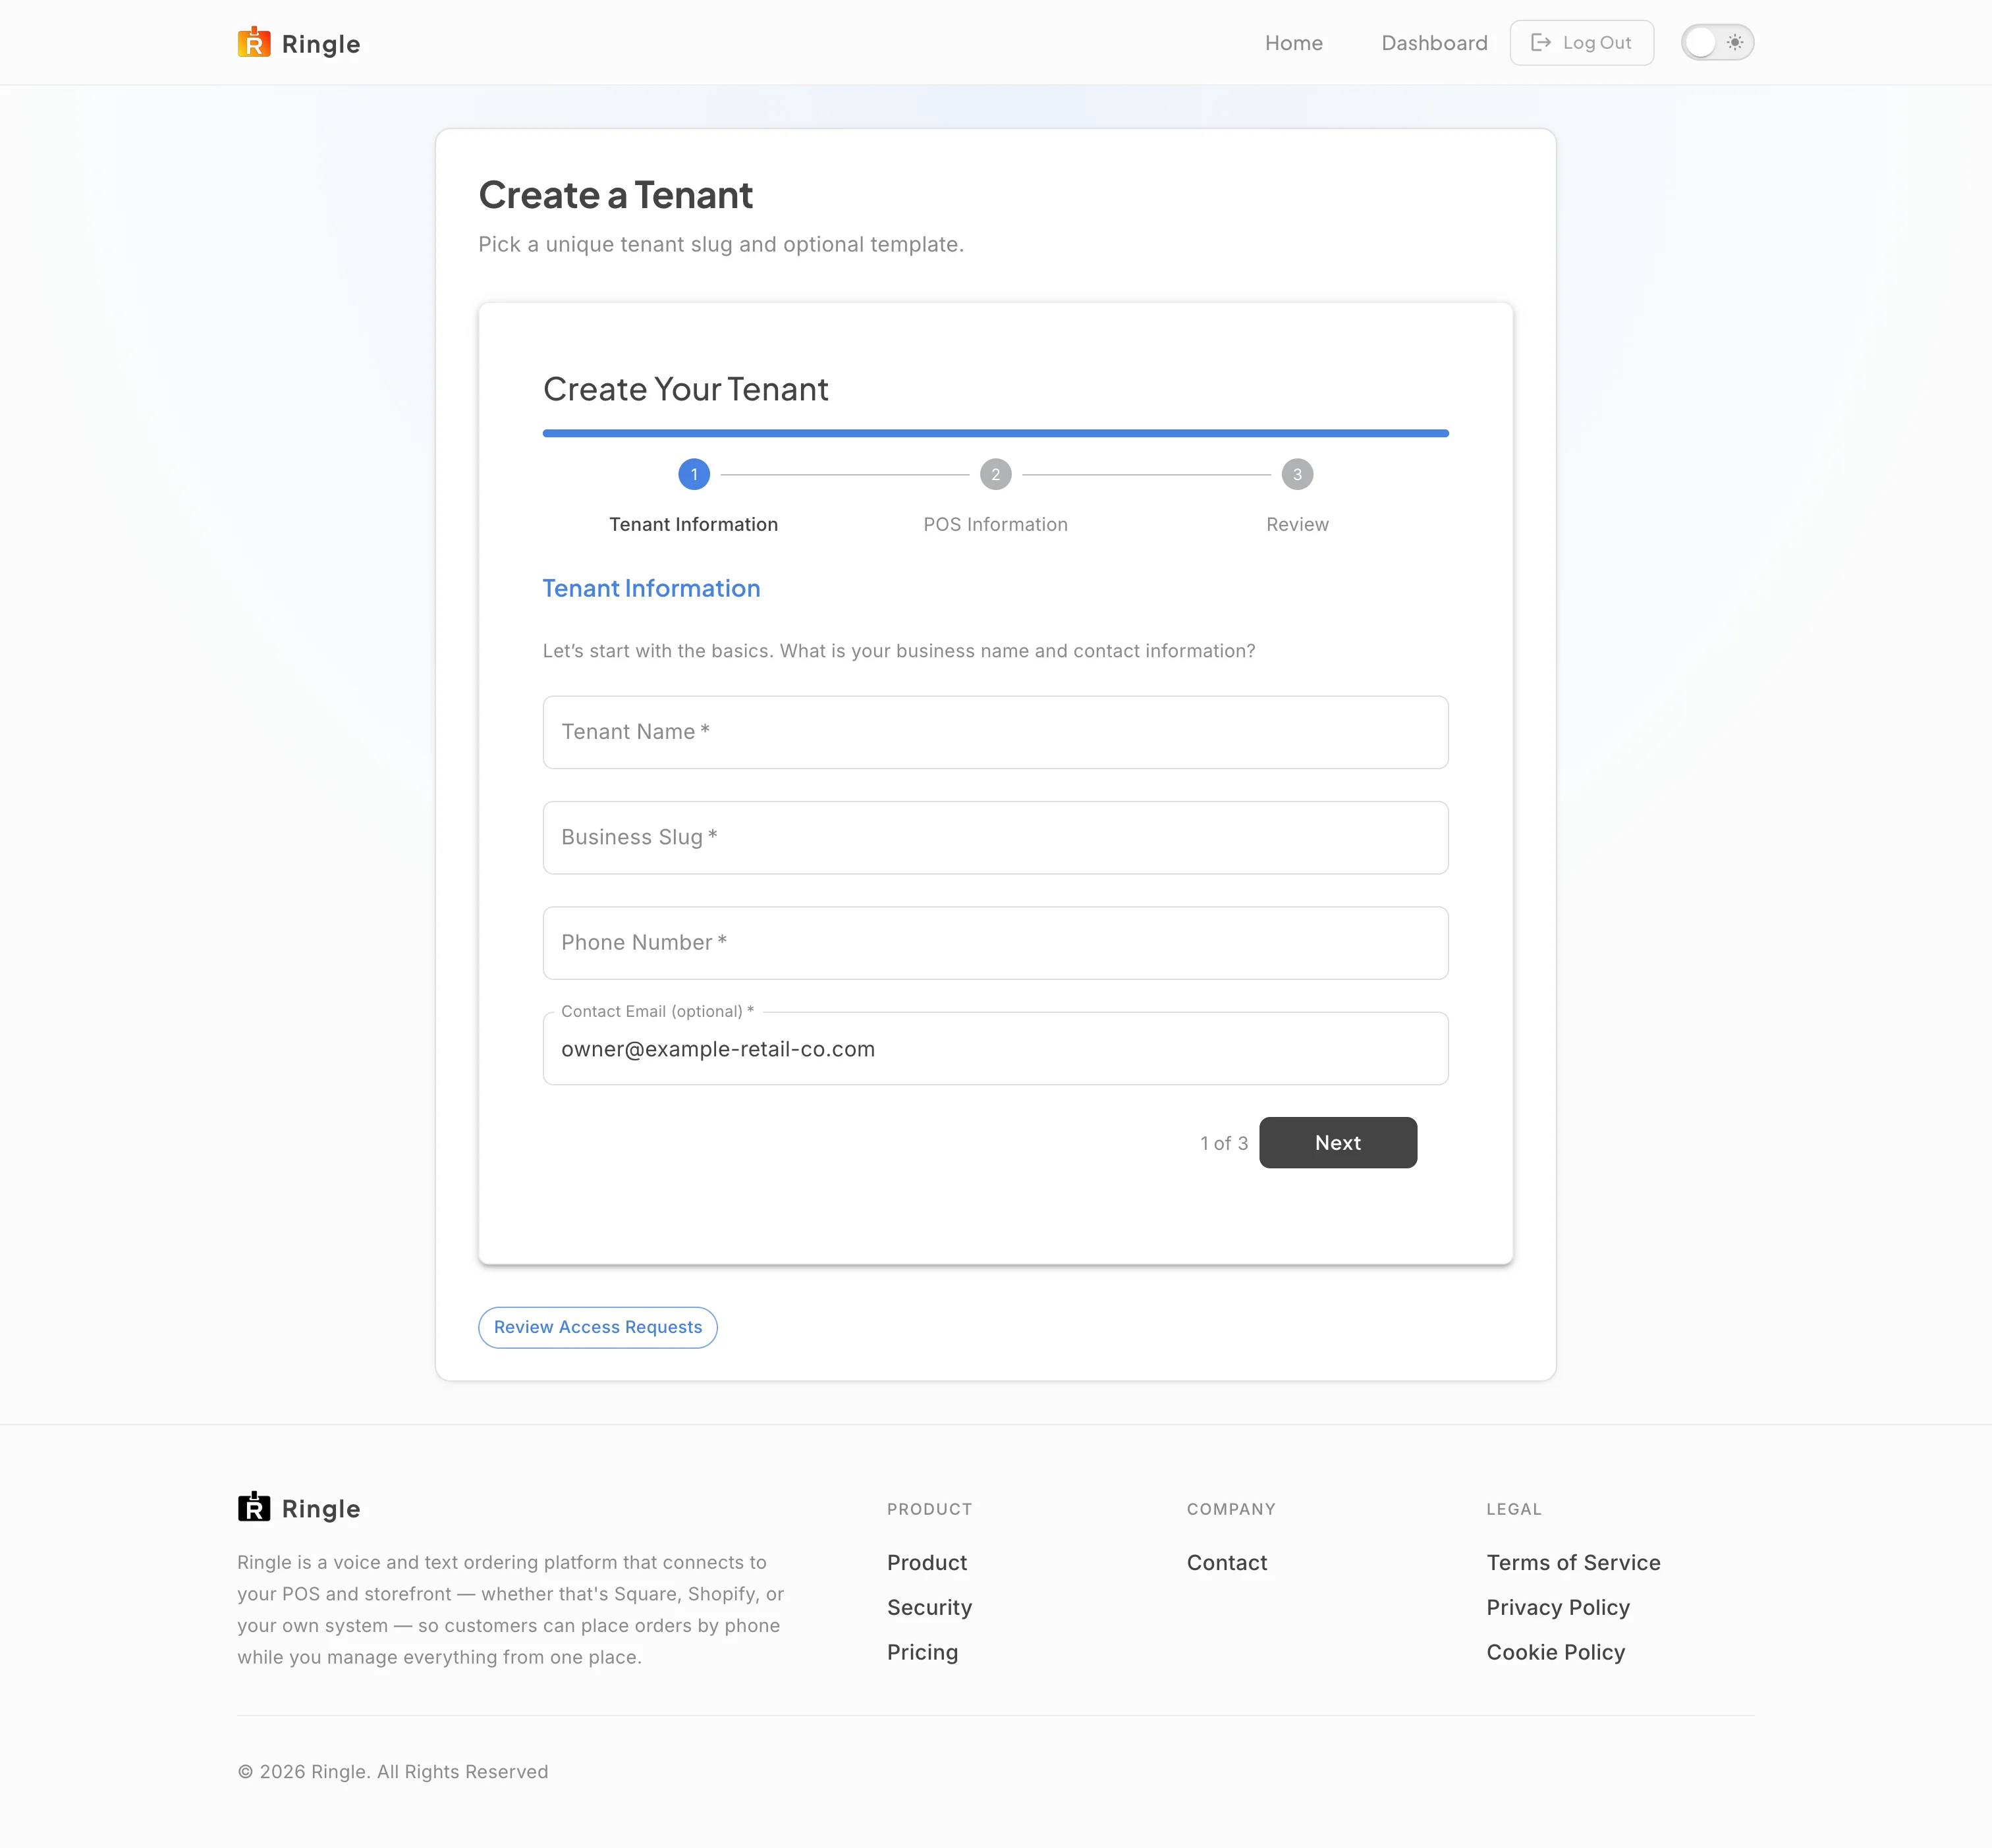
Action: As a platform admin, open the same page to create a tenant directly.
What you should see: Admins see “Create a Tenant” with a three-step wizard. Step one is Tenant Information: Tenant Name, Business Slug, Phone Number, and Contact Email (the email is prefilled from your admin account). Step two is POS Information: a POS Provider dropdown offering Square, Clover, Toast, or None, plus a POS Location Id; this step is optional. Step three is Review, which echoes everything back before anything is created. A “Review Access Requests” shortcut links to the admin queue of pending requests. The platform admin guide covers the admin pages themselves.
/tenant-signup (public). The legacy
/business-creation and /business-signup routes
redirect here. A signed-in member who already has a workspace is
redirected straight to /dashboard.pages/TenantSignupPage.jsx,
components/tenant-management/TenantSignupWizard.jsx,
components/tenant-management/AccessRequestForm.jsx, and
components/tenant-management/AccessRequestStatus.jsx in the
portal app.