Give other people access to your workspace from the Sharing page. Manage members and their roles, invite someone by email, and create public share links that open the guest chat experience.
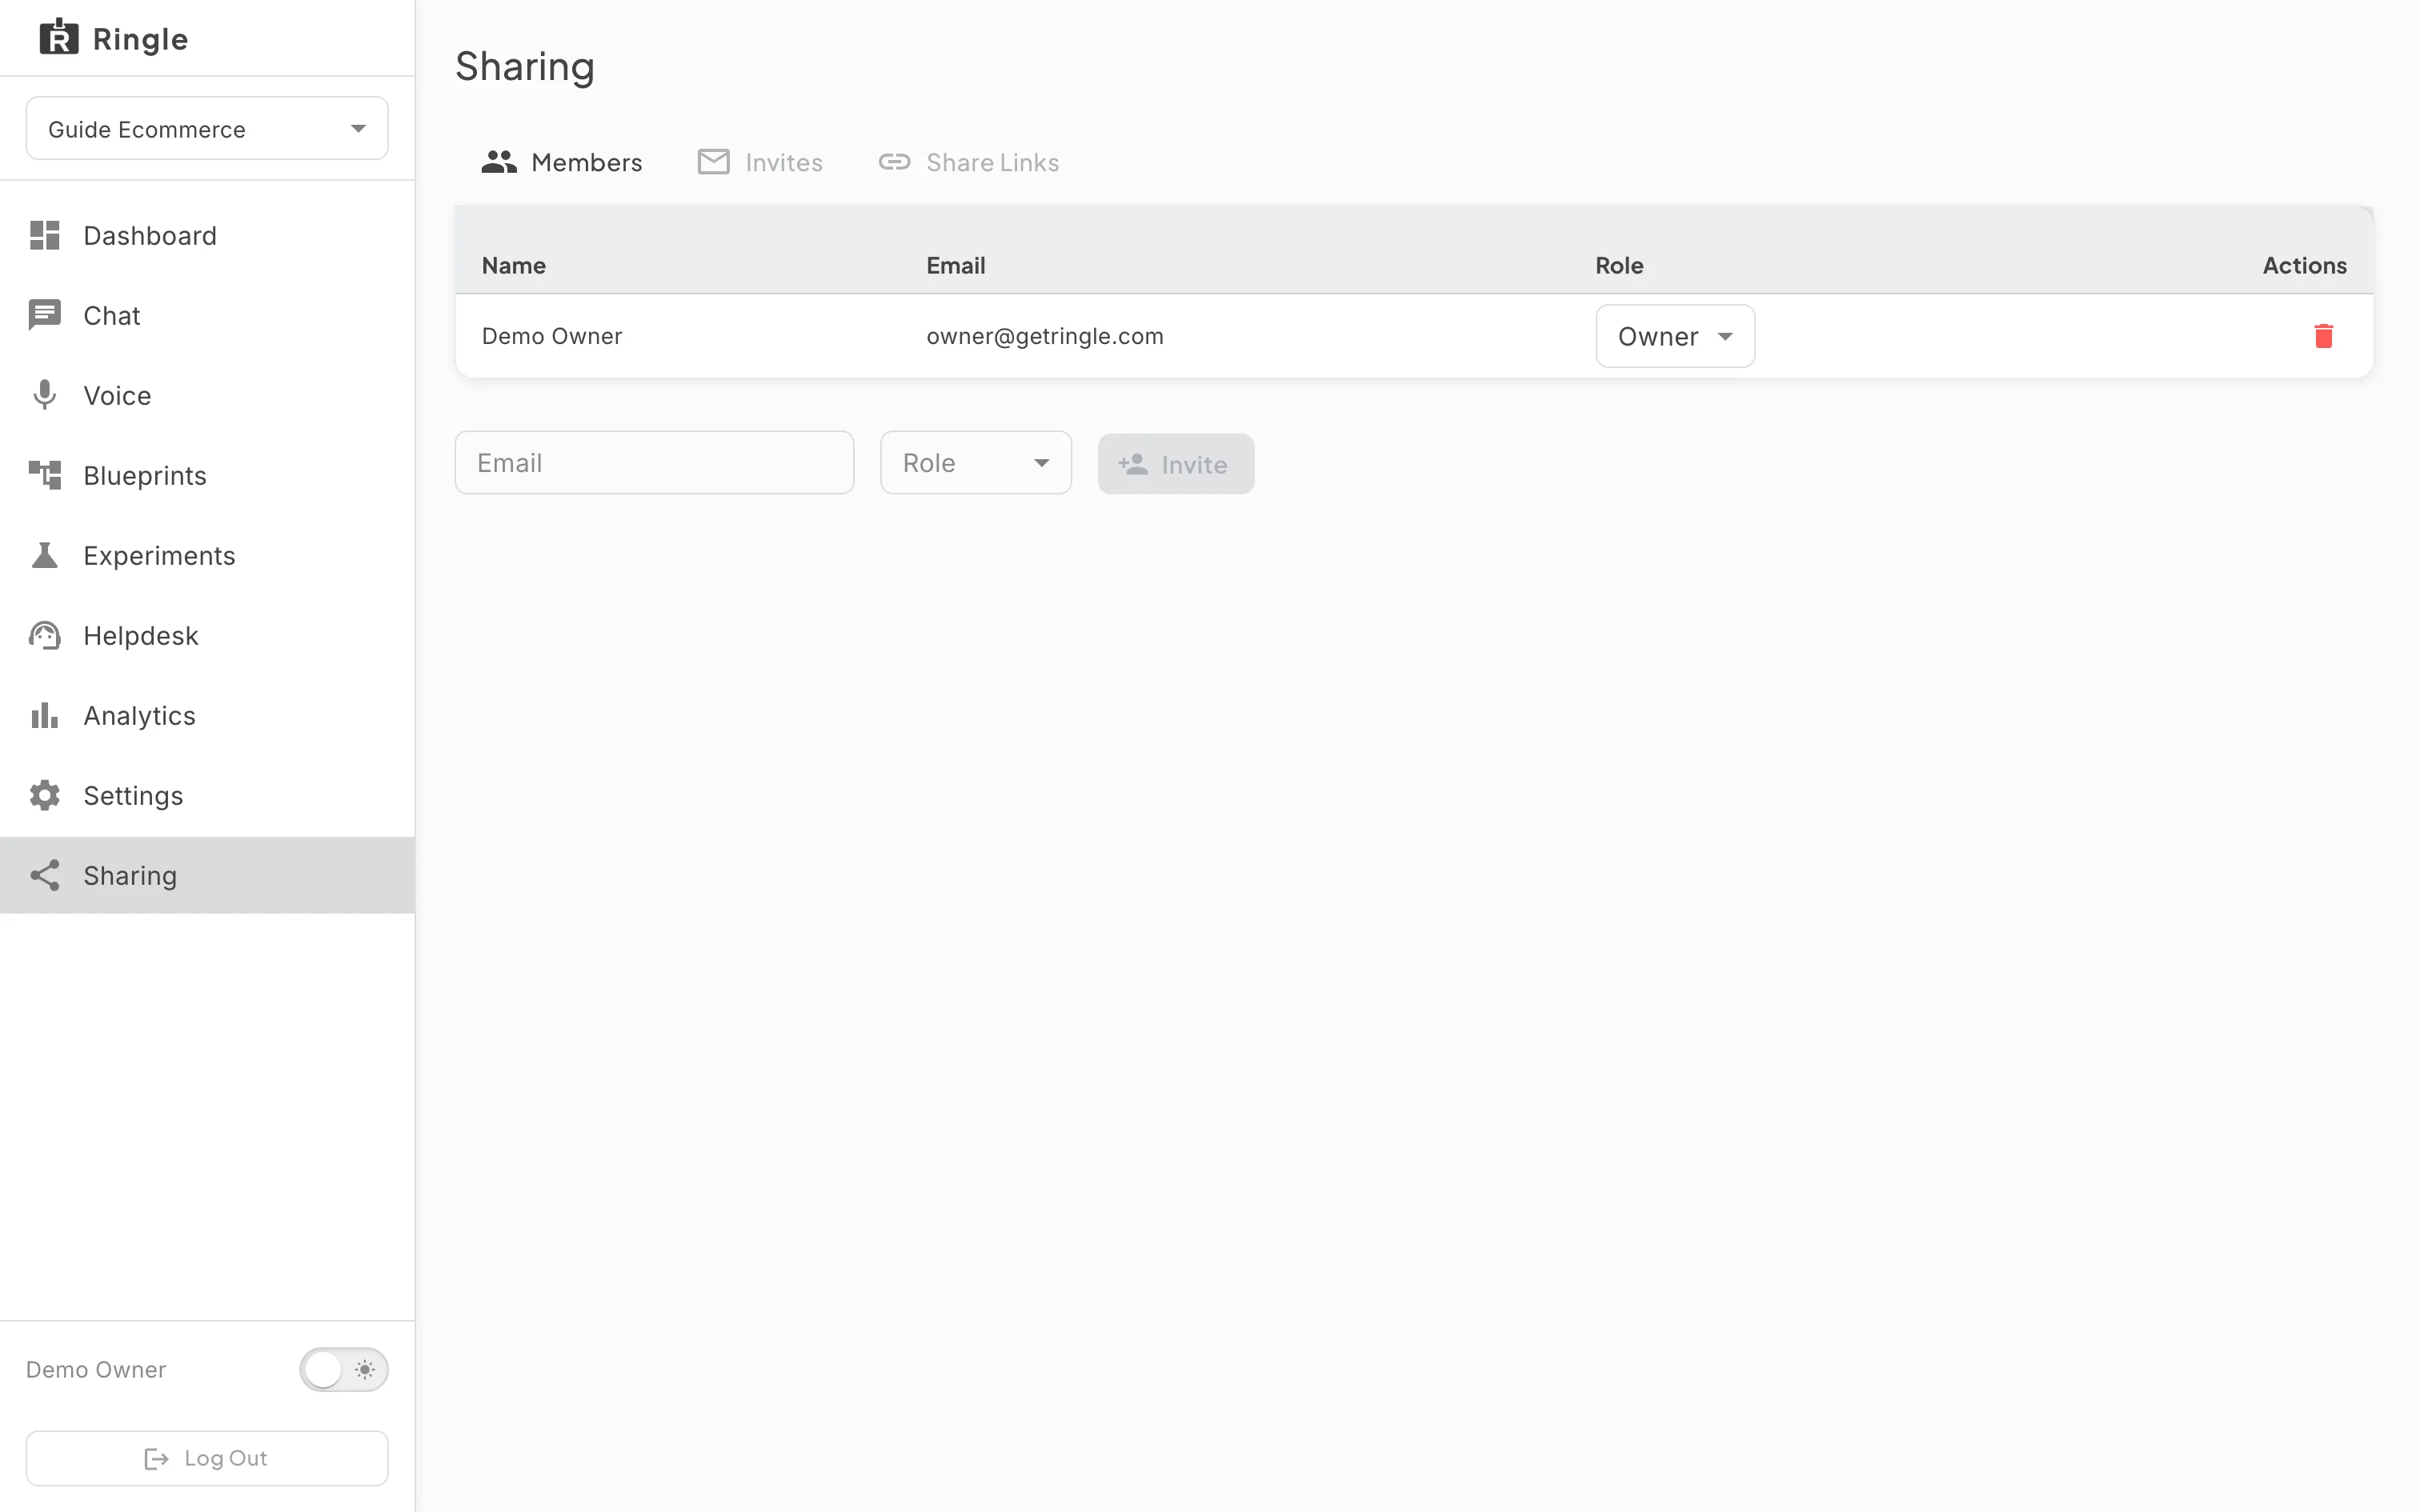
Action: Open Sharing from the workspace sidebar.
What you should see: The Sharing page has three tabs: Members, Invites, and Share Links. The Members tab lists everyone in the workspace with Name, Email, an inline Role dropdown, and a trash icon (“Remove Member”). Below the table is the invite form: an Email field, a Role select, and an Invite button that stays disabled until both are filled. Changing a role applies immediately, with no confirmation. Removing a member first opens a “Remove member?” dialog that names the member and warns they lose access immediately.
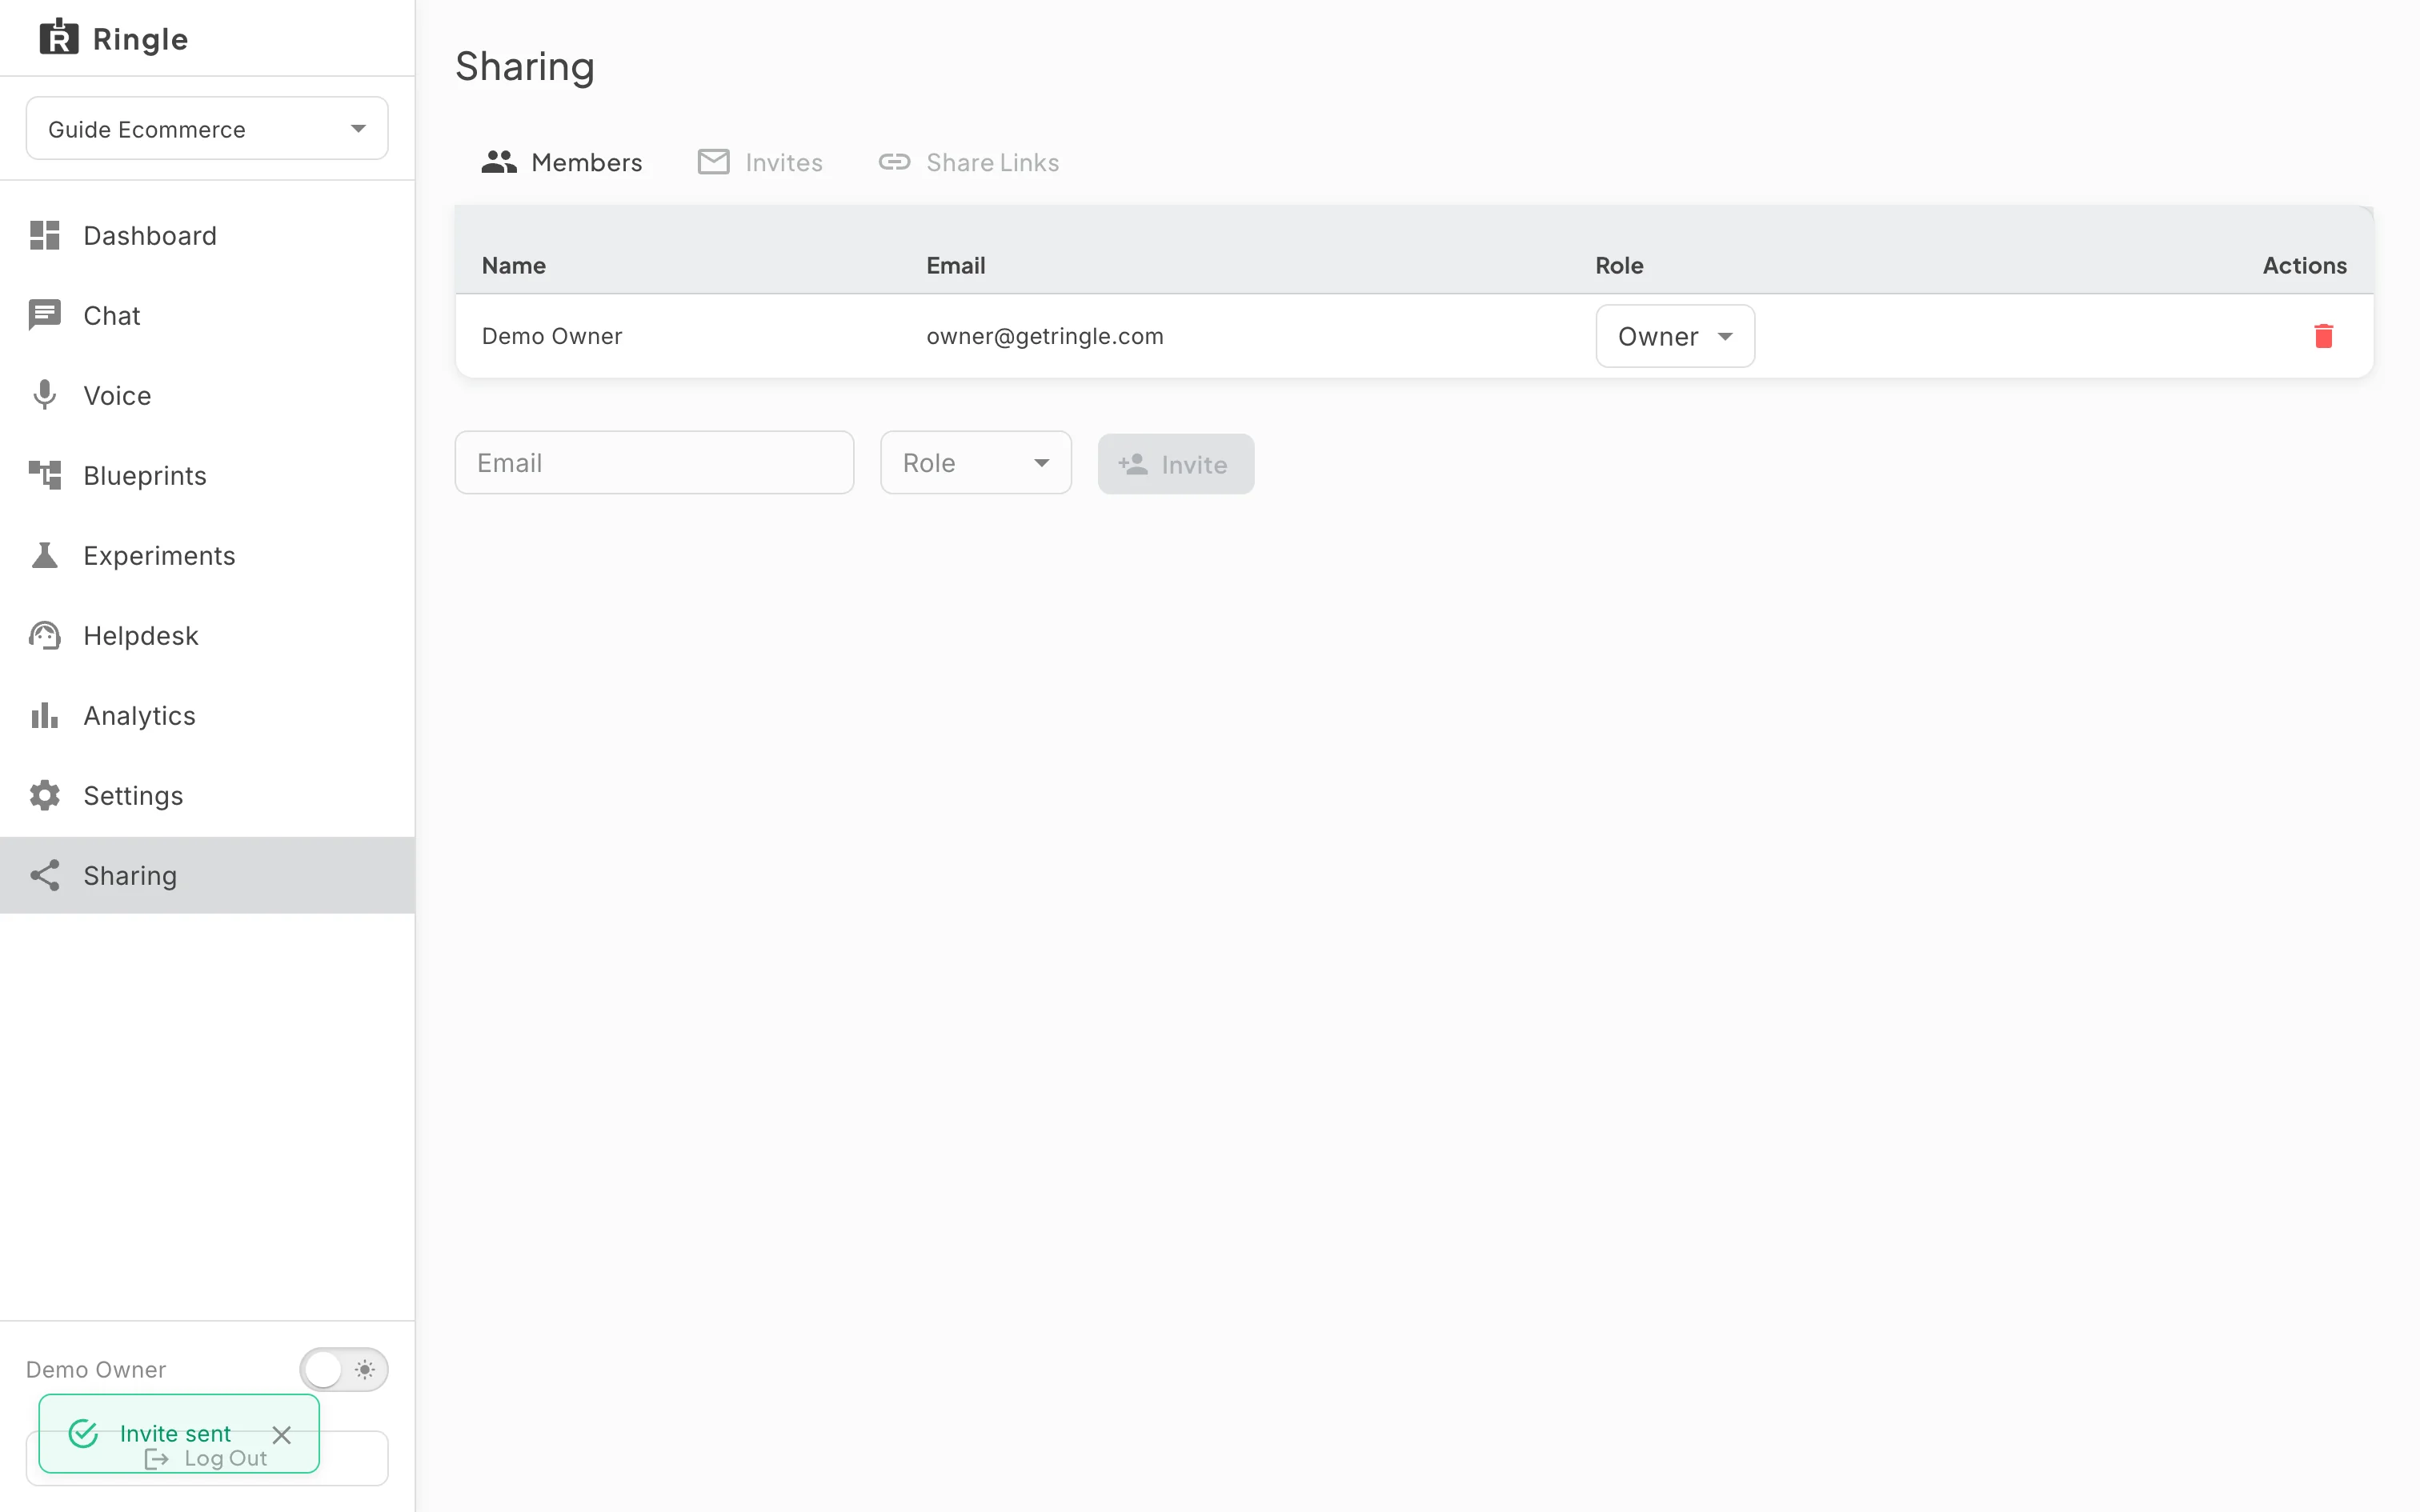
Action: Type the invitee’s email address. Pick a role (Tester here). Click Invite.
What you should see: An “Invite sent” message confirms the email went out. The form clears and the invite appears on the Invites tab. The Role dropdown offers Owner, Manager, Builder, and Tester. The recipient gets an email with an acceptance link. They must sign in (or register) to accept, and they join with the role you picked.
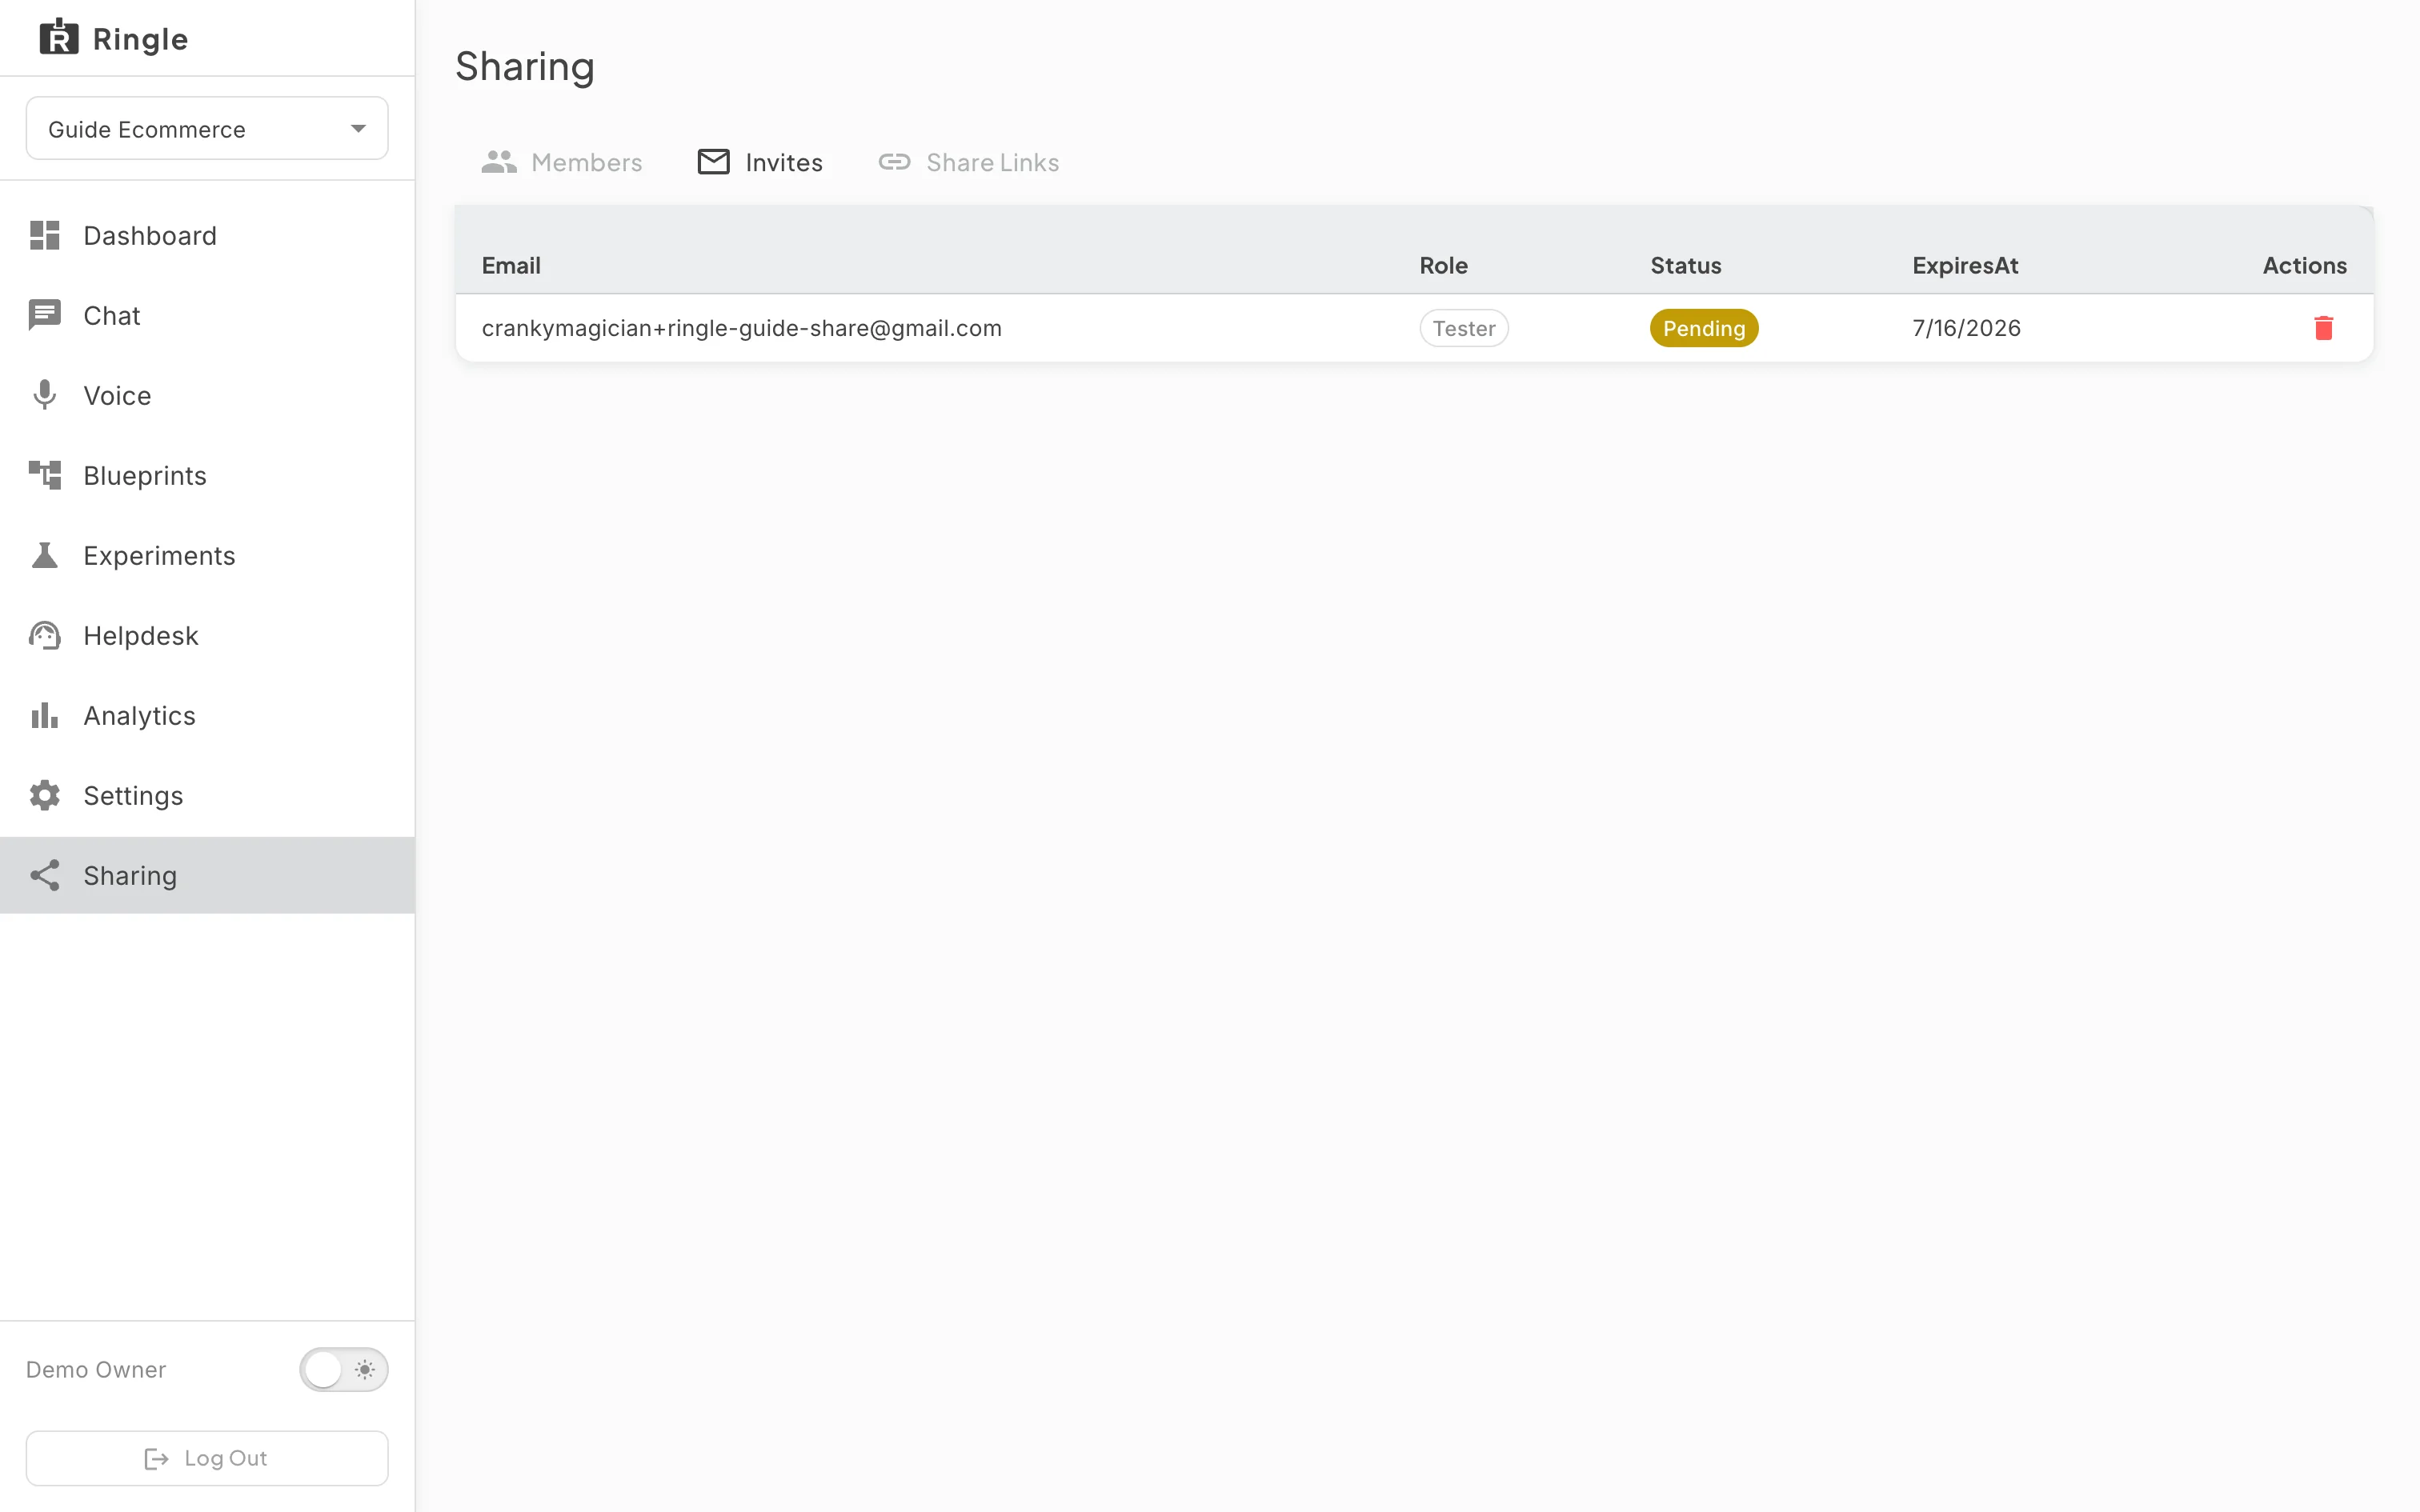
Action: Open the Invites tab.
What you should see: The tab lists sent invites with Email, Role, Status, an expiry date, and an Actions column. (The expiry column header renders as “ExpiresAt”, a known label bug.) A fresh invite shows a yellow Pending chip and expires a week after sending. Once the recipient accepts, the status changes to accepted and they appear on the Members tab. Pending rows carry a trash icon that revokes the invite. It opens a “Revoke invite?” confirmation; confirming shows an “Invite revoked” message and removes the row. Accepted invites cannot be revoked; remove the member instead.
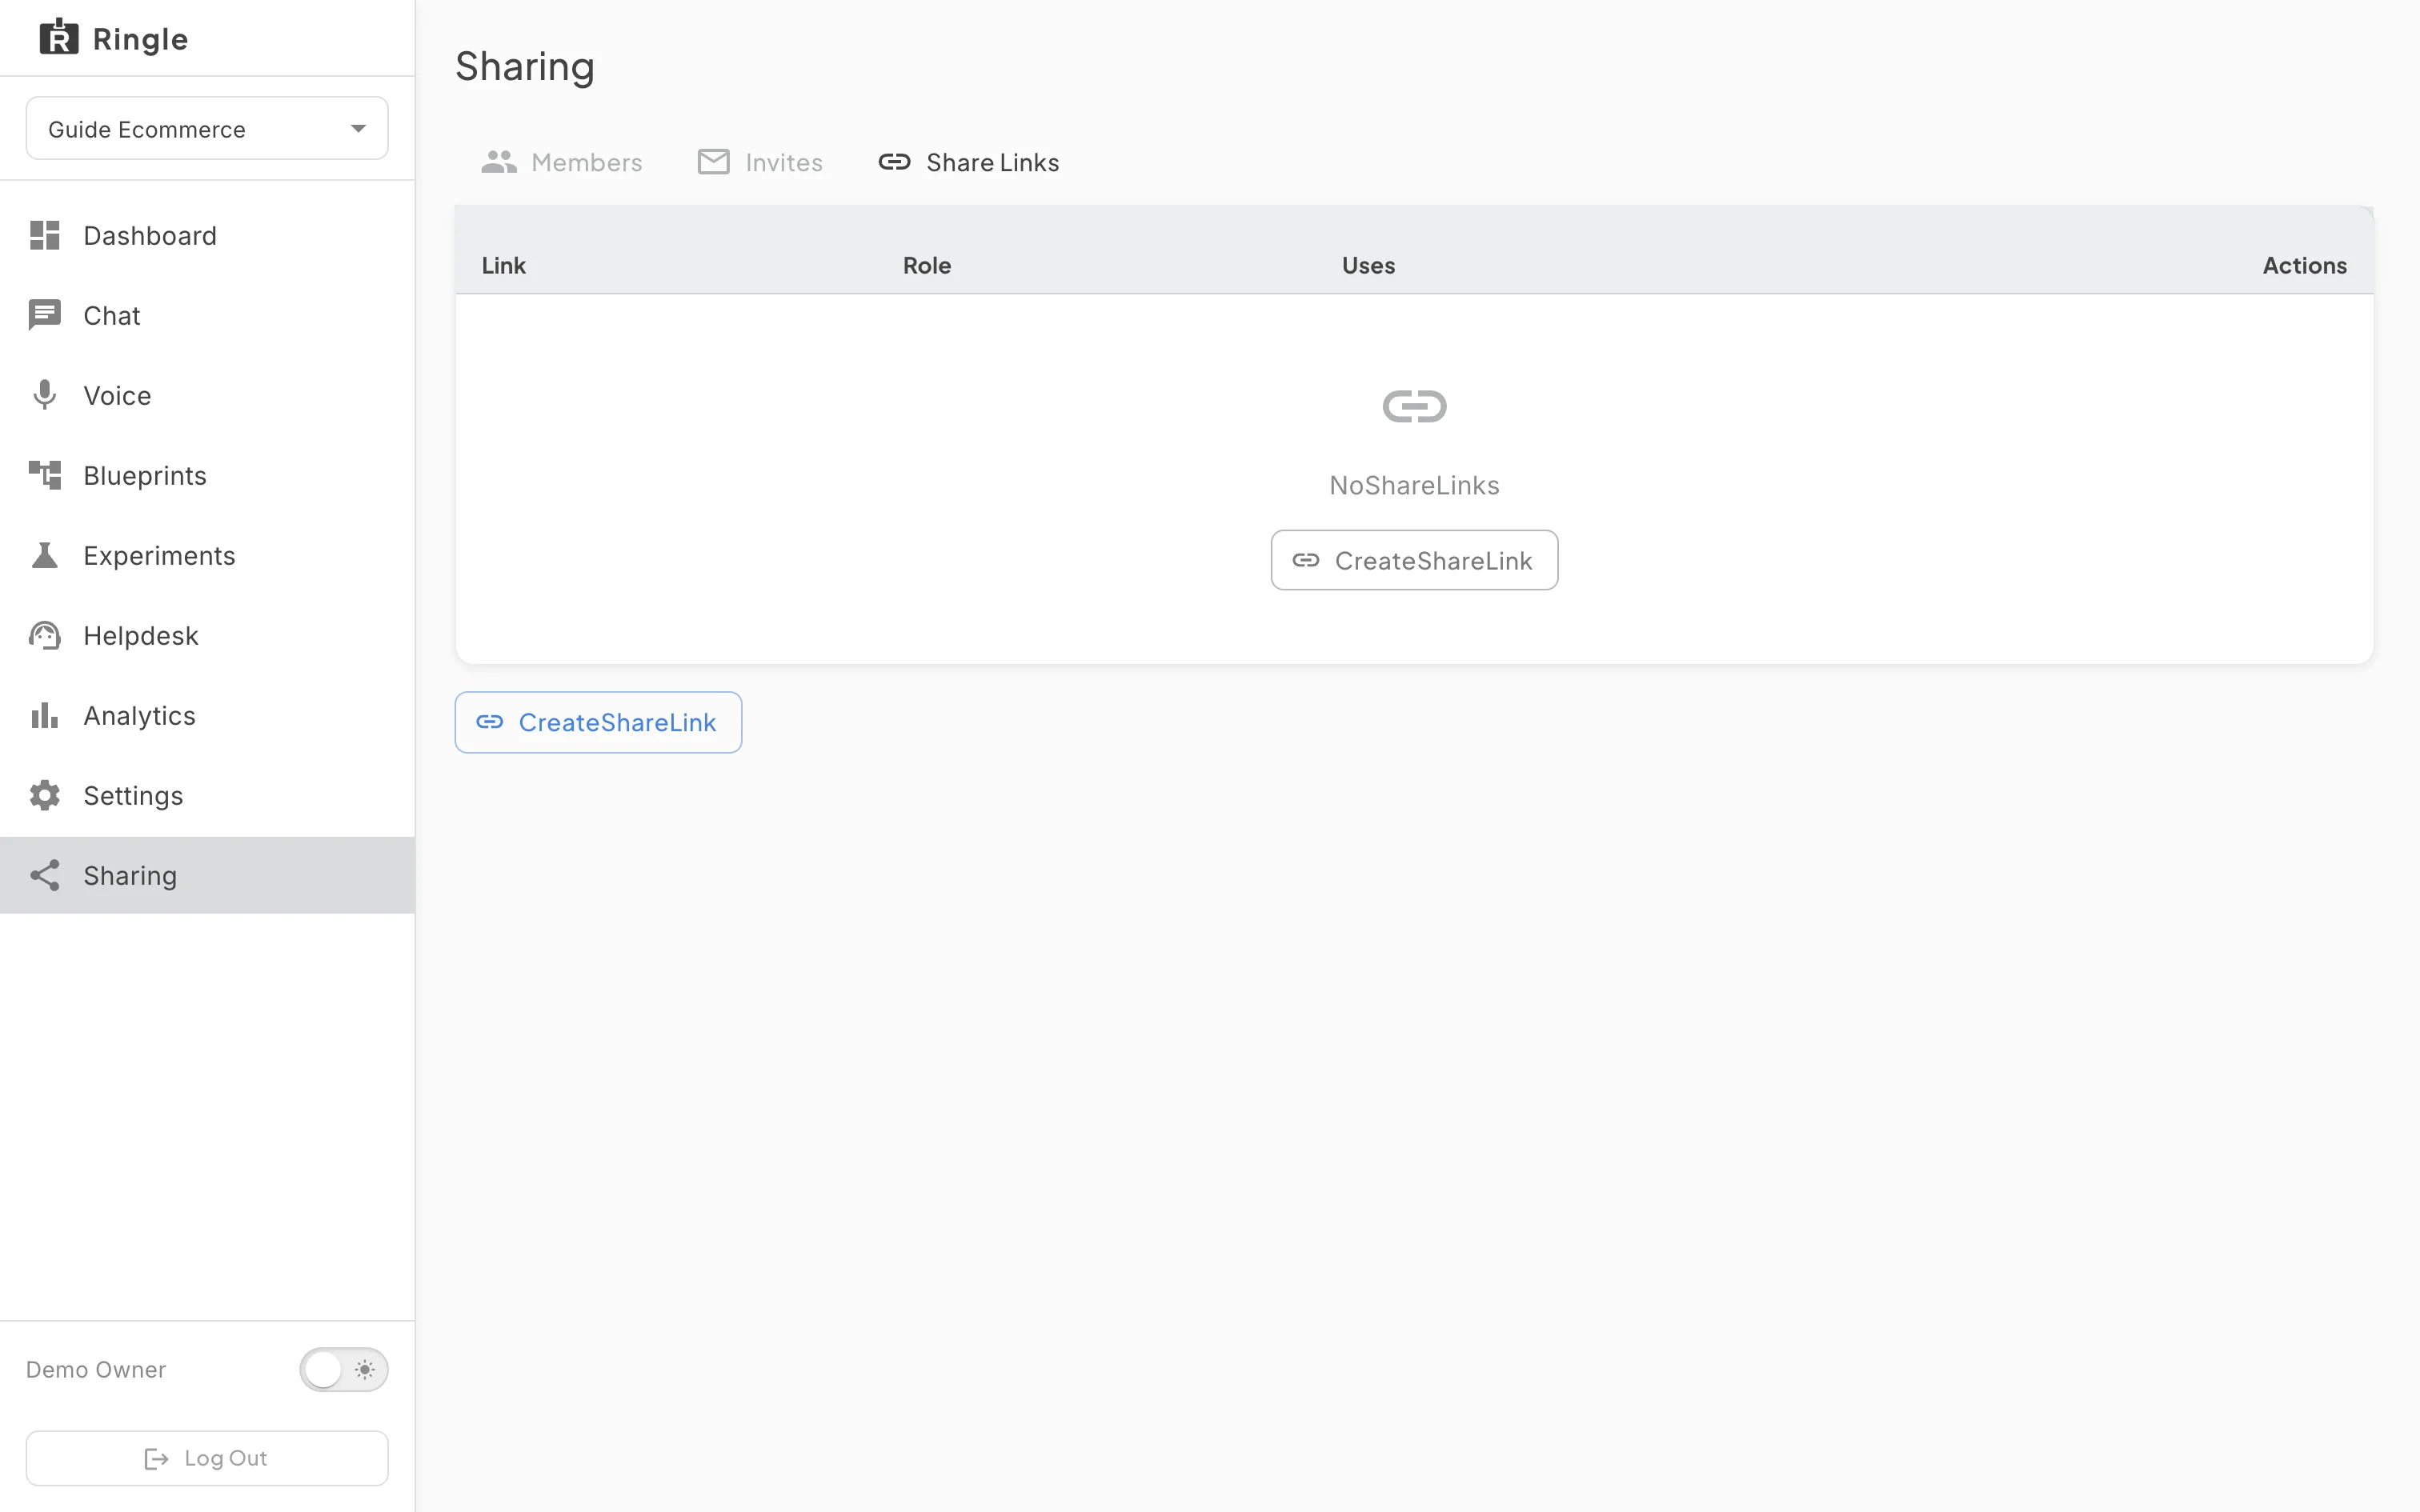
Action: Open the Share Links tab.
What you should see: With no links yet, the tab shows an empty state and a create button below the table. (The empty-state message and buttons render raw label keys, “NoShareLinks” and “CreateShareLink”, a known bug.) Share links are for handing out broadly: anyone with the link can try the workspace assistant as a guest, without an account.
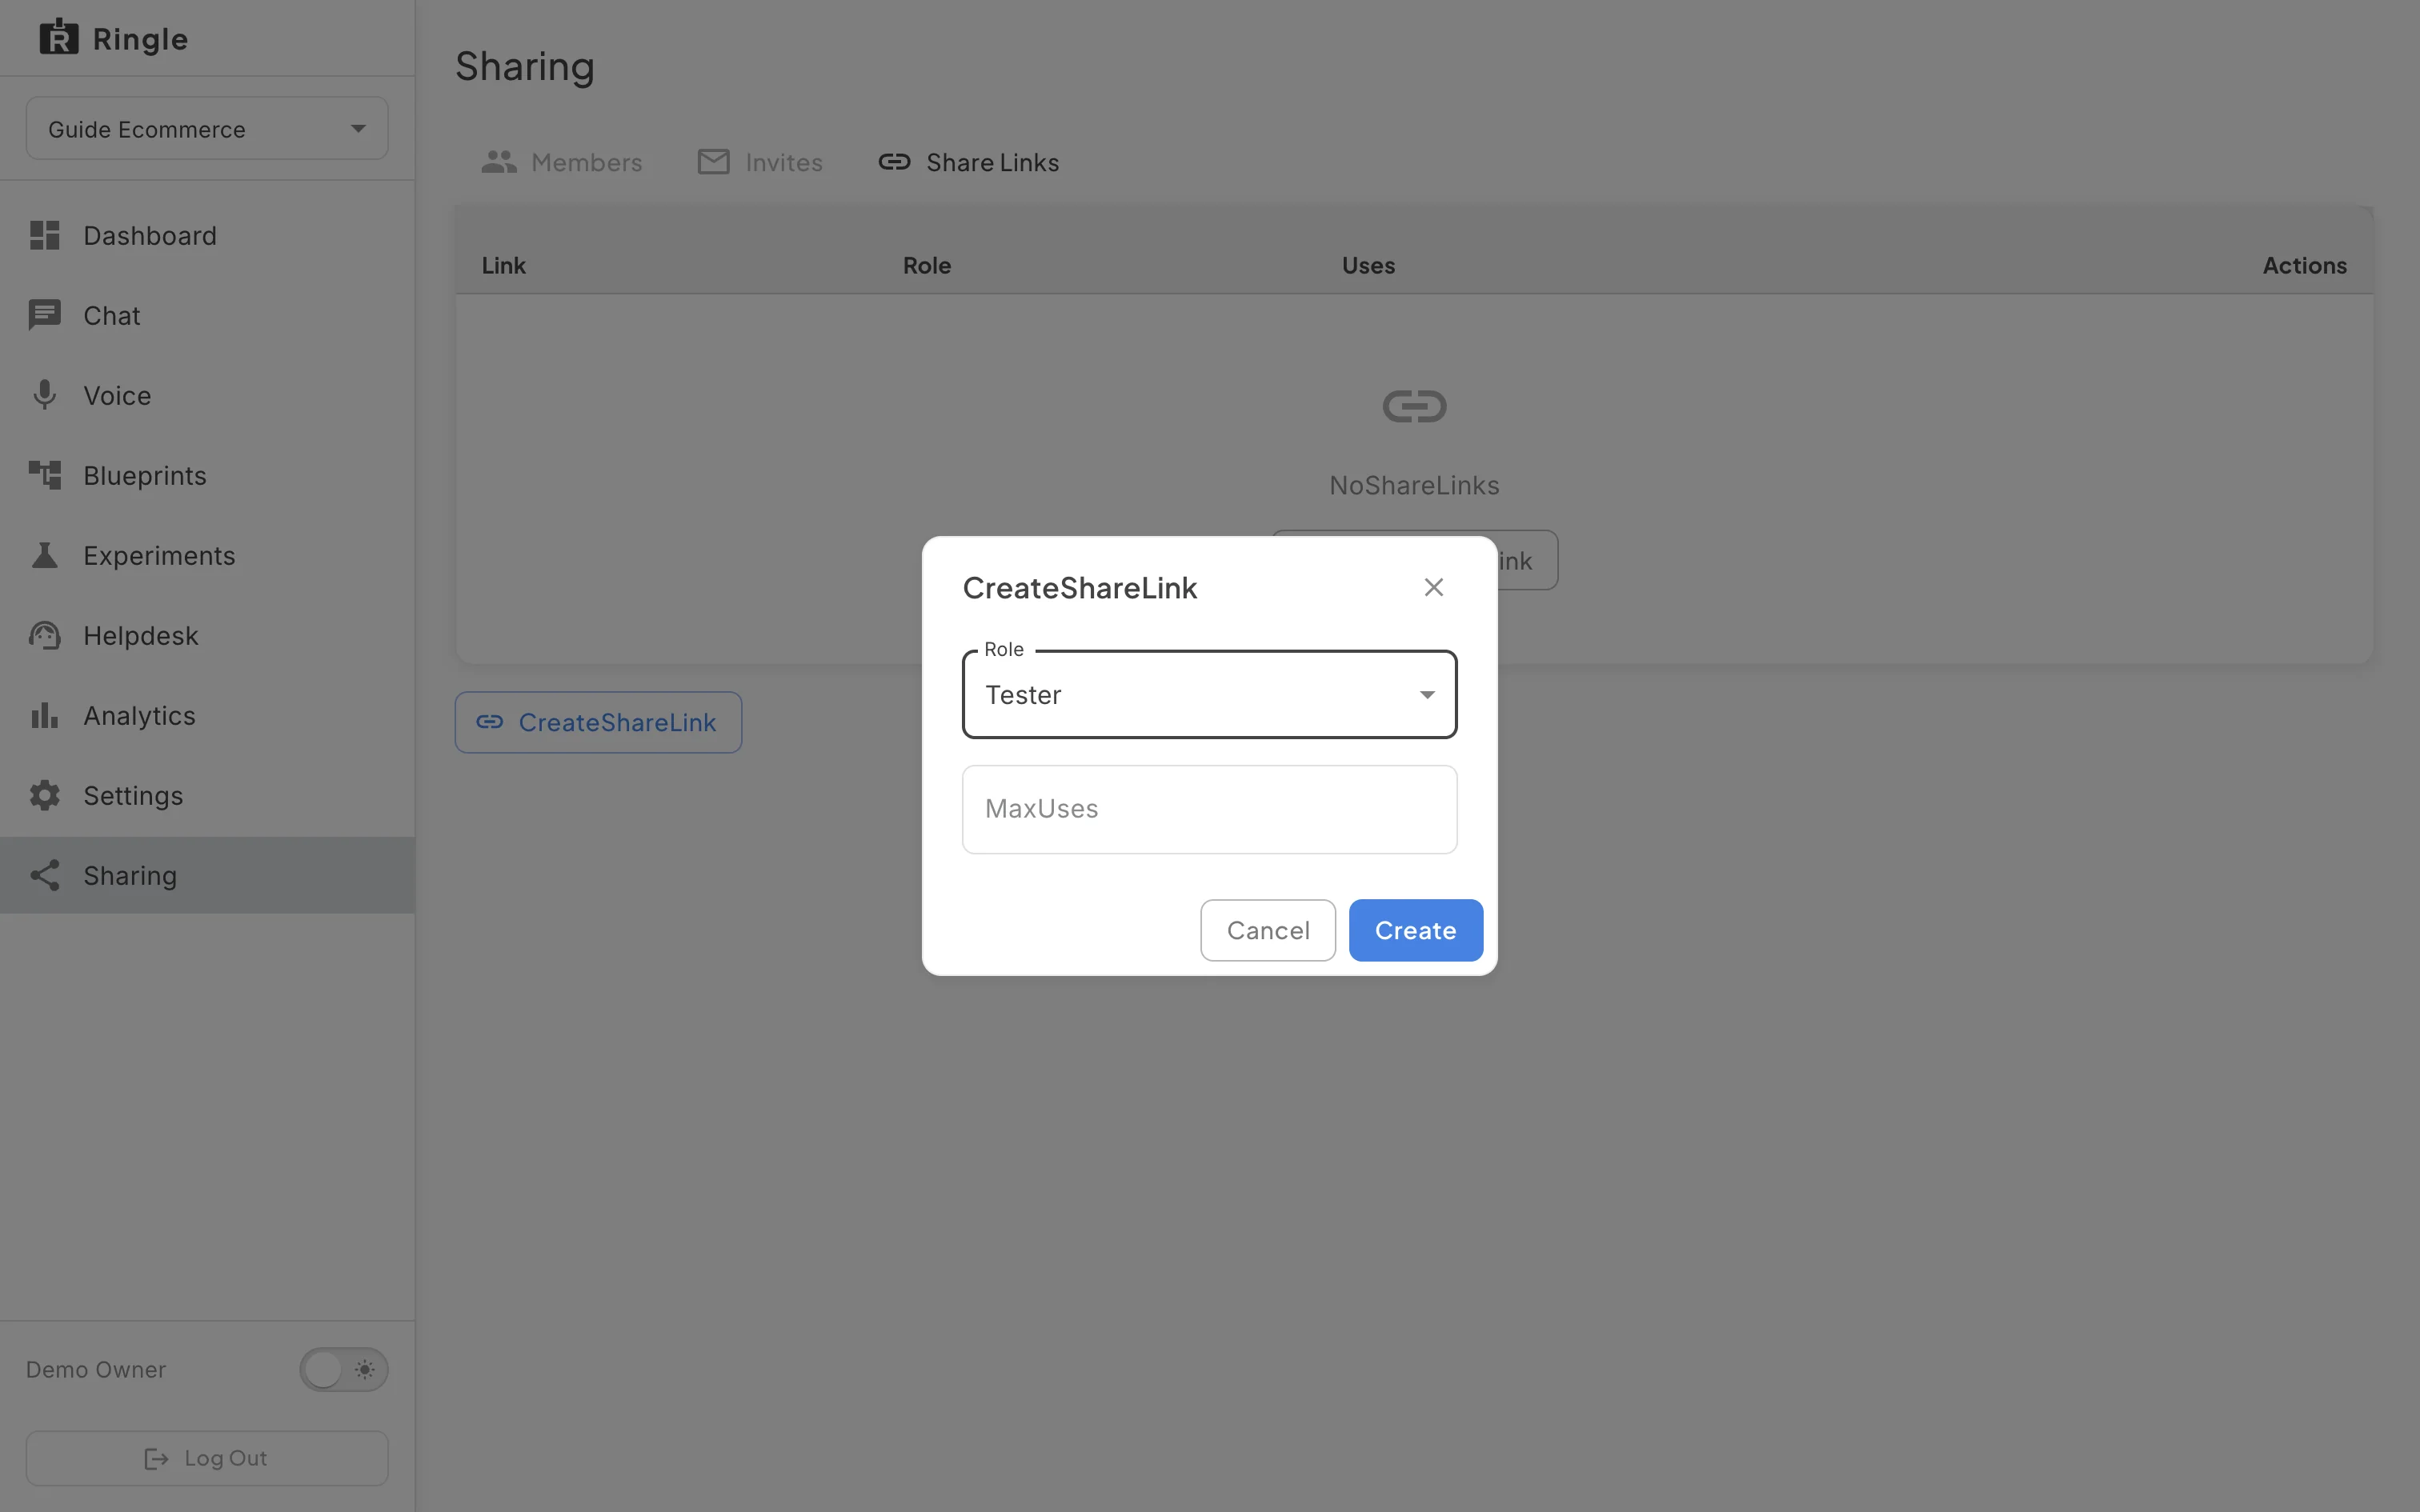
Action: Click the create button. Pick a Role for the link. Optionally, set a maximum number of uses. Click Create.
What you should see: The create dialog opens; its title renders as “CreateShareLink”. It has a required Role select and an optional max-uses number field (the label renders as “MaxUses”). Create is disabled until a role is chosen. Leaving max uses empty allows unlimited uses.
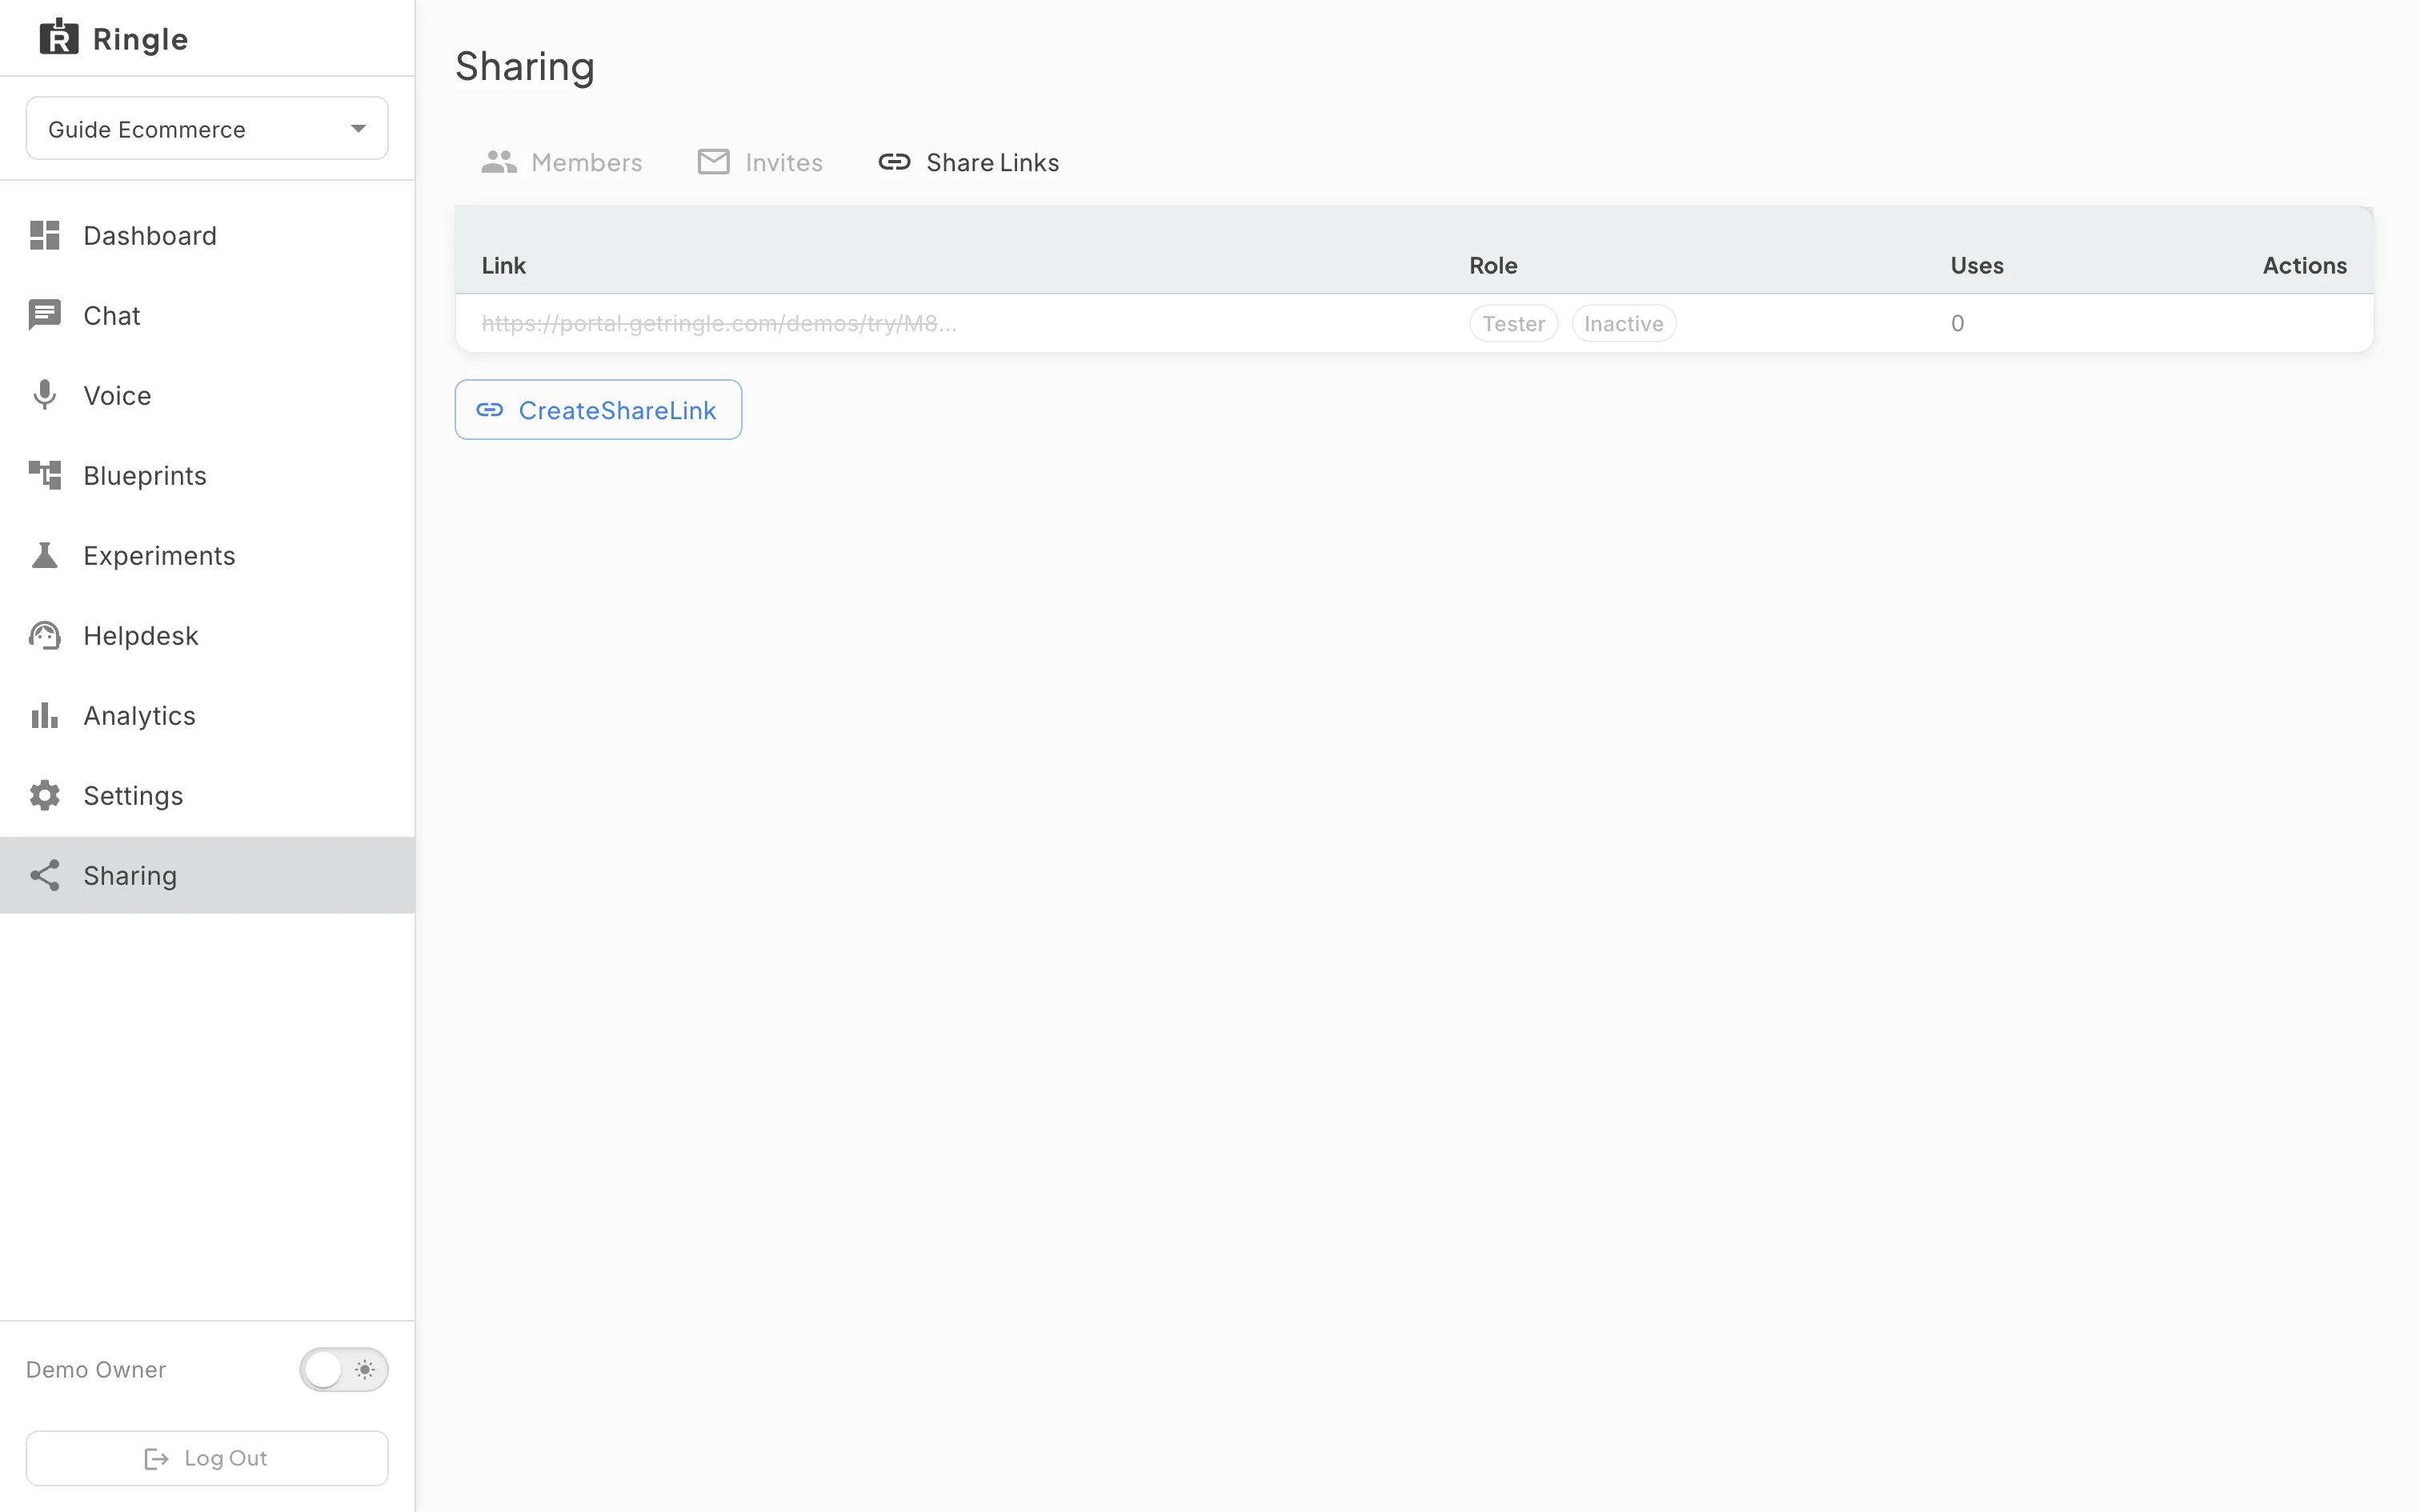
Action: Review the new link row. Use the copy icon to share the link. Use the trash icon (“Deactivate”) when you want to kill it.
What you should see: The row shows the full link URL
(a /demos/try/... address), the role it grants, a use
counter, and Copy and Deactivate actions. Deactivate opens a
confirmation dialog warning that the link stops working immediately and
cannot be reactivated. After confirming, a “Link deactivated” message
appears. The row stays in the list marked as inactive: the URL is greyed
out and struck through, an Inactive chip appears next to the role, and
the Copy and Deactivate actions disappear. This walkthrough deactivated
the link it created.
/demos/:demoWorkspaceId/sharing. Source
component:
pages/demo-workspace/DemoWorkspaceSharing.jsx./demos/invite/:token, a “You’ve been invited!” acceptance
page that requires signing in. Share links created on this page point to
/demos/try/:token, the public guest experience where
visitors chat or talk with the workspace assistant, no account needed. A
third route, /demos/join/:token, is a signed-in “Join a
Workspace” acceptance page used for workspace-join links.