The Message Templates page owns everything the assistant sends over email and SMS: the templates themselves, a delivery log of what actually went out, the custom email sending domains, and the branded short-link domains used in outbound messages.
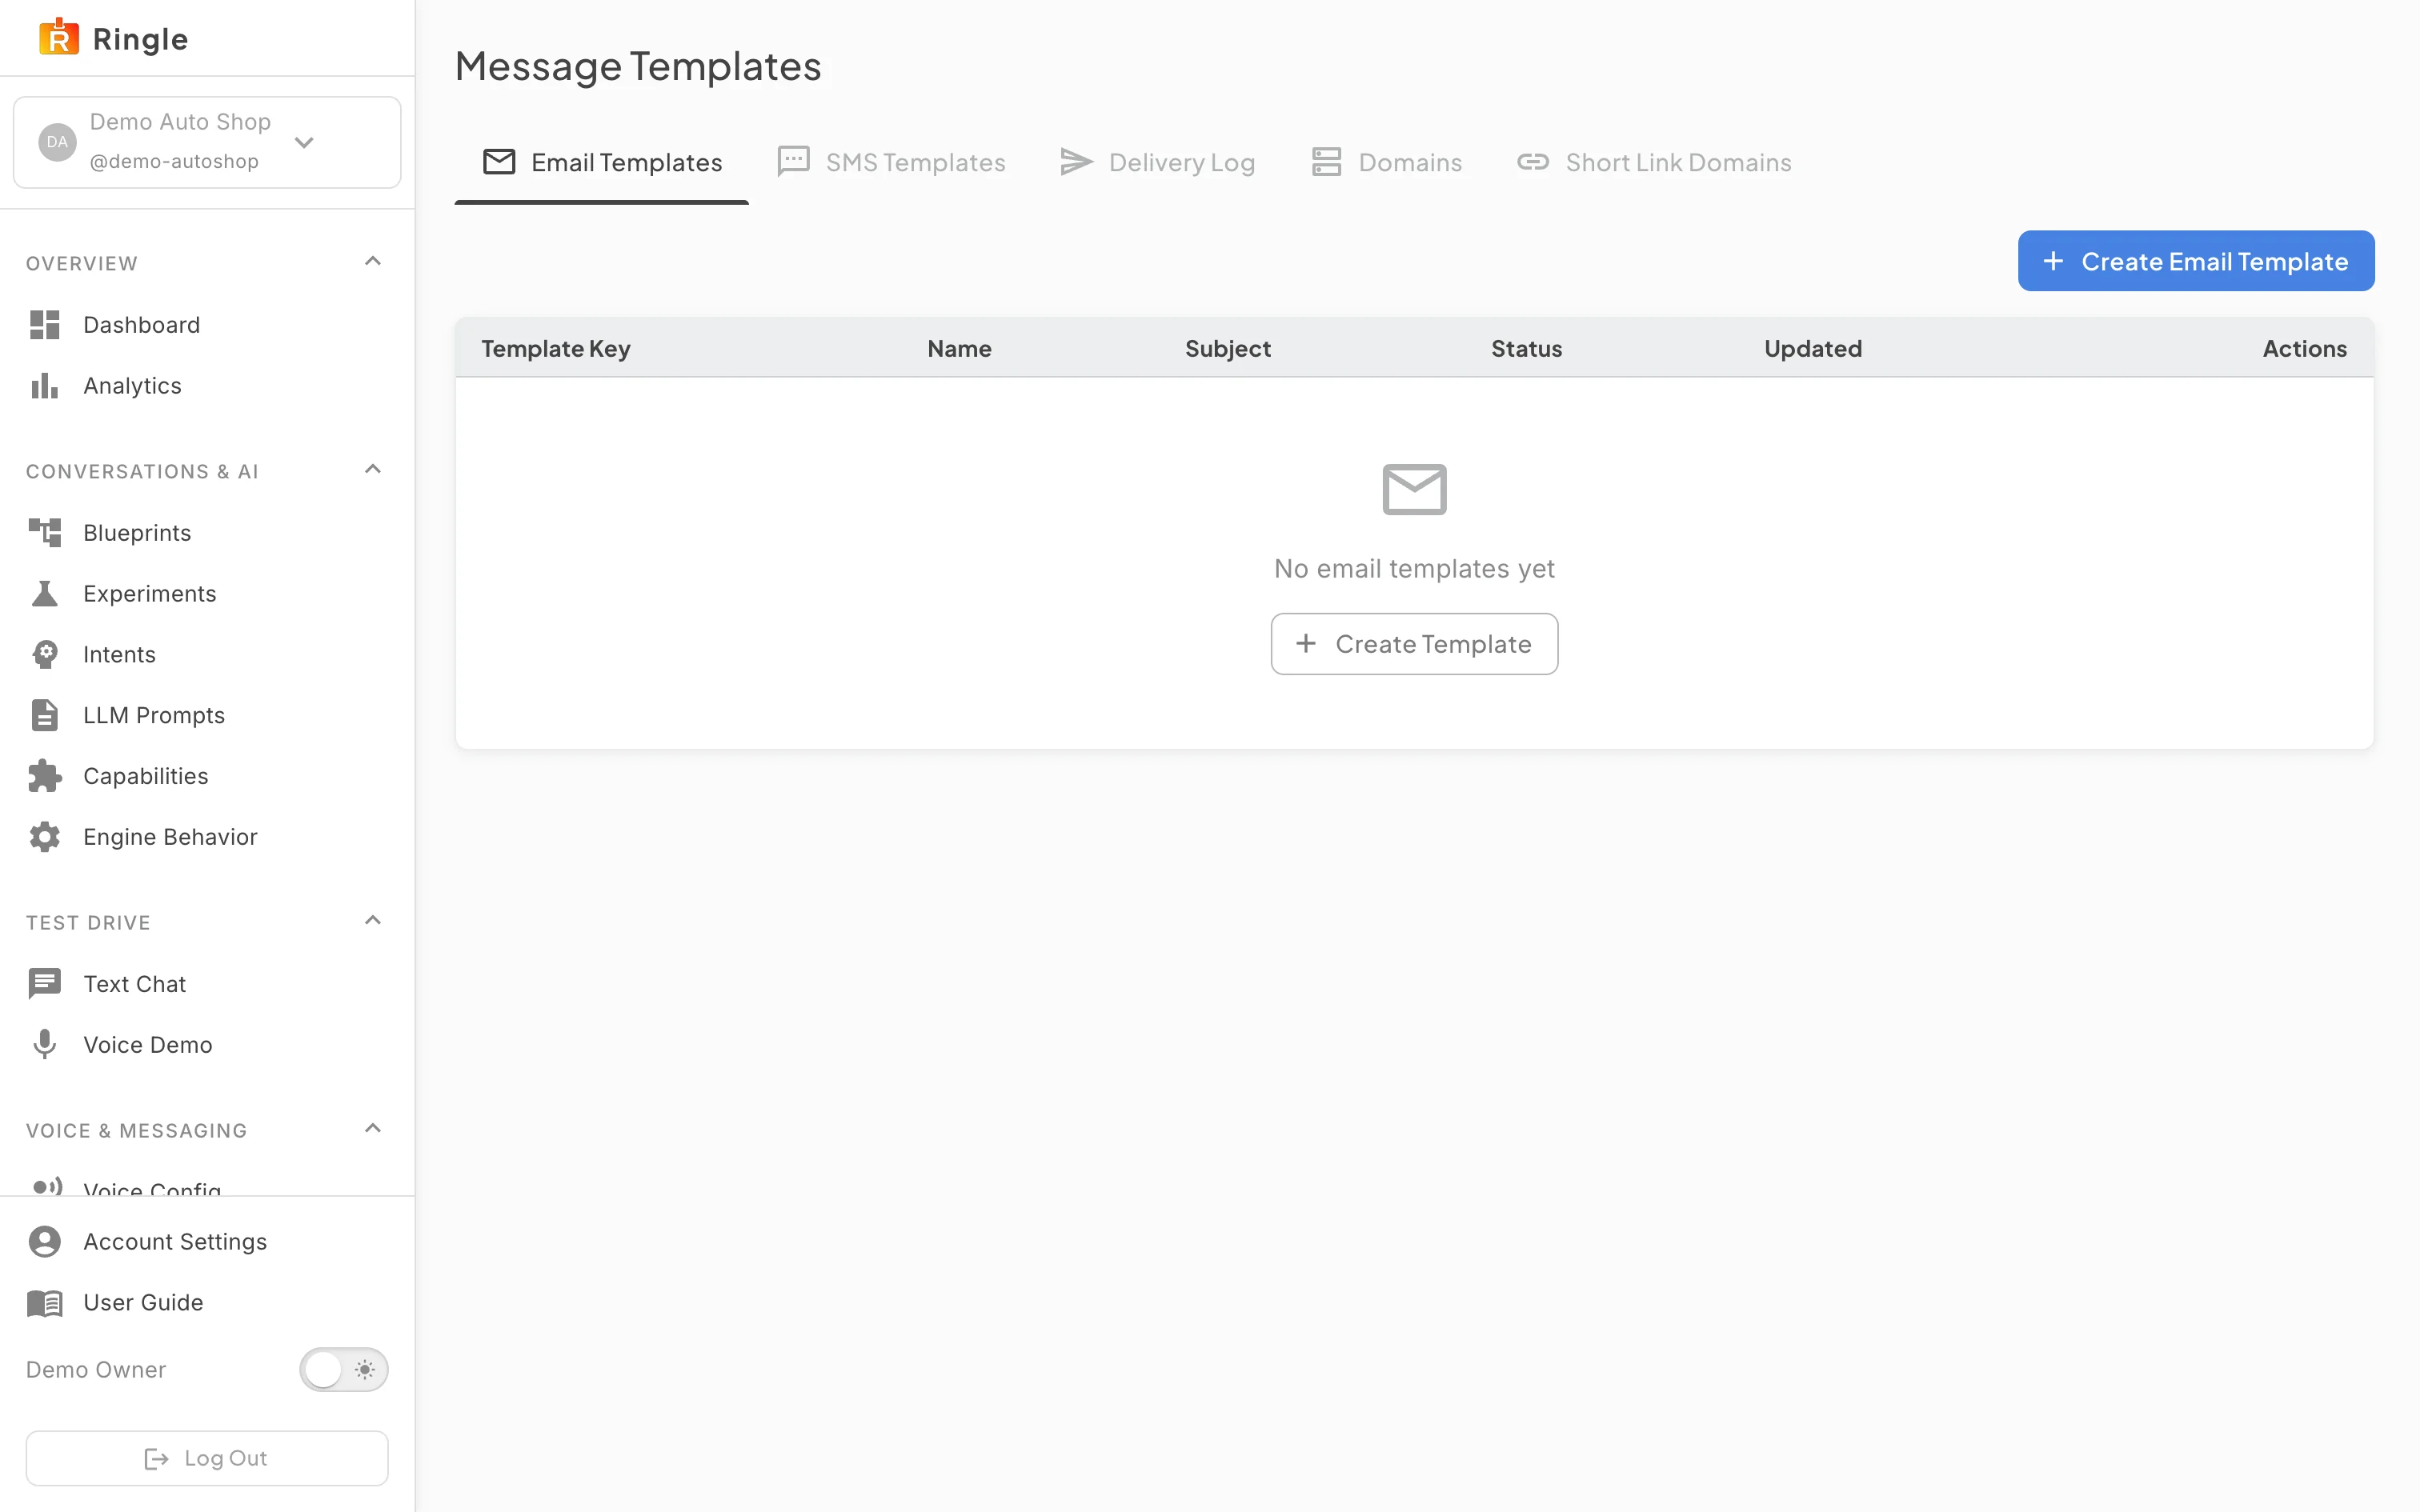
Action: Click Message Templates under Voice & Messaging in the sidebar.
What you should see: The page opens on the first of
five tabs: Email Templates, SMS Templates, Delivery Log, Domains, and
Short Link Domains. The Email Templates tab shows a table with Template
Key, Name, Subject, Status, Updated, and Actions columns, plus a Create
Email Template button. Each template that exists lists its key (such as
order_status_found), name, subject line, an Active status
chip, the last update time, and edit and delete icons. The demo tenant
has no templates yet, so an empty state with a Create Template button
appears.
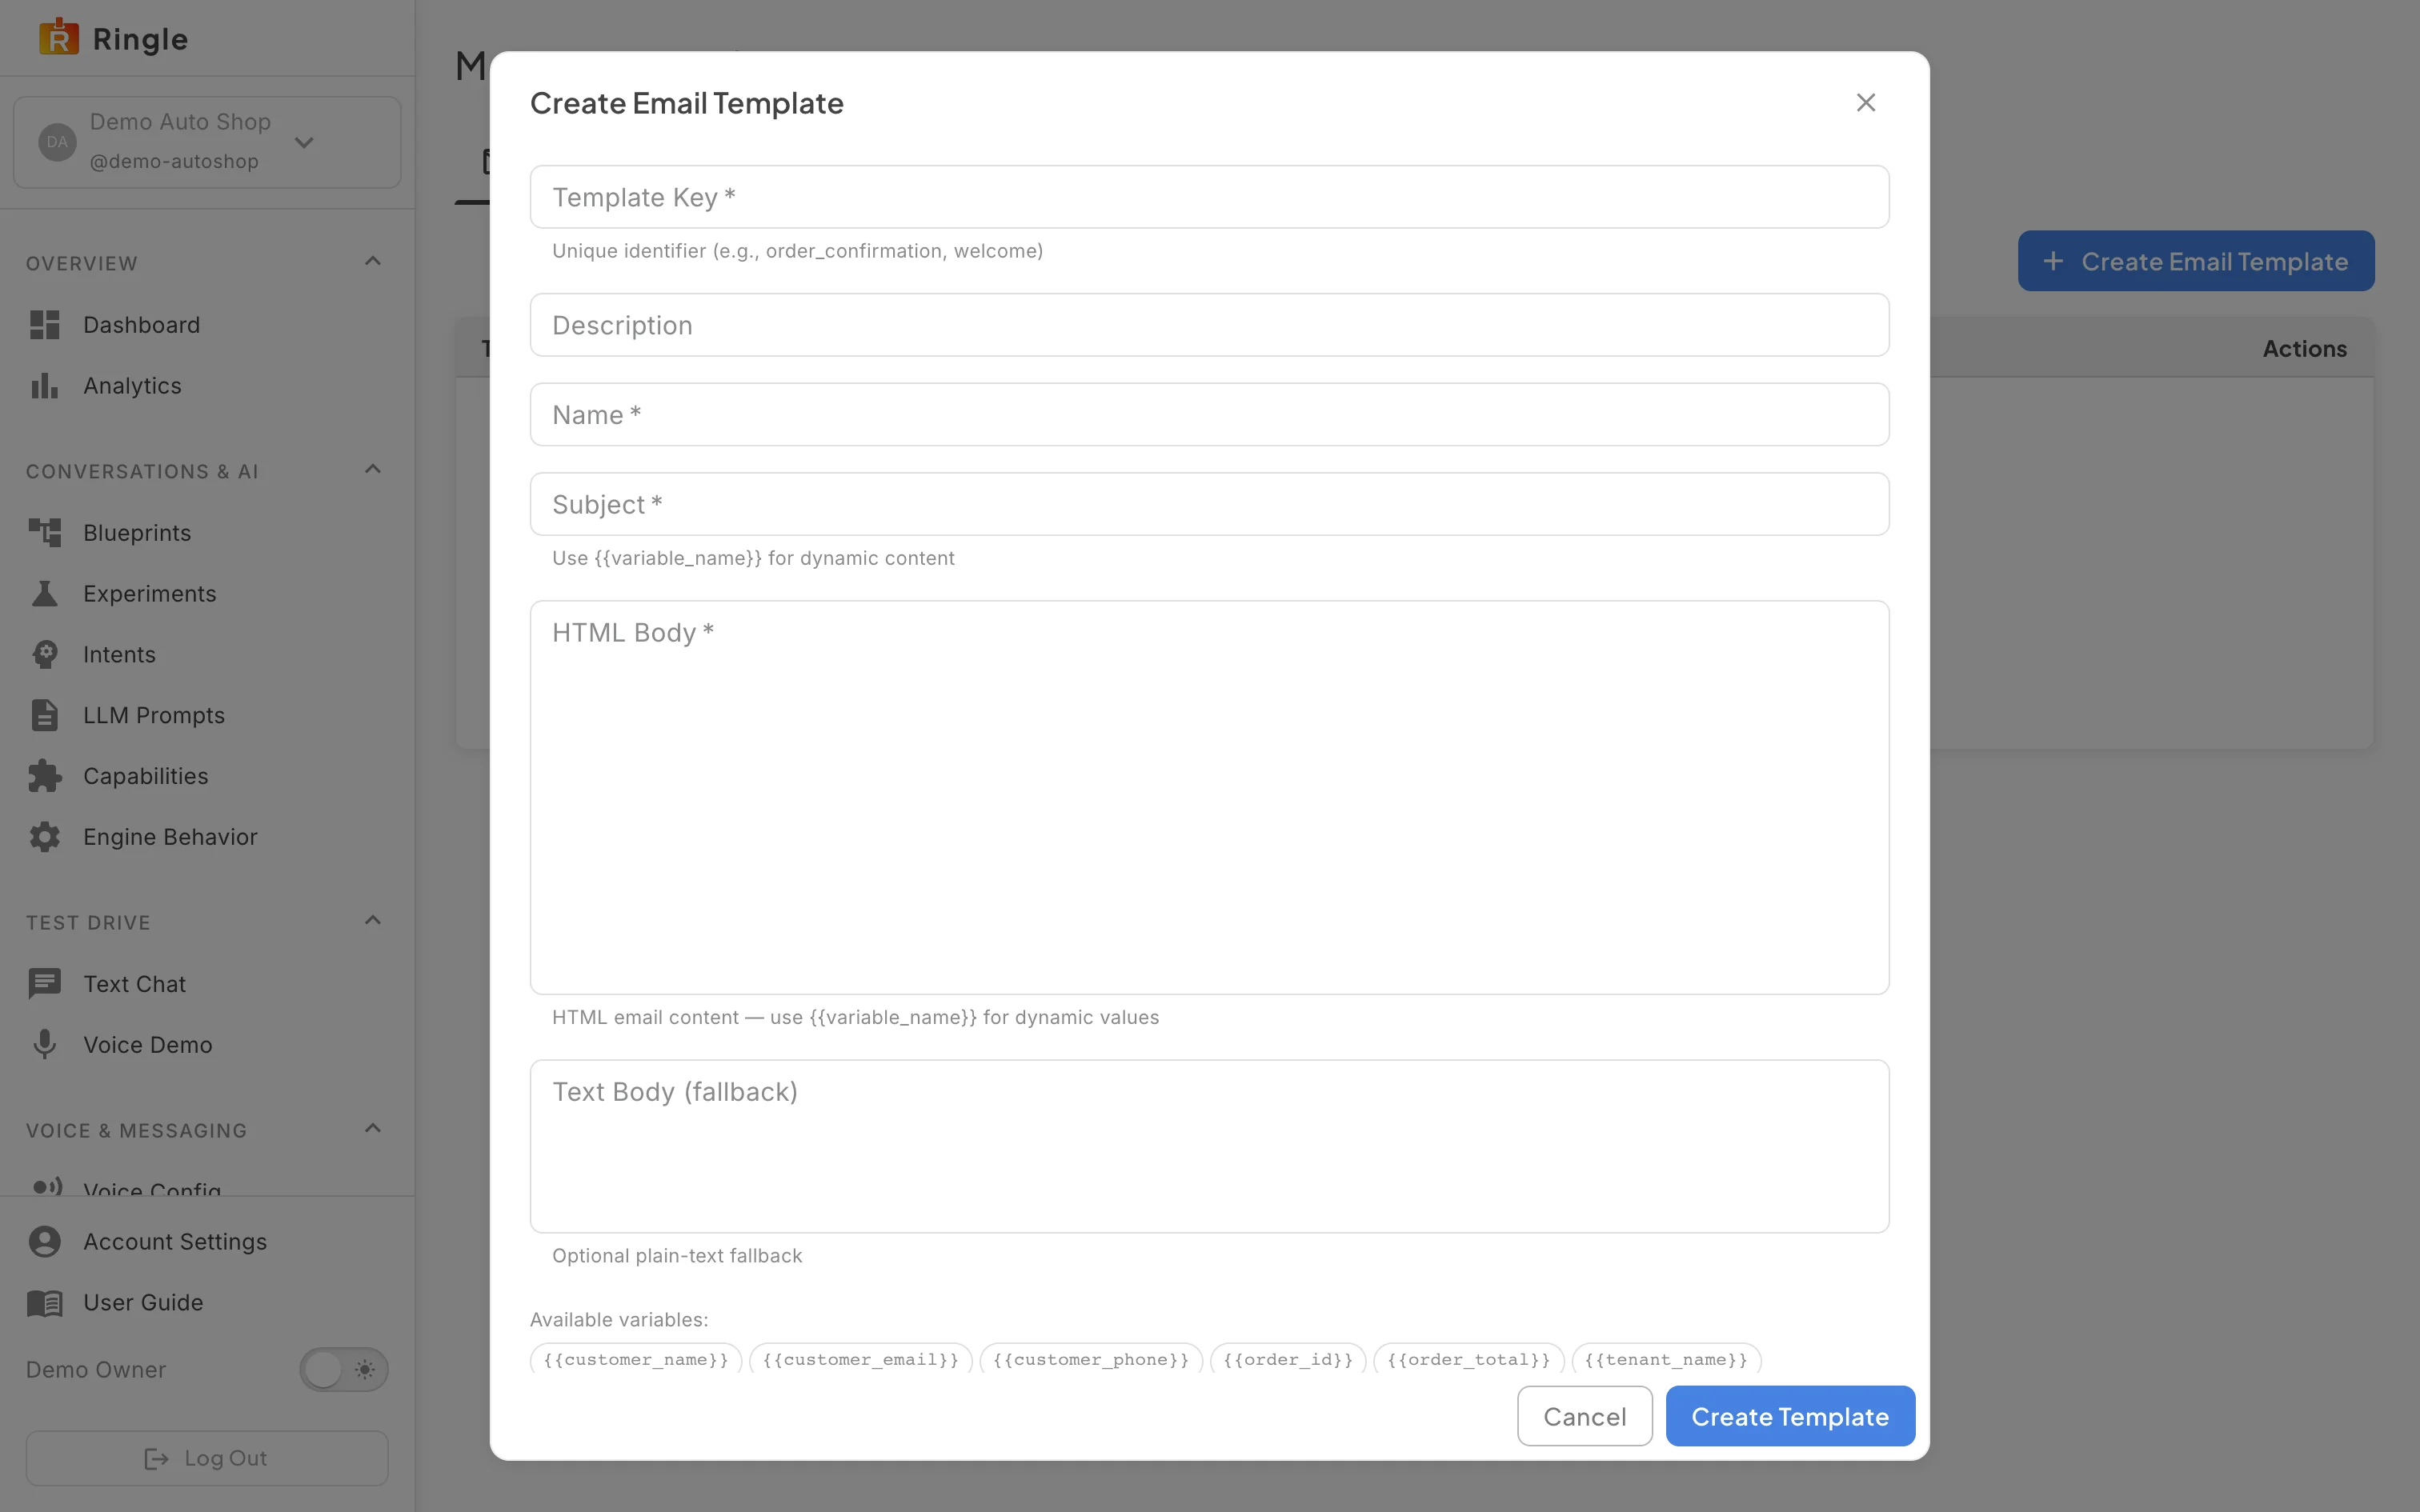
Action: Click Create Email Template (or the pencil on an existing template) to open the editor. Review it. Then click Cancel.
What you should see: The template editor opens.
Create Email Template has a Template Key field (unique identifier), a
Description, the Name and Subject fields, HTML Body and Text Body
(fallback) editors, and a row of clickable variable chips:
{{customer_name}}, {{customer_email}},
{{customer_phone}}, {{order_id}},
{{order_total}}, and {{tenant_name}}. Editing
an existing template shows the same fields with the Template Key locked.
Cancel closes the dialog without saving. See Troubleshooting for a known
gap where the Edit dialog opens with empty body fields.
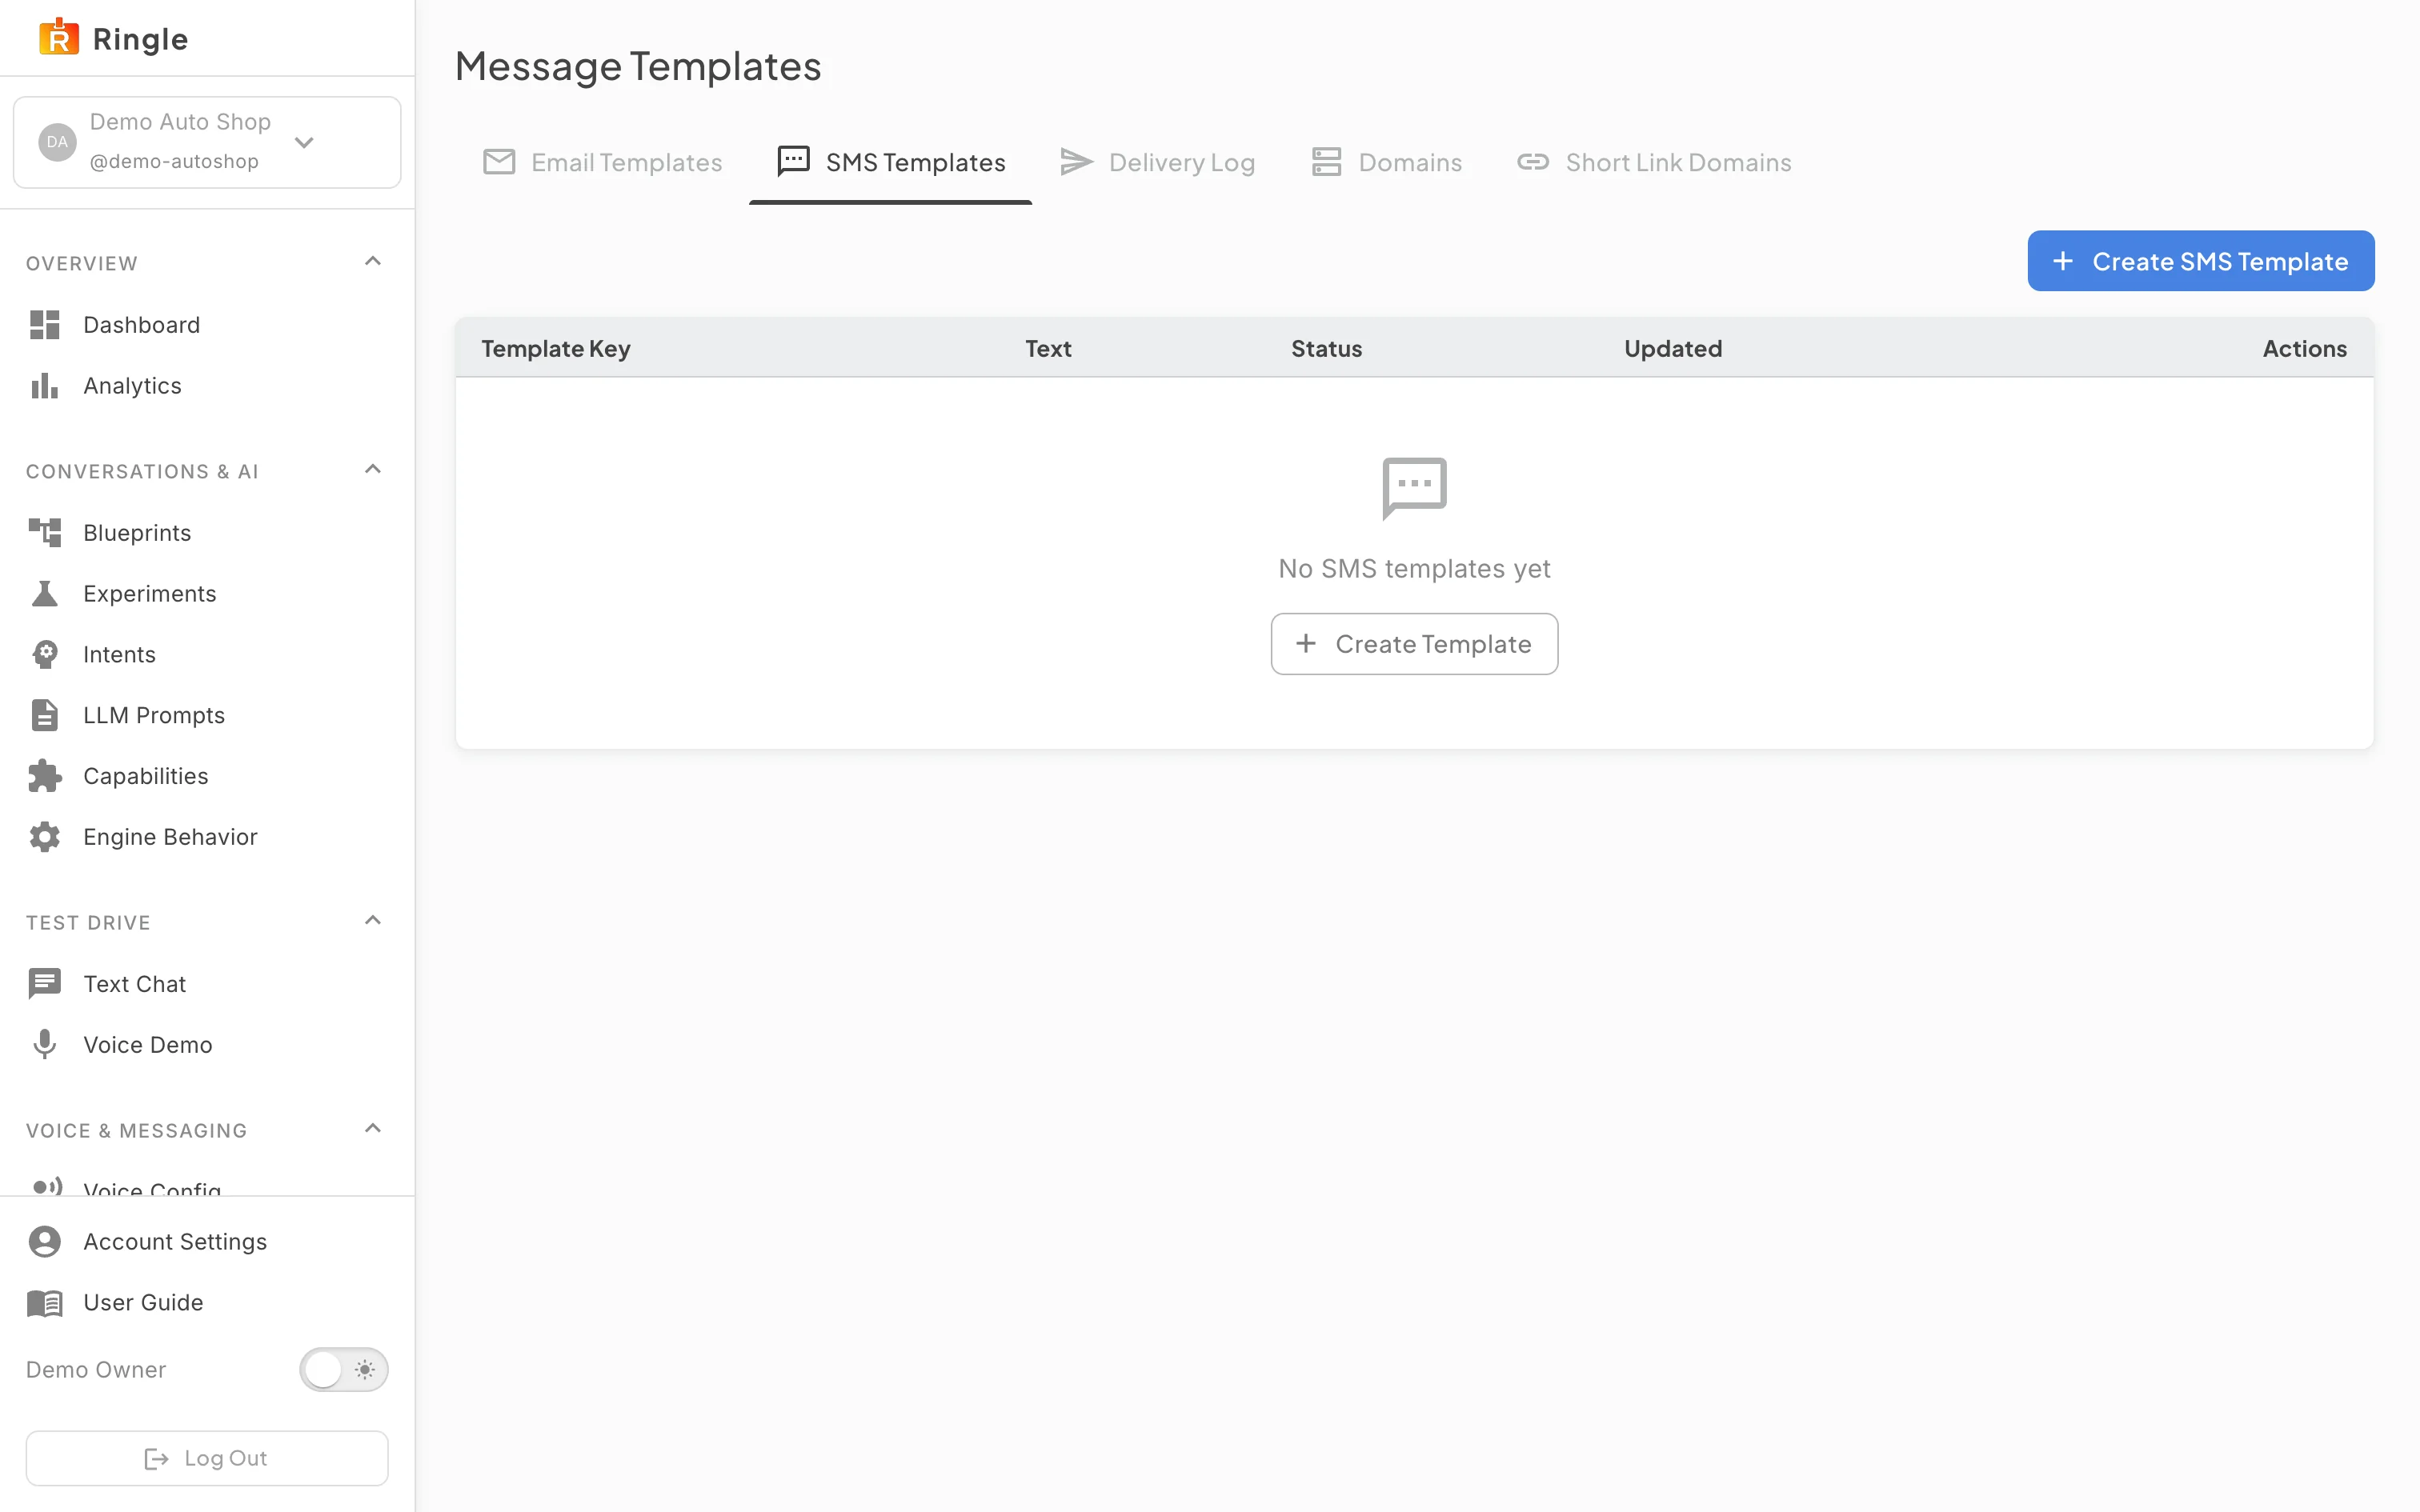
Action: Switch to the SMS Templates tab.
What you should see: The tab shows the same table pattern for SMS (key, text, status, updated). The demo tenant has none yet, so an empty state with a Create Template button appears.
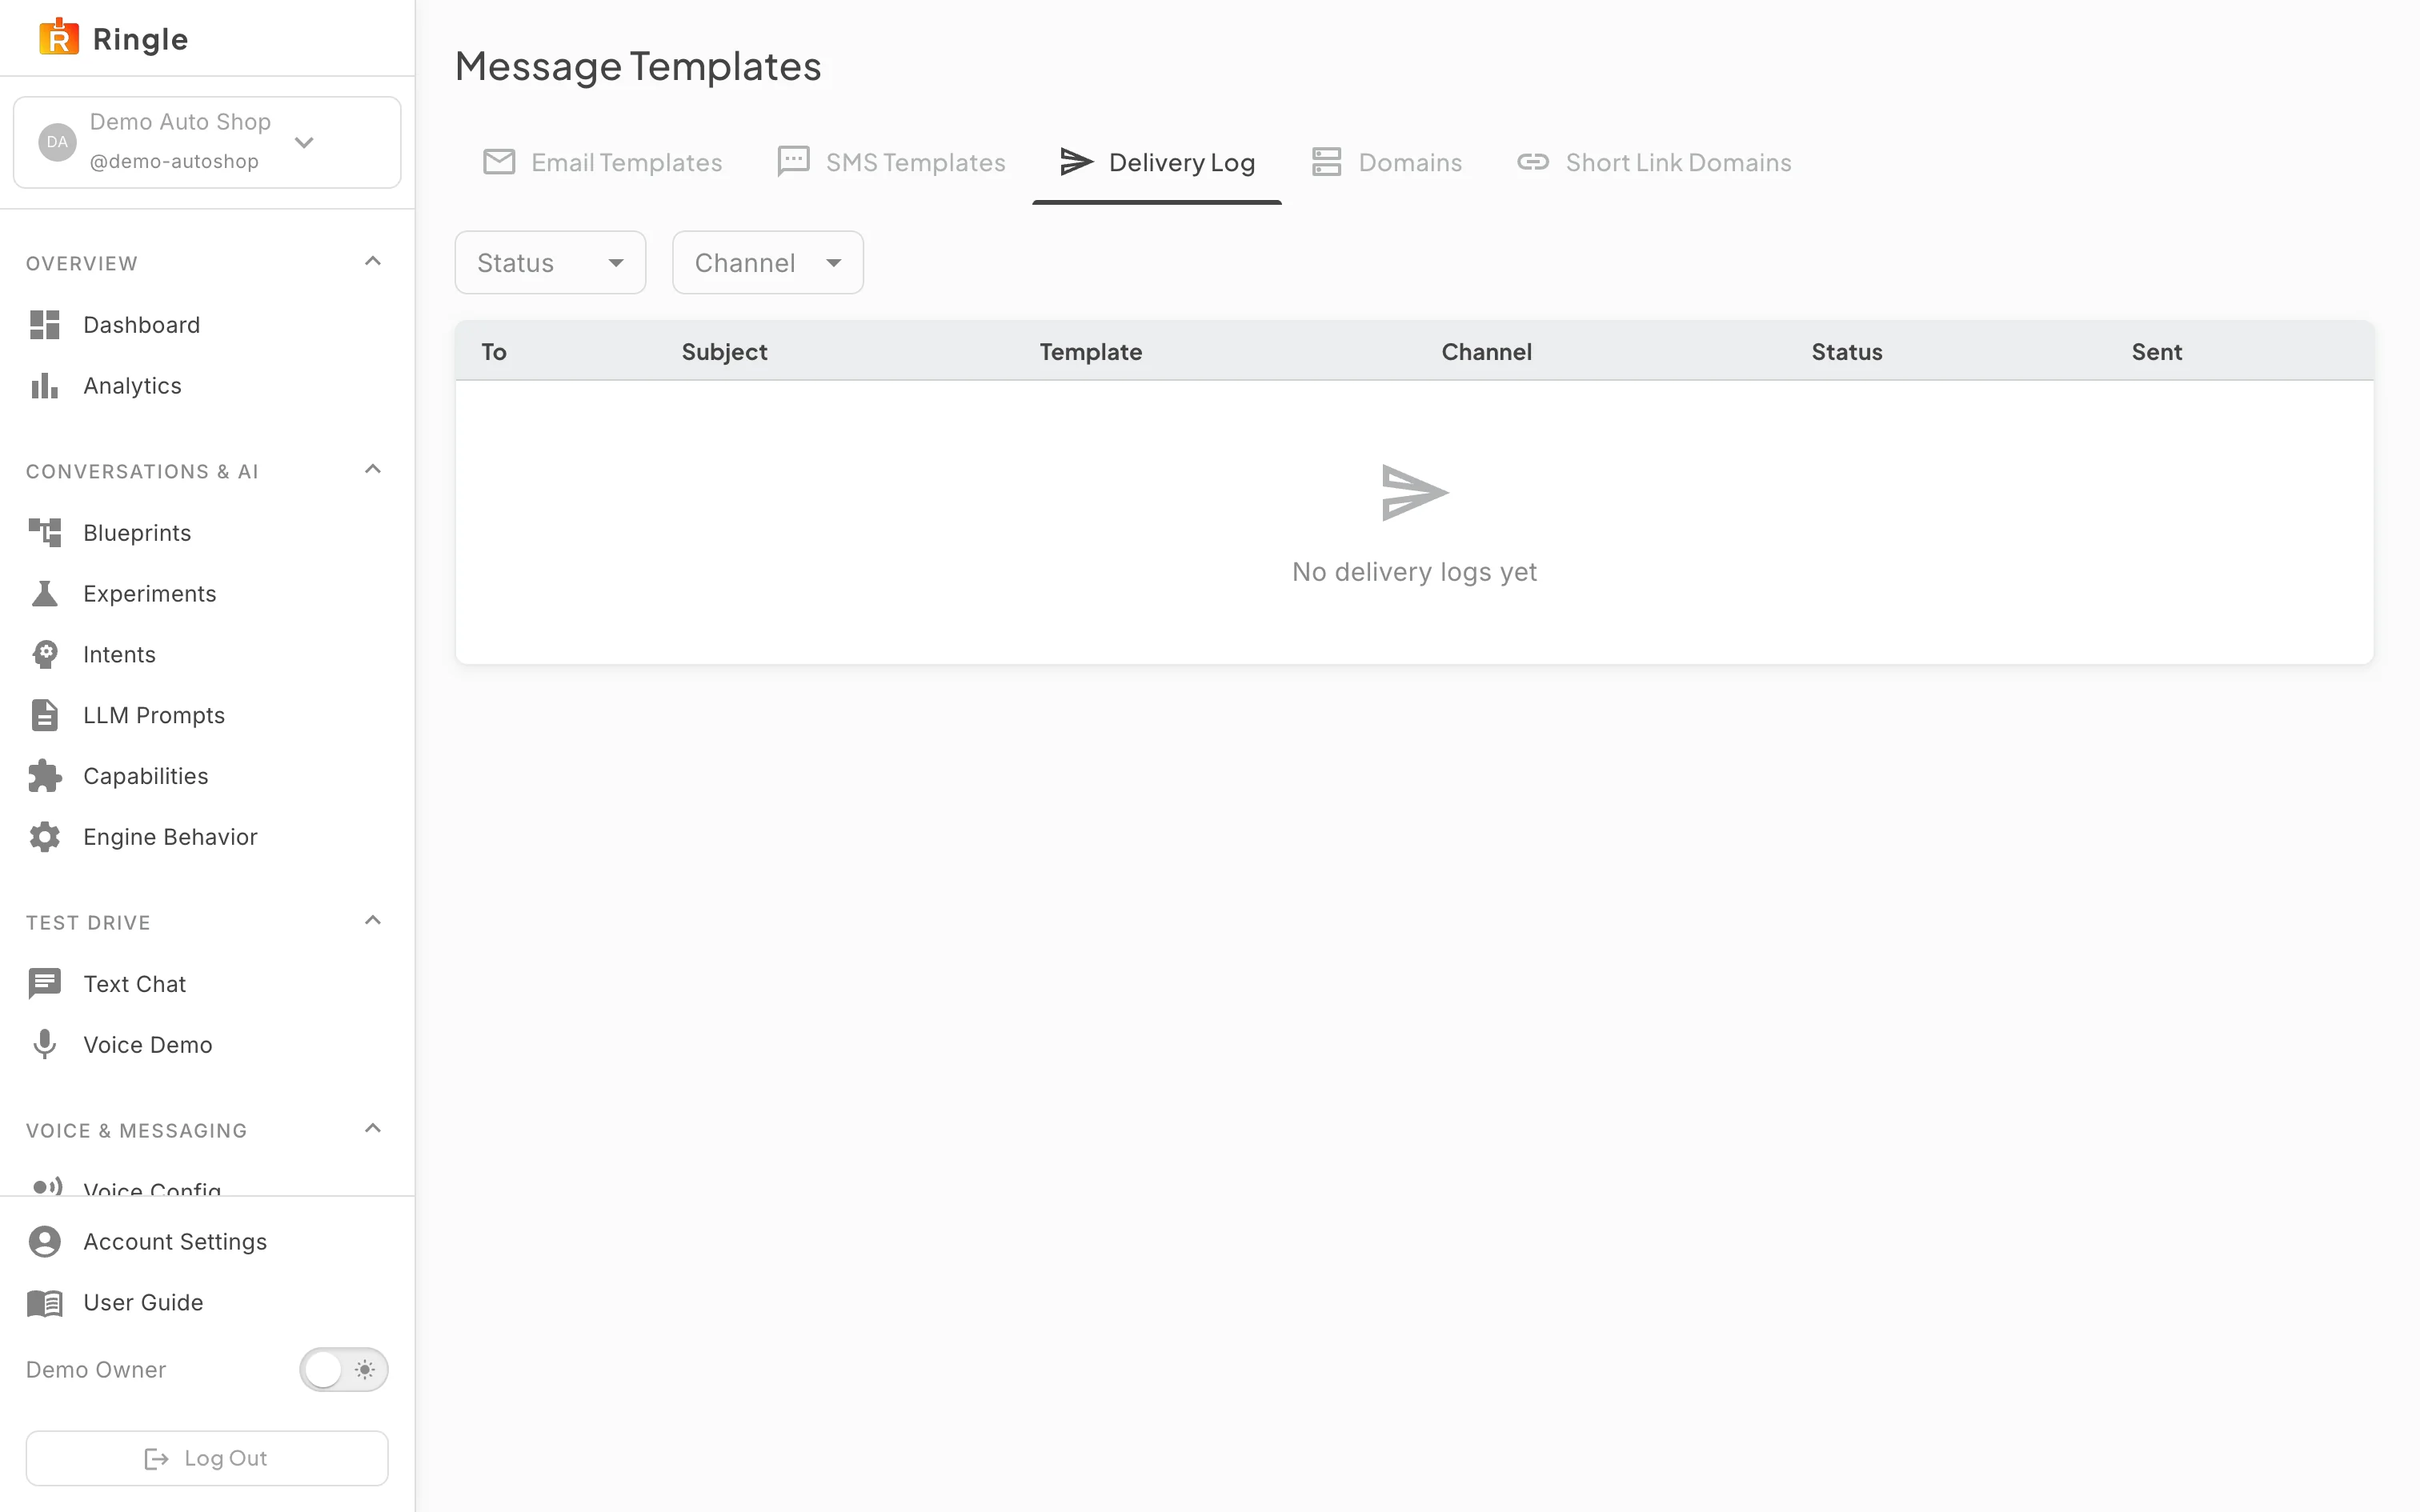
Action: Switch to the Delivery Log tab.
What you should see: A read-only log of outbound messages appears, with Status and Channel filters and columns for To, Subject, Template, Channel, Status, and Sent. Each row shows the recipient, subject, template (when one was used), a channel chip, a status chip (sent, delivered, or bounced), and the send time. Pagination sits at the bottom. The demo tenant has sent nothing yet, so the tab shows “No delivery logs yet”.
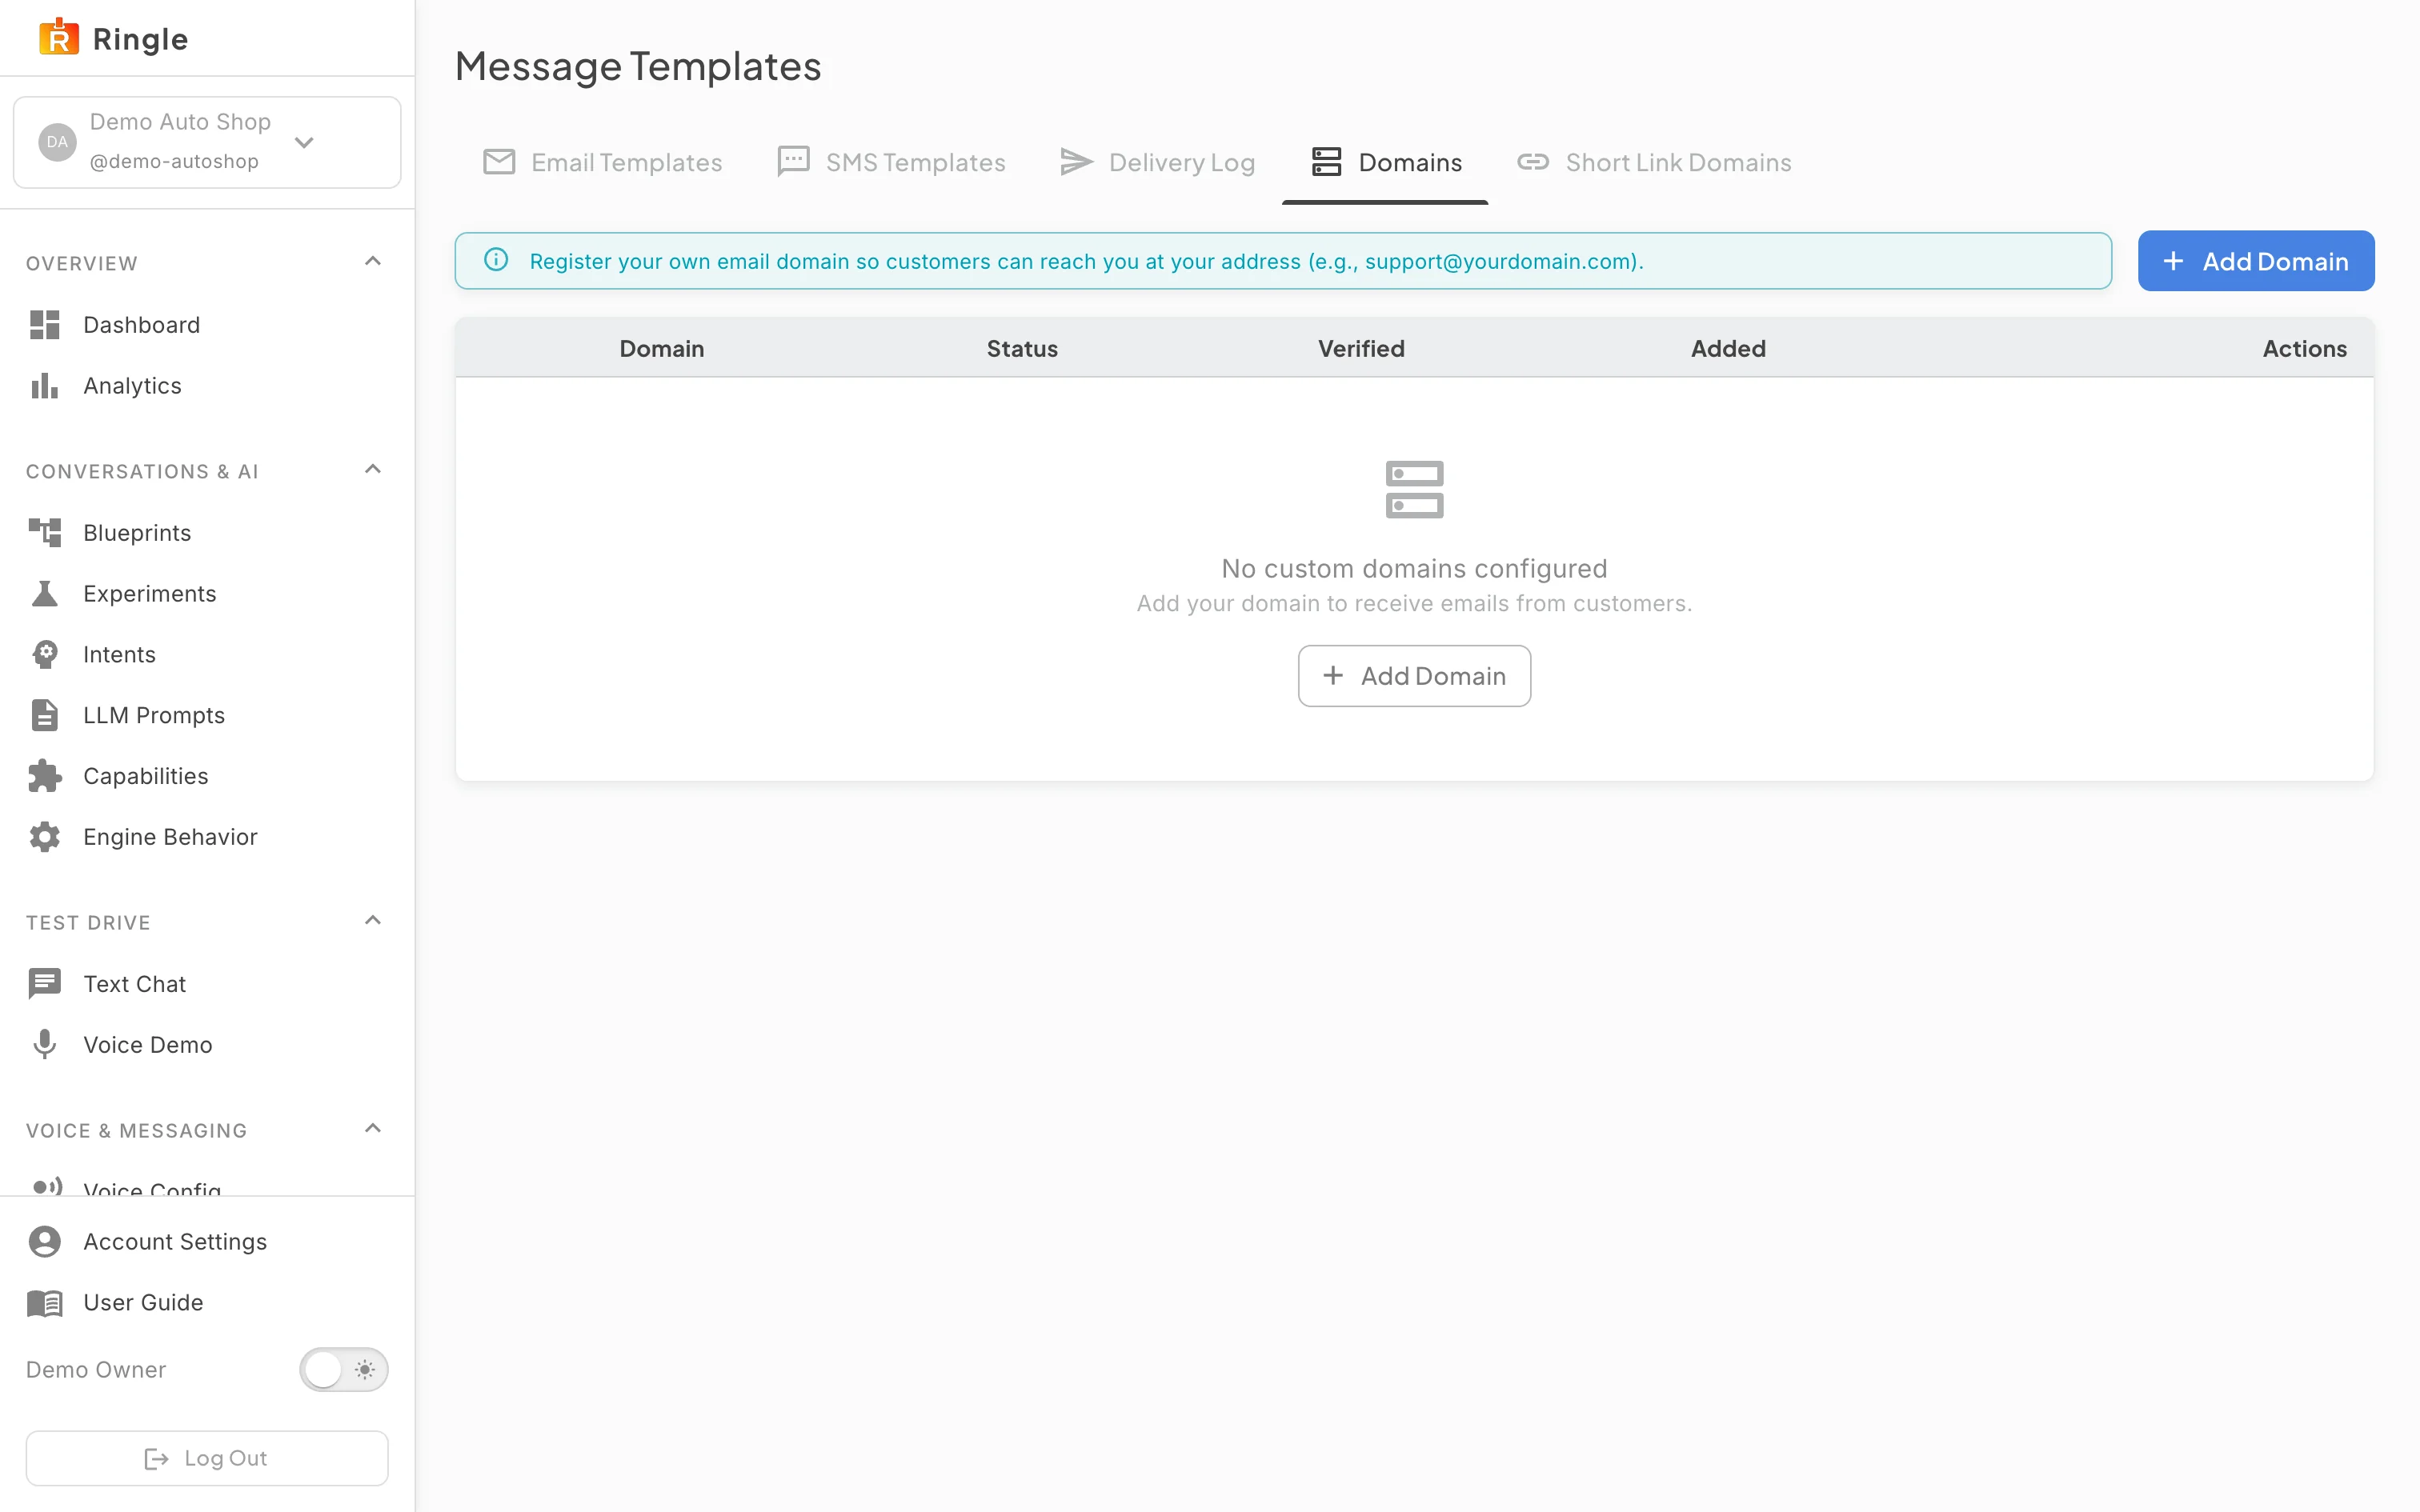
Action: Switch to the Domains tab.
What you should see: The tab explains that registering your own email domain lets customers reach you at your address. It lists registered domains with status, verification date, and a delete action. Rows that are not yet verified also show a Verify button. The demo tenant has no domain configured, so an empty state with an Add Domain button appears.
Screenshot not available (the demo tenant has no email domain to expand)
Action: Click the caret at the left of a domain row to expand it.
What you should see: The row expands to show the DNS records to add at your domain provider: a DKIM TXT record, an MX record, and an SPF TXT record. Each record has its own status chip and a copy button for its value.
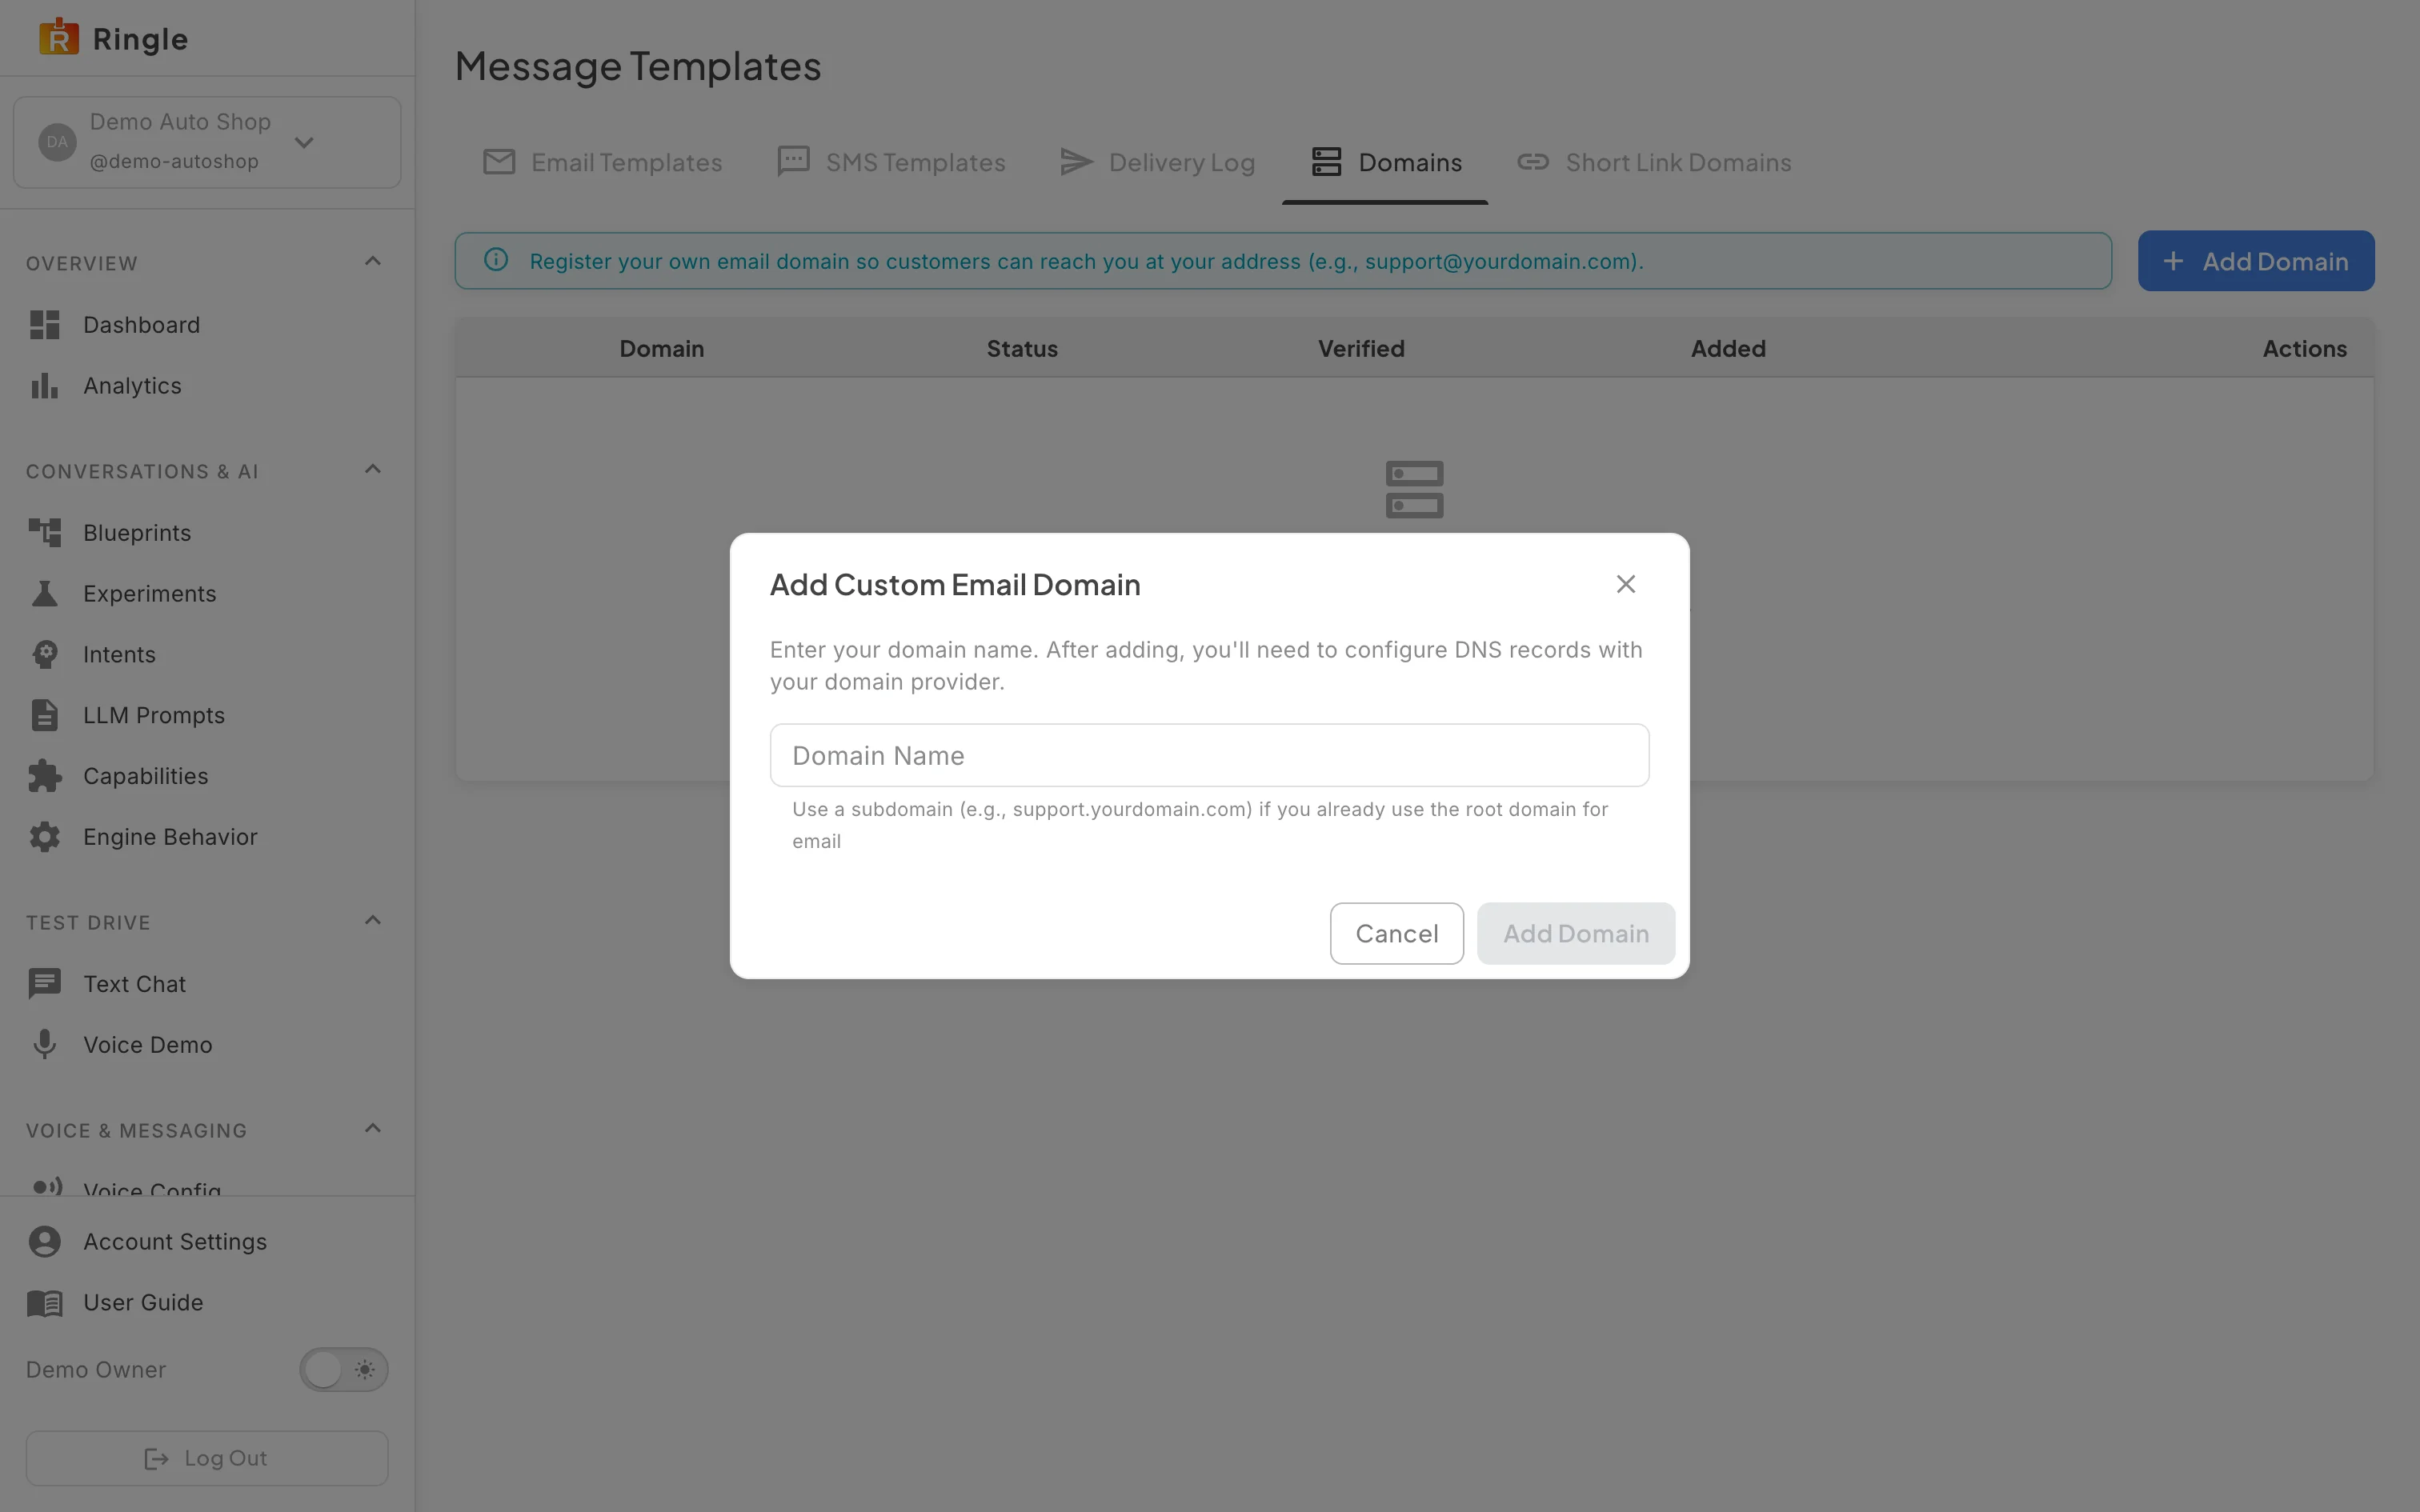
Action: Click Add Domain. Review the dialog. Then click Cancel.
What you should see: The Add Custom Email Domain
dialog asks for a single Domain Name (for example
support.yourdomain.com). It recommends a subdomain if the
root domain already handles email. The Add Domain button stays disabled
until a name is entered. Cancel closes the dialog without adding
anything.
Screenshot not available (the demo tenant has no short-link domain to expand)
Action: Switch to the Short Link Domains tab. Expand the domain row.
What you should see: This tab manages the branded domain used for the short URLs Ringle sends in SMS, chat, and email. It opens with an explanation and an Add Domain button; the demo tenant has none configured, so an empty state shows. Once a domain is added, its row expands to the single CNAME record to add (the domain pointing at Ringle’s short-link host) with a copy button. While a domain is verifying, the row shows a spinner and the page re-checks automatically.
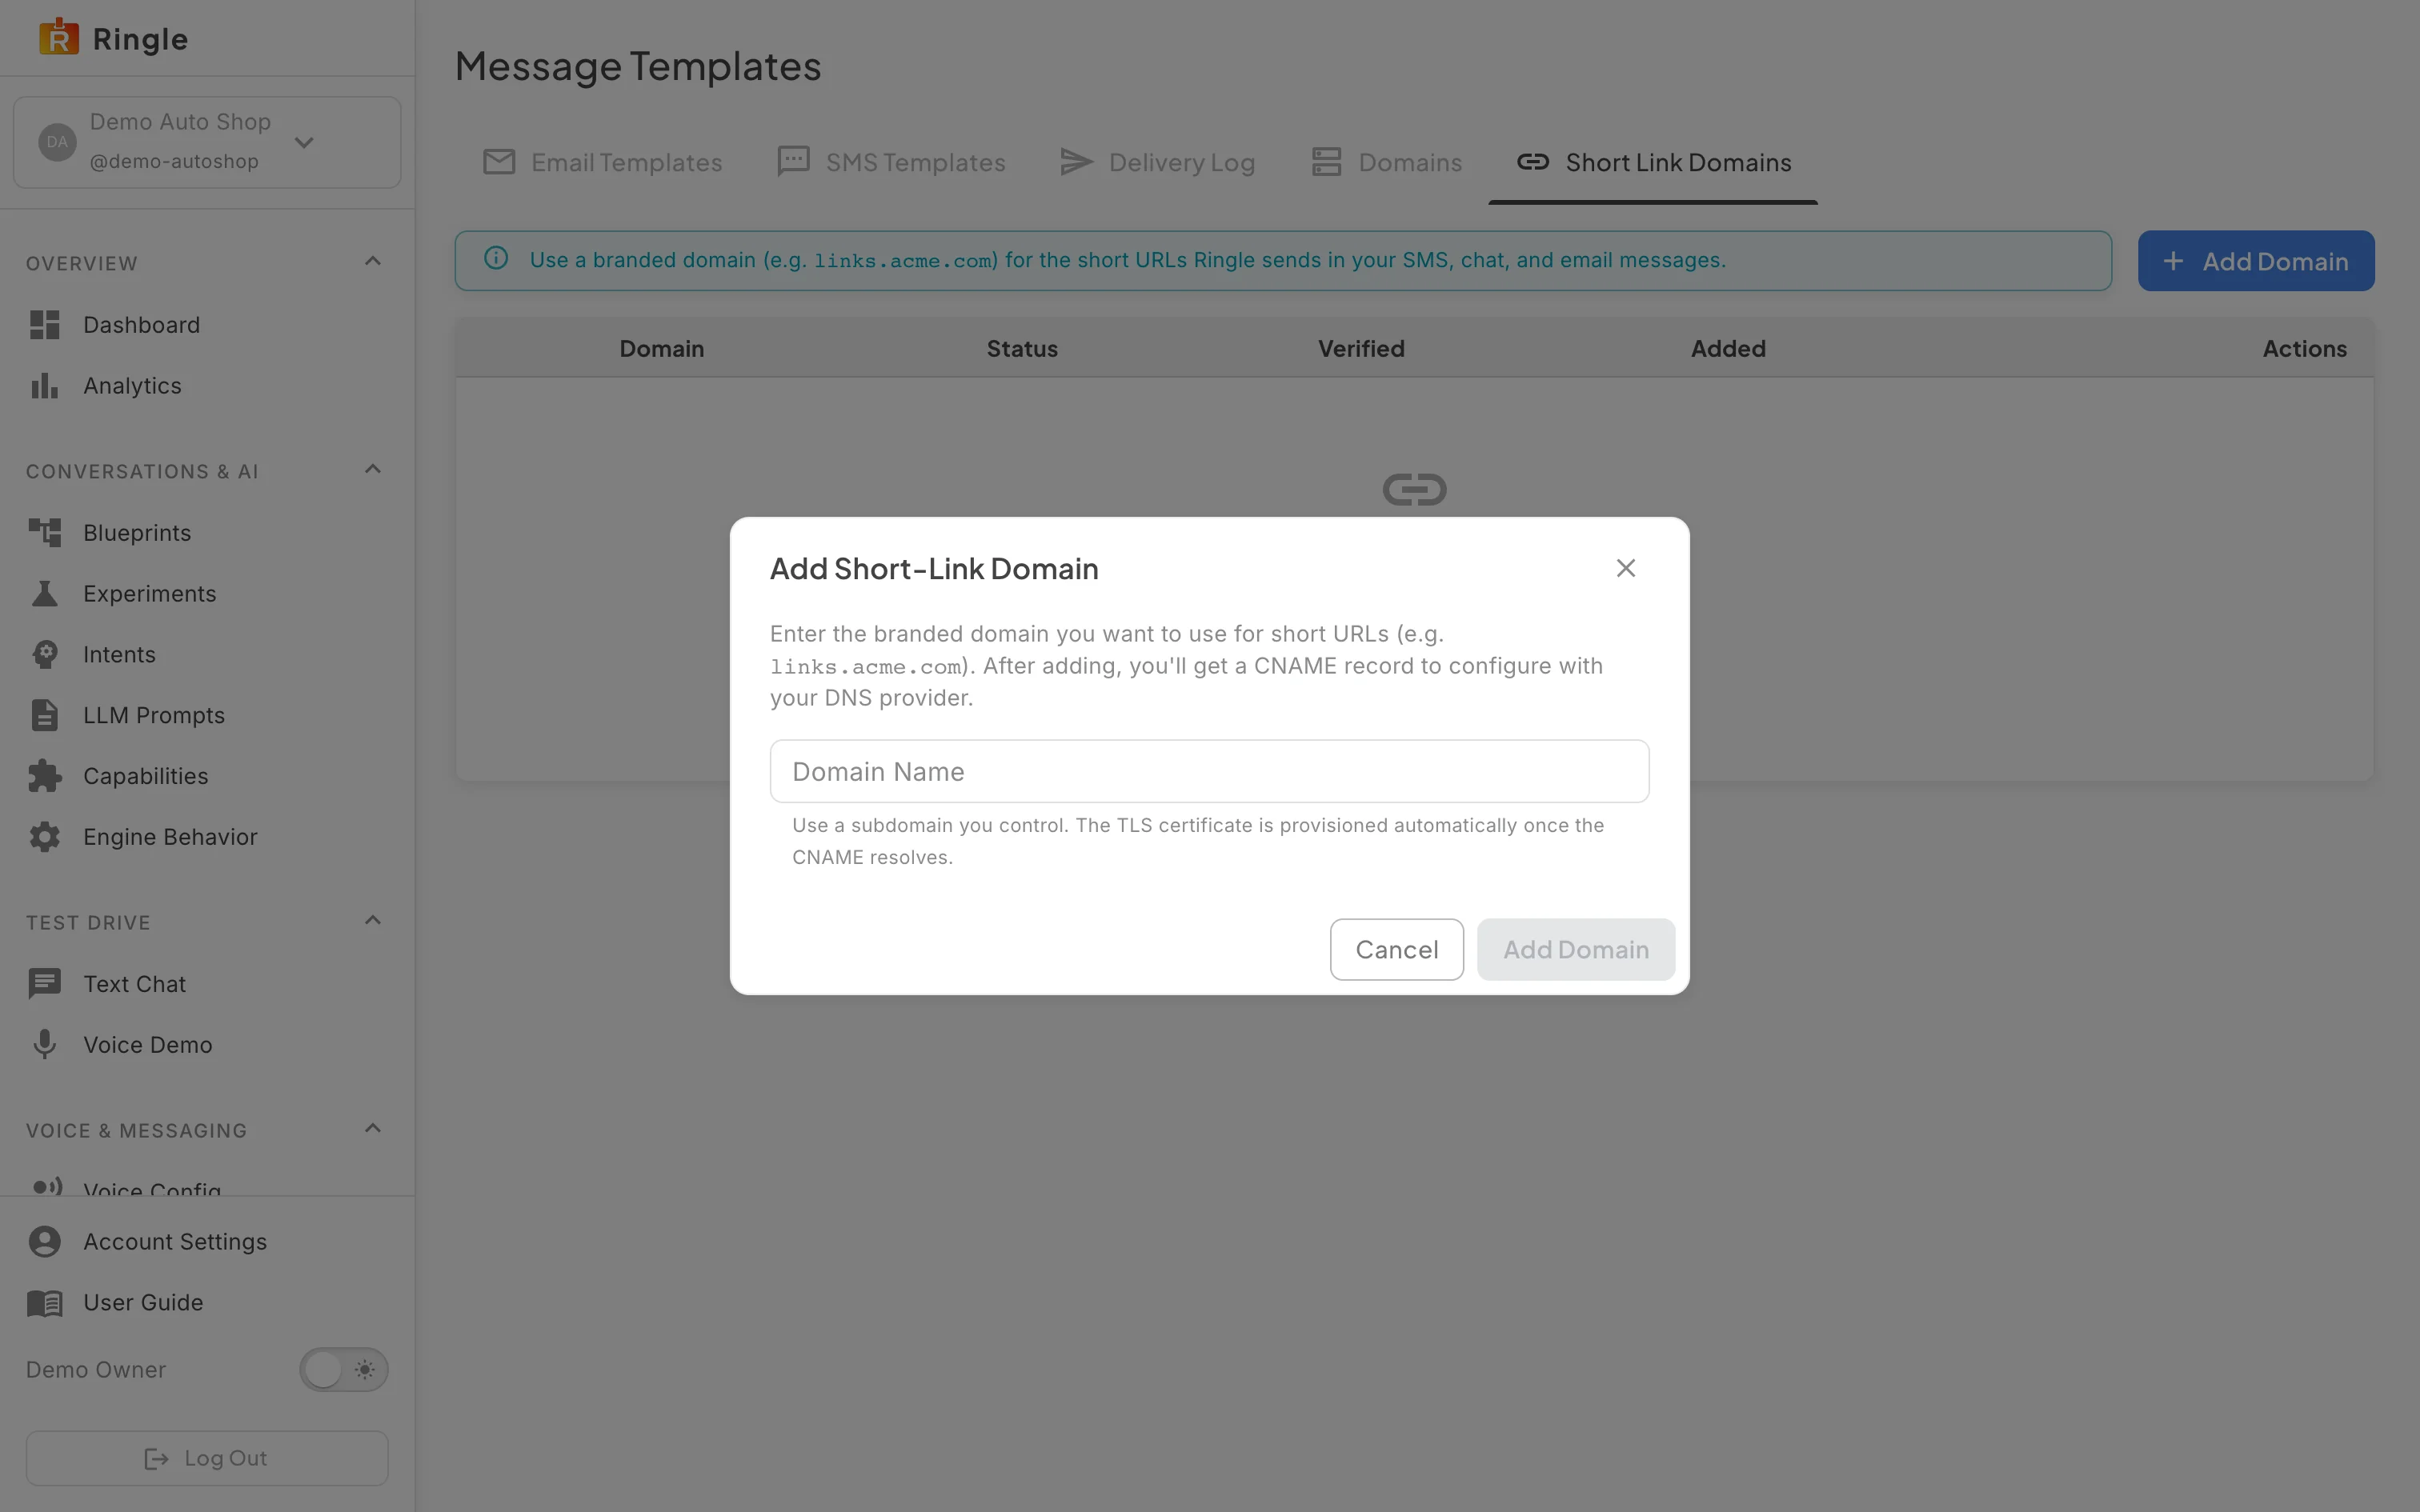
Action: Click Add Domain on this tab. Review the dialog. Then click Cancel.
What you should see: The Add Short-Link Domain
dialog asks for the branded domain (for example
links.acme.com). It notes that a CNAME record follows and
that the TLS certificate is provisioned automatically once the CNAME
resolves. Cancel closes it without changes.
/settings/messaging, sidebar item “Message
Templates” under Voice & Messaging, gated by the
tenants.settings.manage permission.pages/settings/MessagingTemplatesPage.jsx; the
Domains tab renders
components/messaging/DomainManagementPanel.jsx and the
Short Link Domains tab renders
components/messaging/ShortLinkDomainPanel.jsx.