Two pages run the email channel. Email Setup turns the channel on, sets the reply-from address, verifies that your mail provider forwards messages into Ringle, and shows provider-specific forwarding instructions. Email Inbox is where you read and manage the resulting conversations.
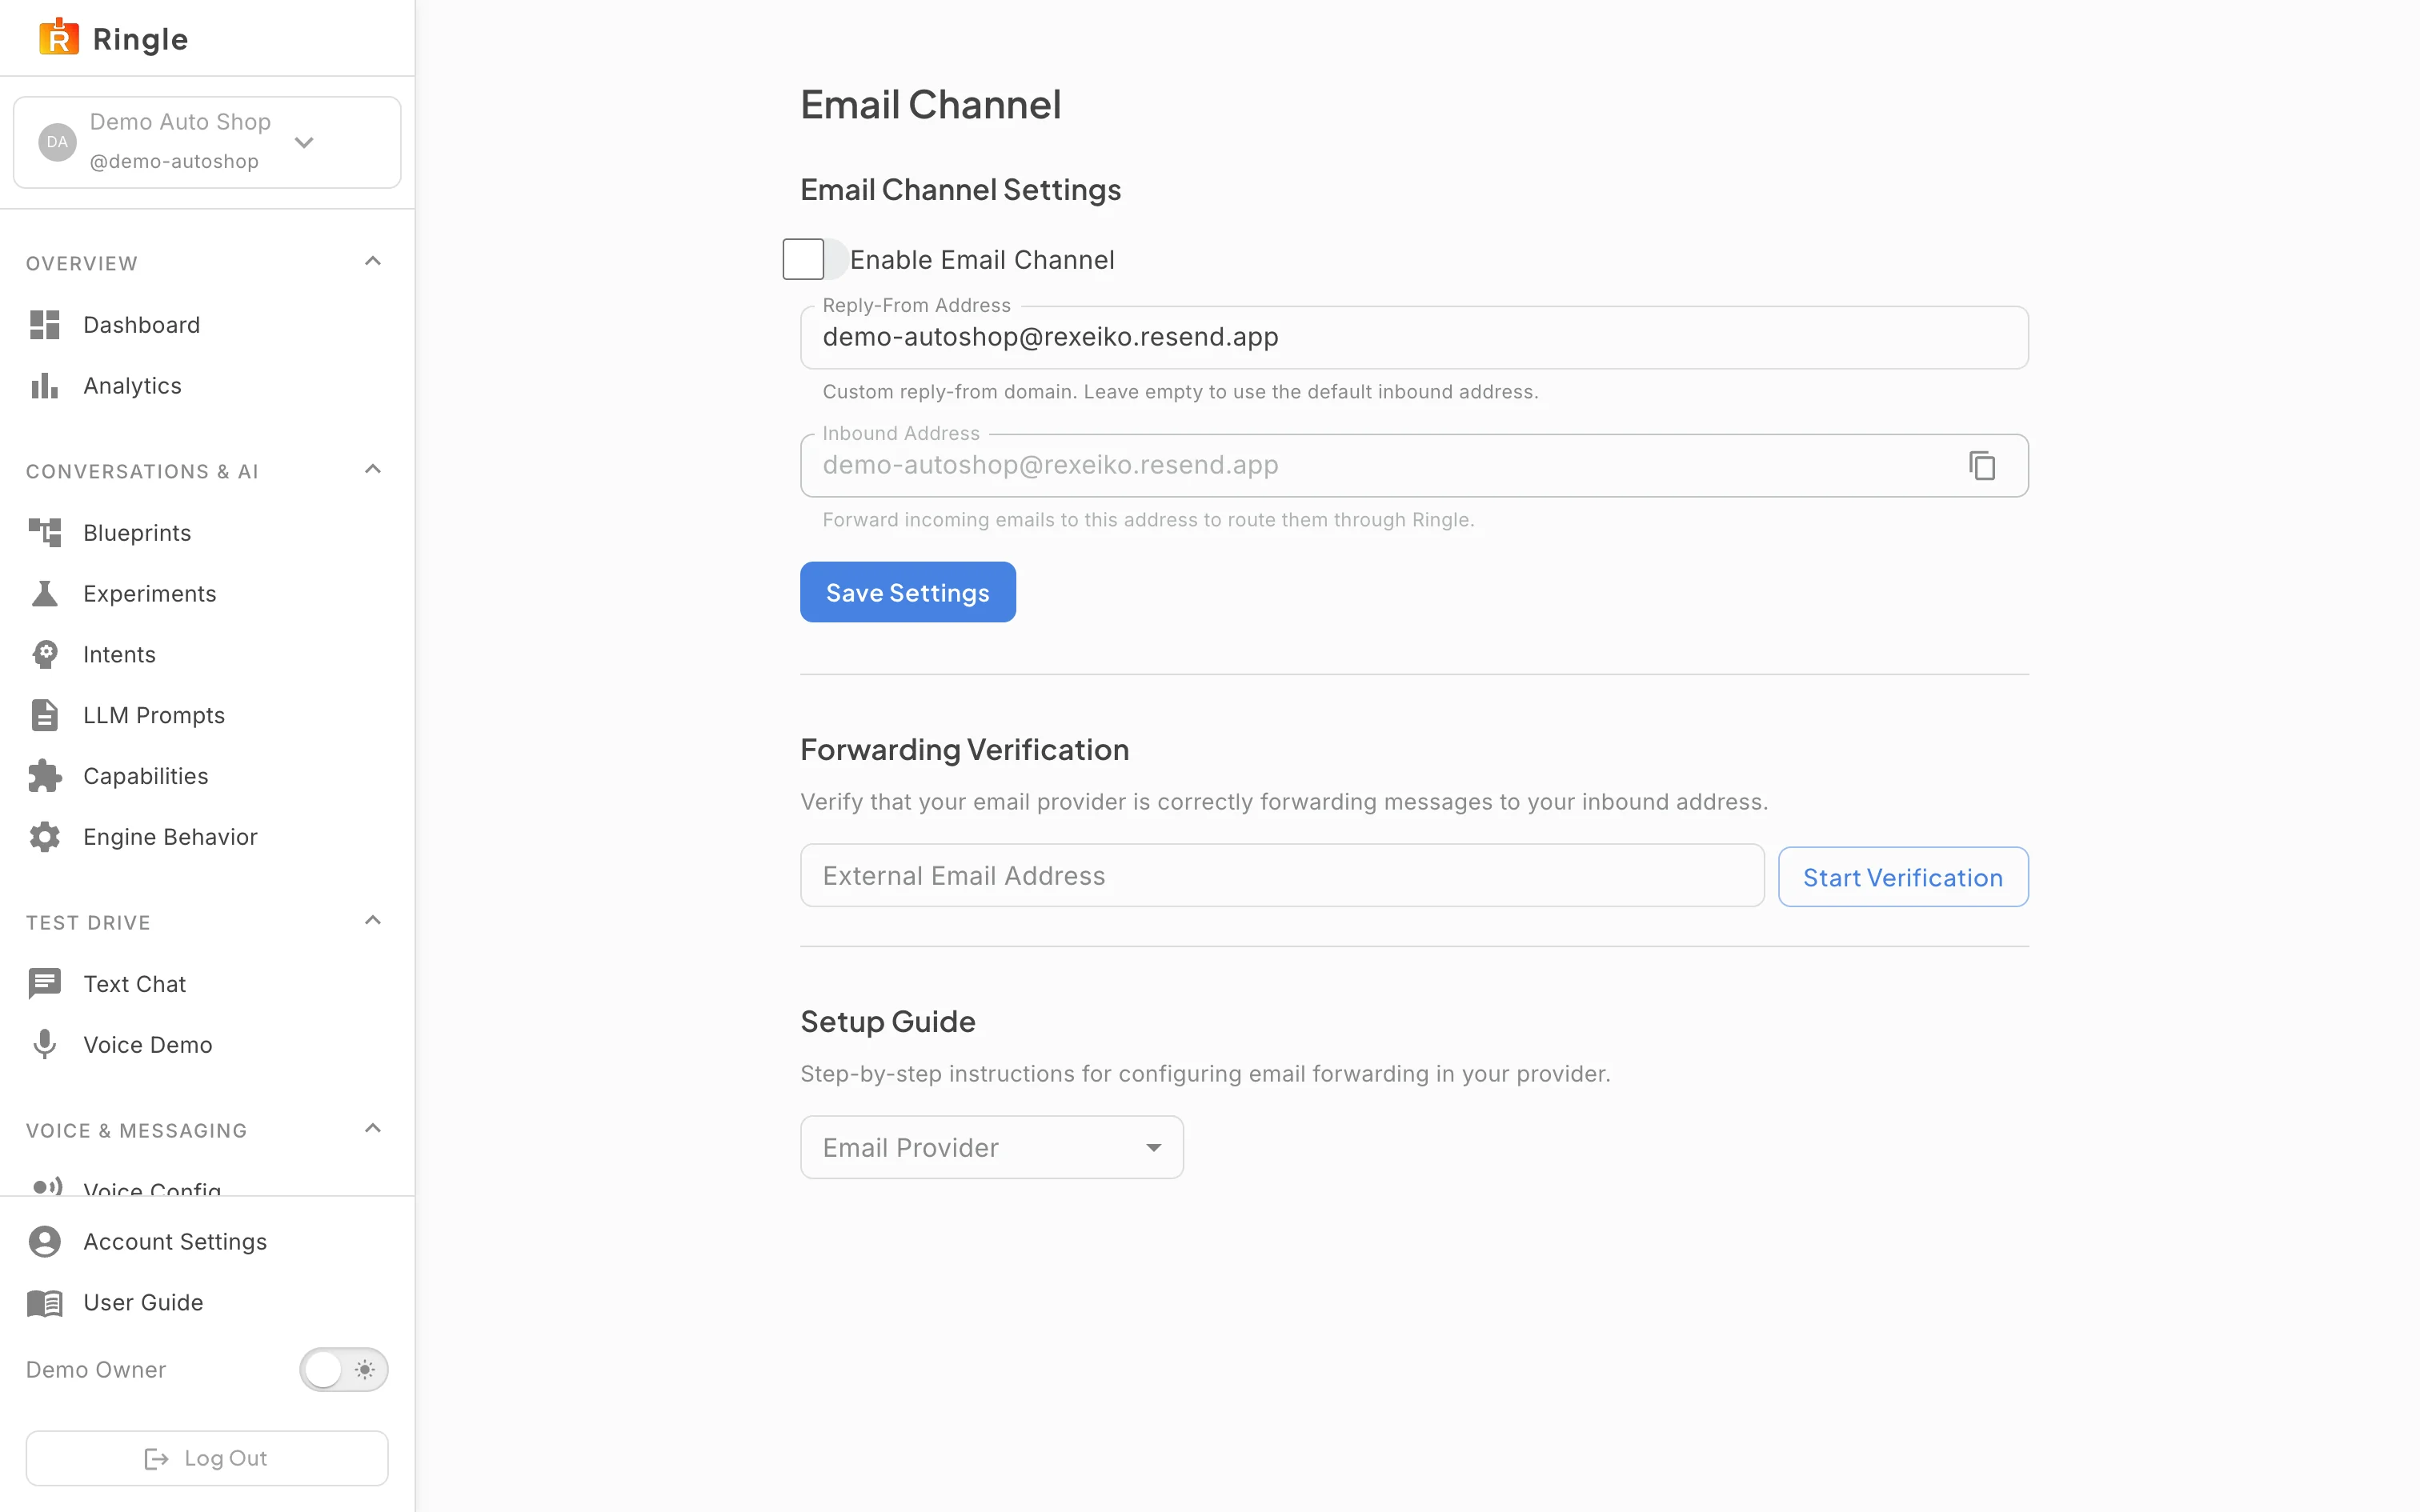
Action: Click Email Setup under Voice & Messaging in the sidebar.
What you should see: The Email Channel page shows three stacked sections. Email Channel Settings has an Enable Email Channel switch, a Reply-From Address field (the demo tenant uses its verified custom domain), a read-only Inbound Address with a copy button, and a Save Settings button. Forwarding Verification takes an external address and a Start Verification button. Setup Guide has an Email Provider selector.
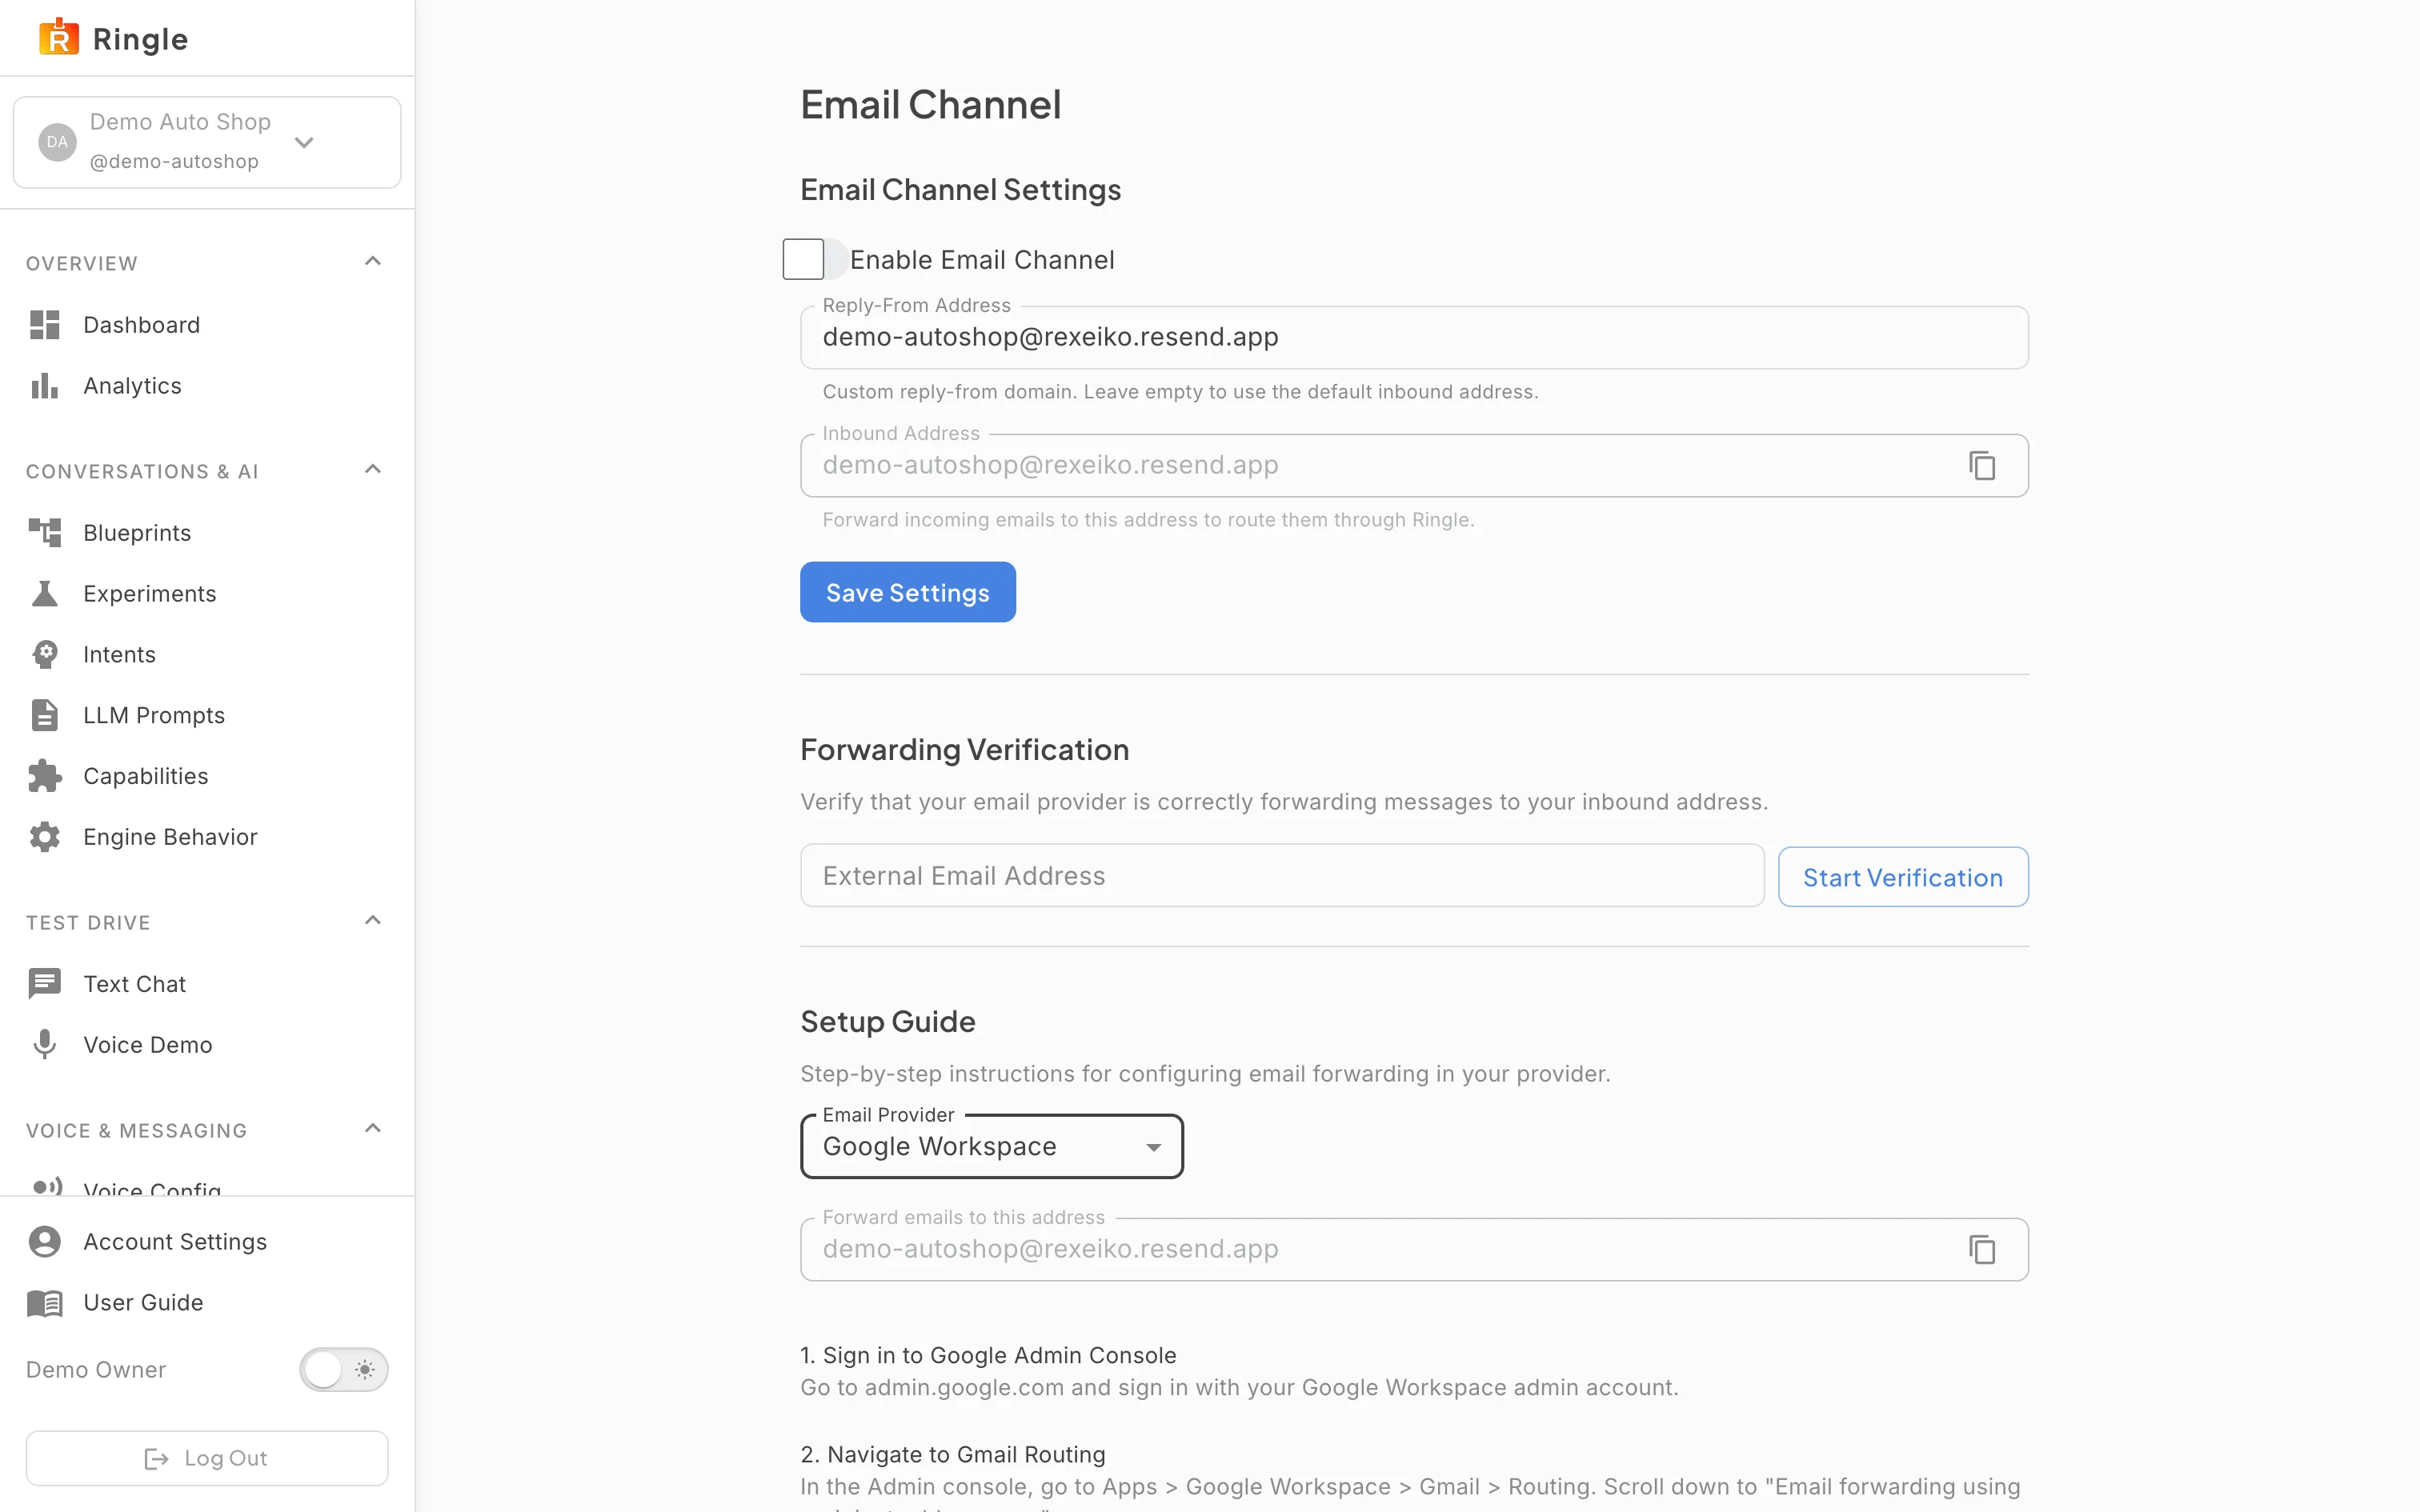
Action: In Setup Guide, pick your email provider, for example Google Workspace.
What you should see: The guide expands to show the exact forward-to address (copyable) and numbered steps for that provider: sign in to the admin console, configure the forwarding rule to the Ringle address, wait for propagation, then return here and click Start Verification. Exchange Online, Google Workspace, and Gmail have written guides. Other shows a coming-soon notice.
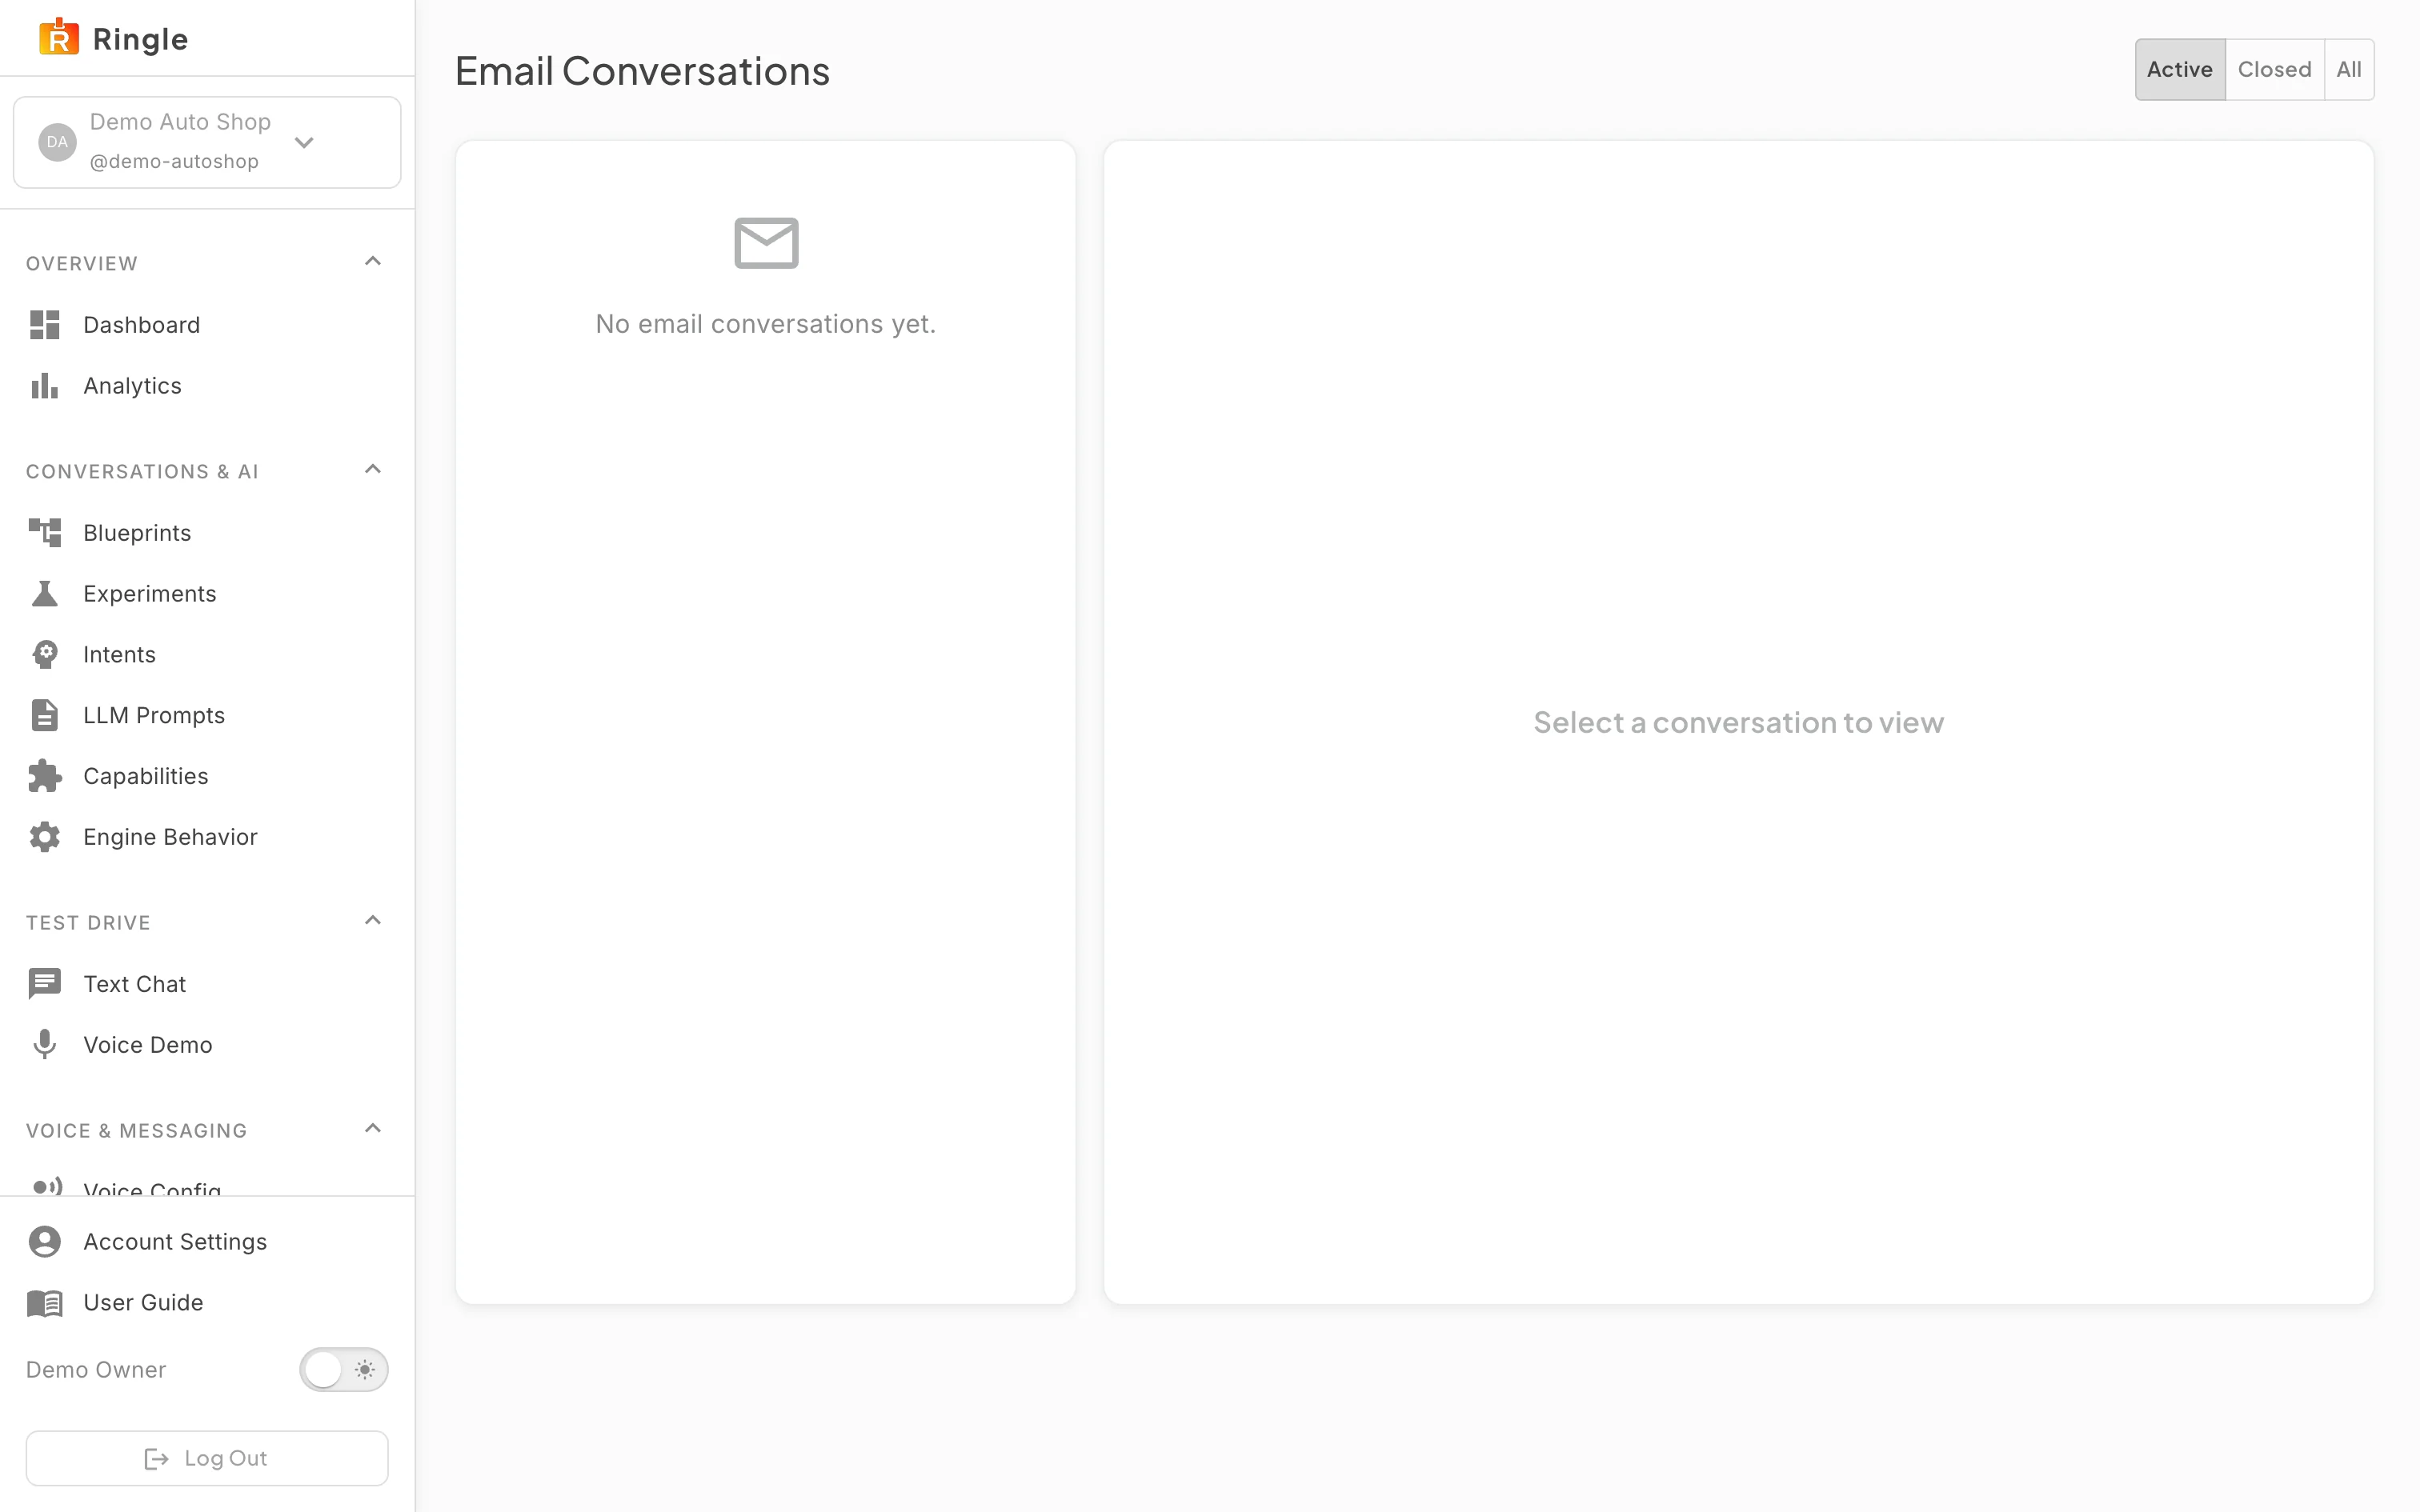
Action: Click Email Inbox under Voice & Messaging in the sidebar.
What you should see: The Email Conversations page opens with a status filter (Active, Closed, All; Active is the default). The left pane lists conversations by customer address with a message count, the last activity time, and a status chip. The right pane prompts you to select a conversation. The demo tenant has no email conversations, so the list shows “No email conversations yet.” and the right pane reads “Select a conversation to view”.
Screenshot not available (the demo tenant has no email conversations to open)
Action: Click a conversation in the list.
What you should see: The thread opens on the right. The header shows the customer address and conversation status. Active threads have Escalate and Close buttons. The message history shows inbound mail on the left and bot replies on the right (each with its subject line). A reply box at the bottom lets you send a manual response.
/settings/email-channel (sidebar “Email Setup”)
and /settings/email-conversations (sidebar “Email Inbox”),
both under Voice & Messaging. Source:
pages/settings/EmailChannelSettingsPage.jsx (which renders
components/tenant-management/EmailChannelManagement.jsx)
and pages/settings/EmailConversationsPage.jsx.tenants.settings.manage
permission. Email Inbox has no sidebar permission gate, so it is the one
Voice & Messaging item that read-only roles also see.demo-autoshop@rexeiko.resend.app) is the demo tenant’s own
default address. No replies were sent and no conversations were
escalated or closed.