Browse and manage the demo orders and the product catalog that your workspace’s AI assistant works against. Check an order’s status and delivery history. Add or edit the products the assistant can talk about.
/orders or /products to your workspace
address.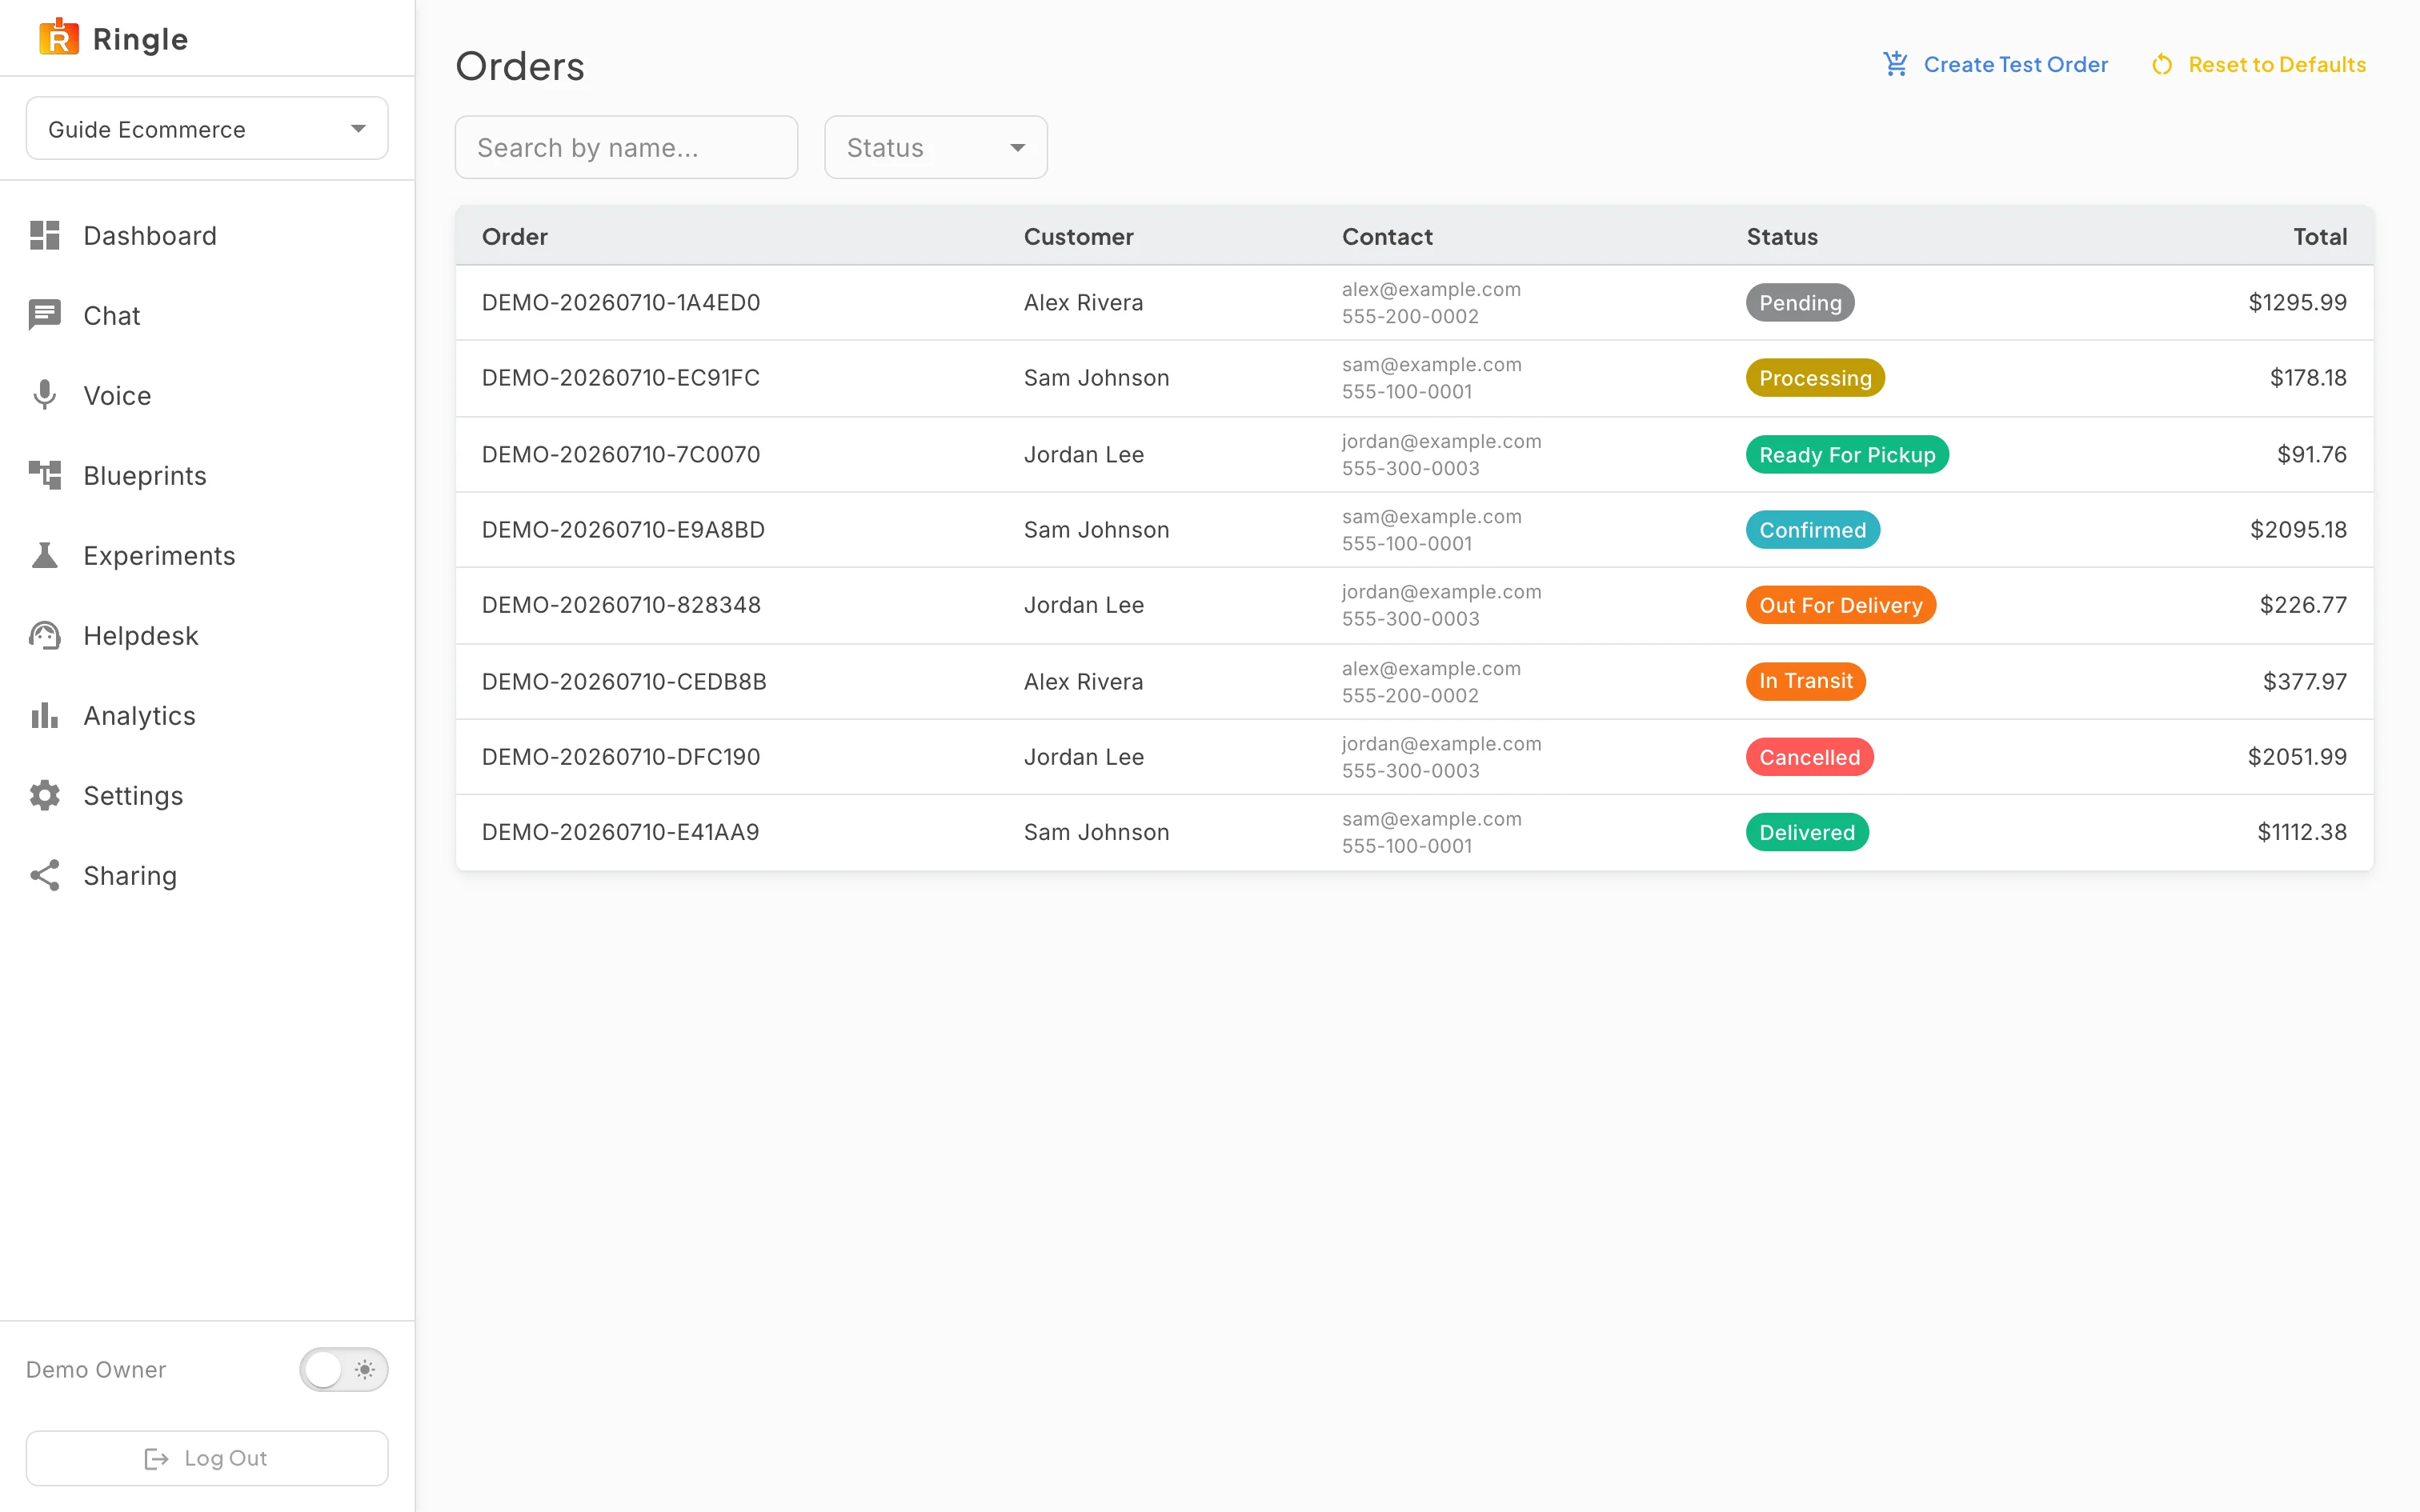
Action: Open the Orders page by adding
/orders to your workspace URL.
What you should see: The Orders page lists the seeded demo orders in a table with Order, Customer, Contact, Status, and Total columns. Each order number is dated (for example DEMO-20260703-29D082) and carries a colored status chip such as Processing, Pending, In Transit, or Delivered. Above the table are a “Search by name” box and a Status filter covering the full lifecycle (pending through delivered, ready for pickup, picked up, cancelled). There are also two header buttons: Create Test Order and Reset to Defaults.
Action: Click any order row.
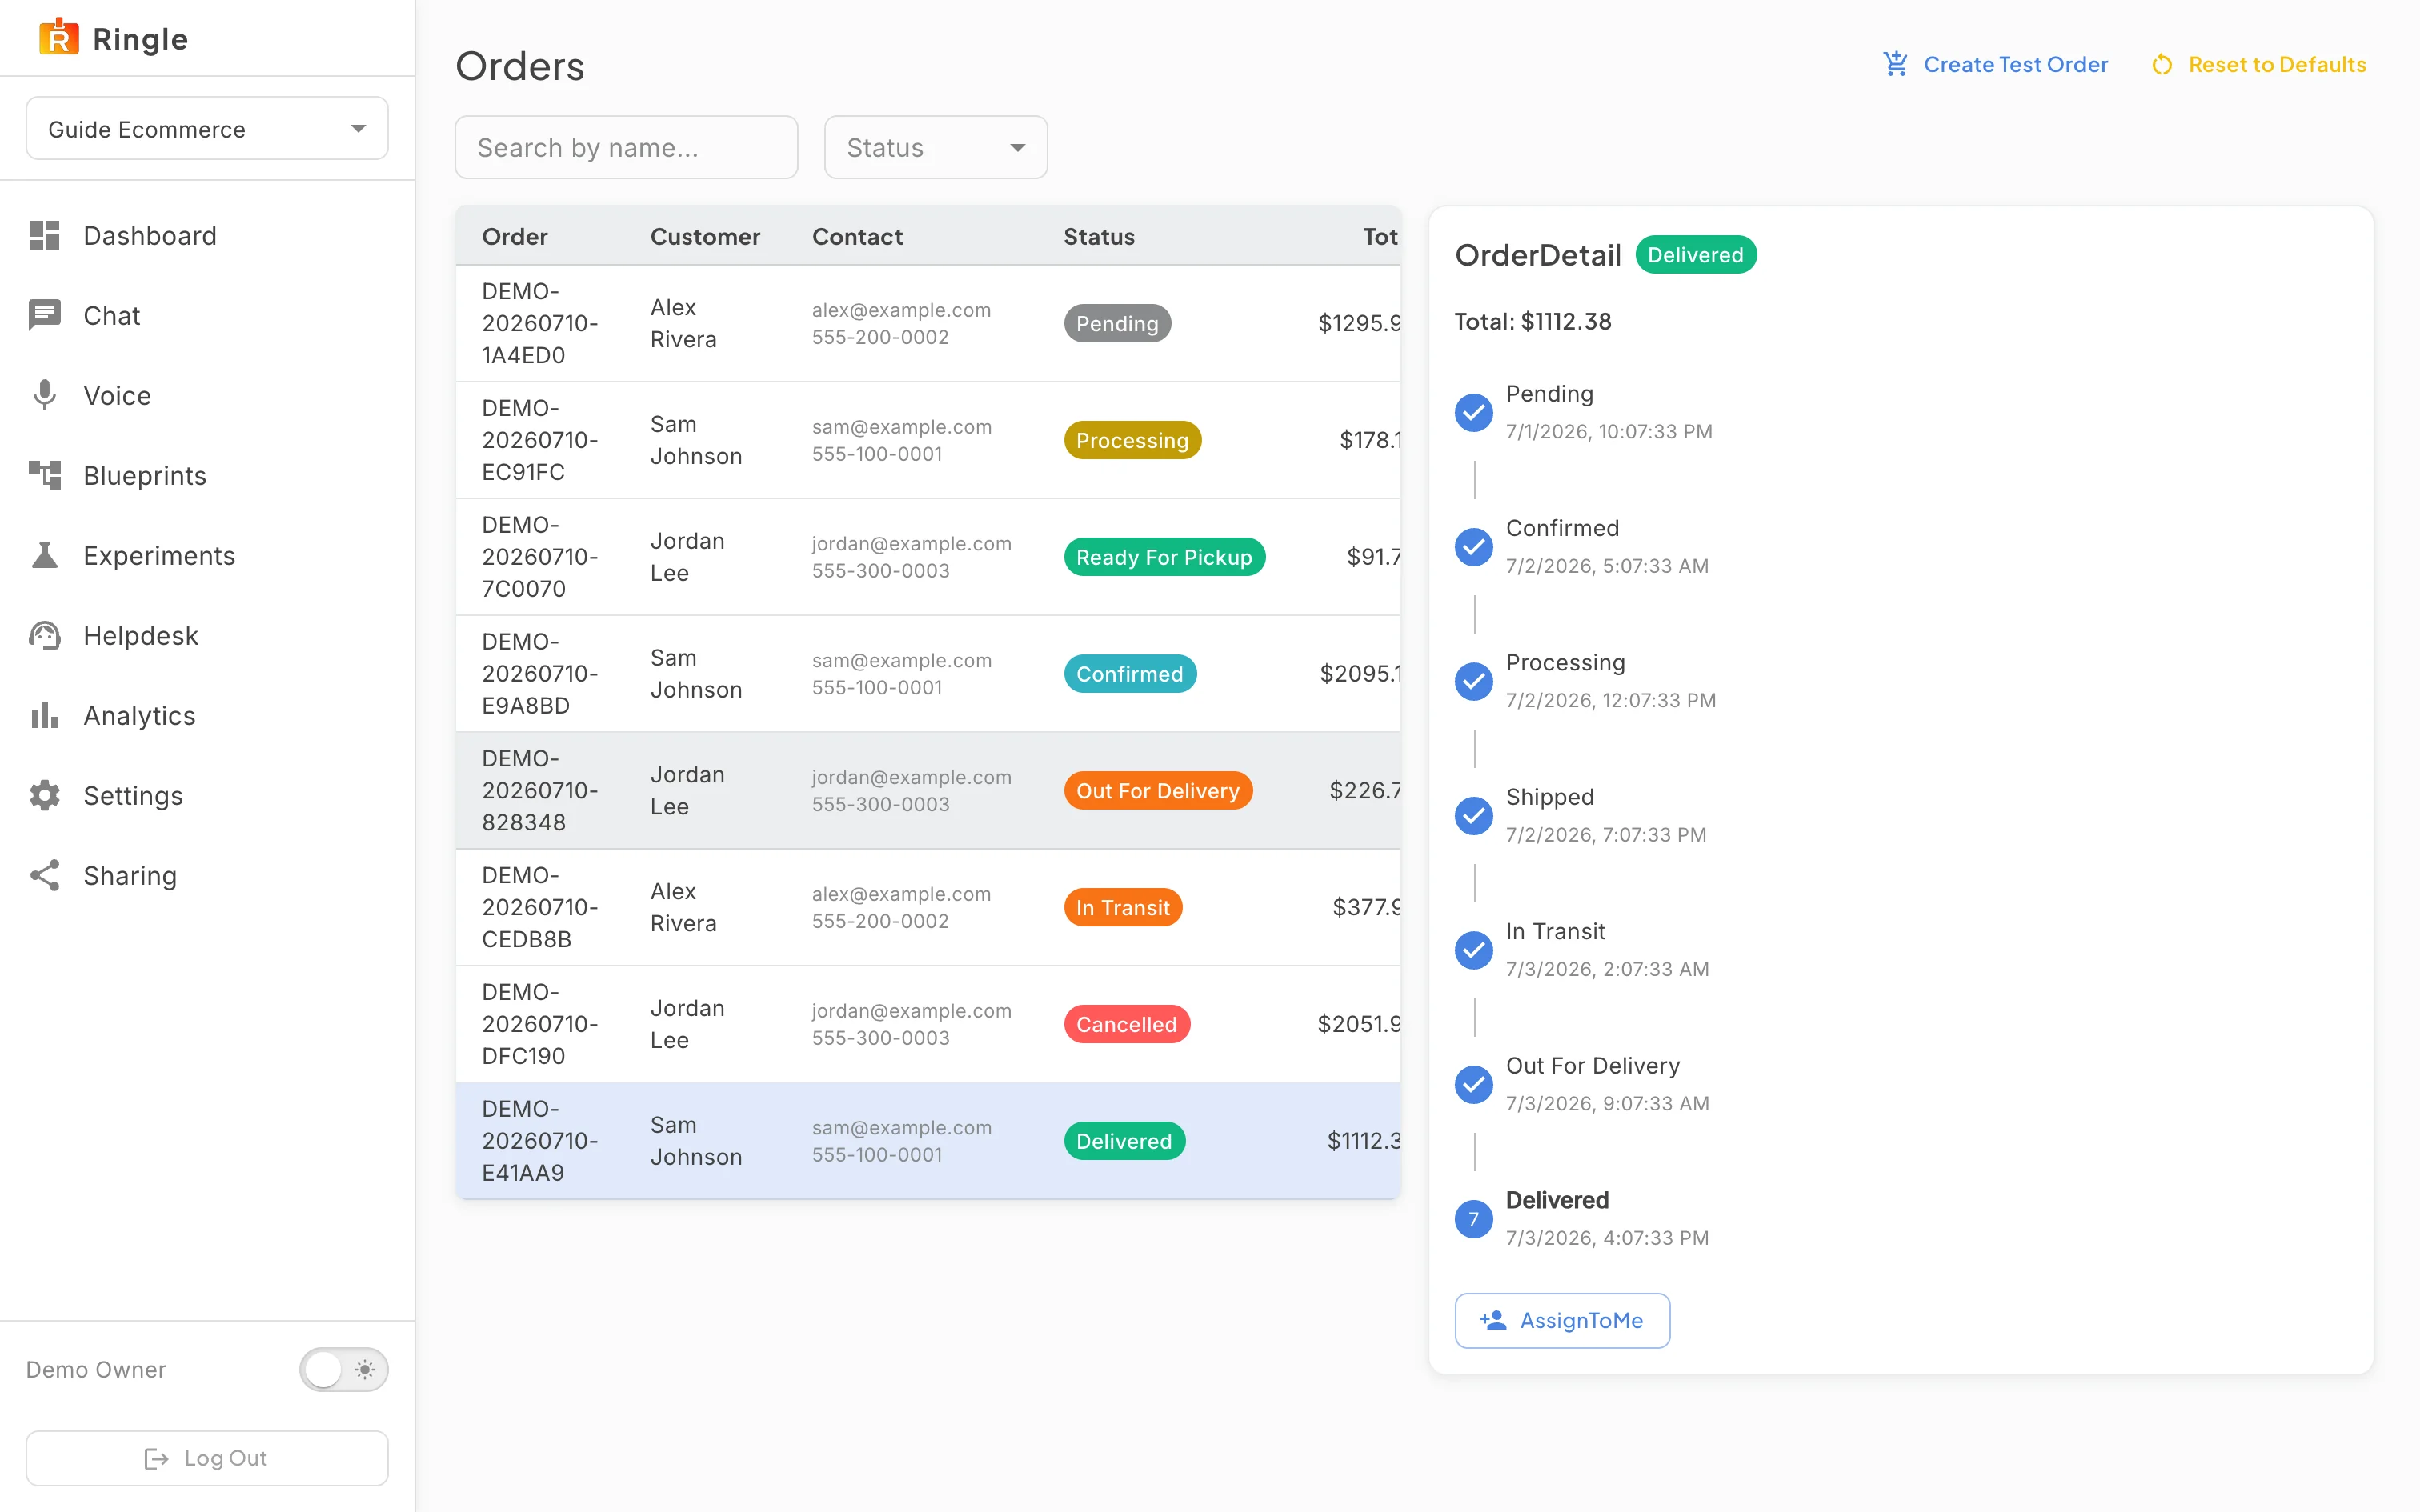
What you should see: A detail panel opens to the right of the table. It shows the order’s status chip, its total, and a delivery timeline. The timeline has a timestamped entry for every stage the order has passed (pending, confirmed, processing, shipped, in transit, out for delivery, delivered). Orders with line items also list them with quantity and price. Below the timeline are the actions valid for that order: a “Move to” button for the next status, Cancel for orders still in pending, confirmed, or processing, and an assign-to-me button. A finished order like the Delivered one shown only offers assignment.
Action: Open the Products page by replacing
/orders with /products in the URL.
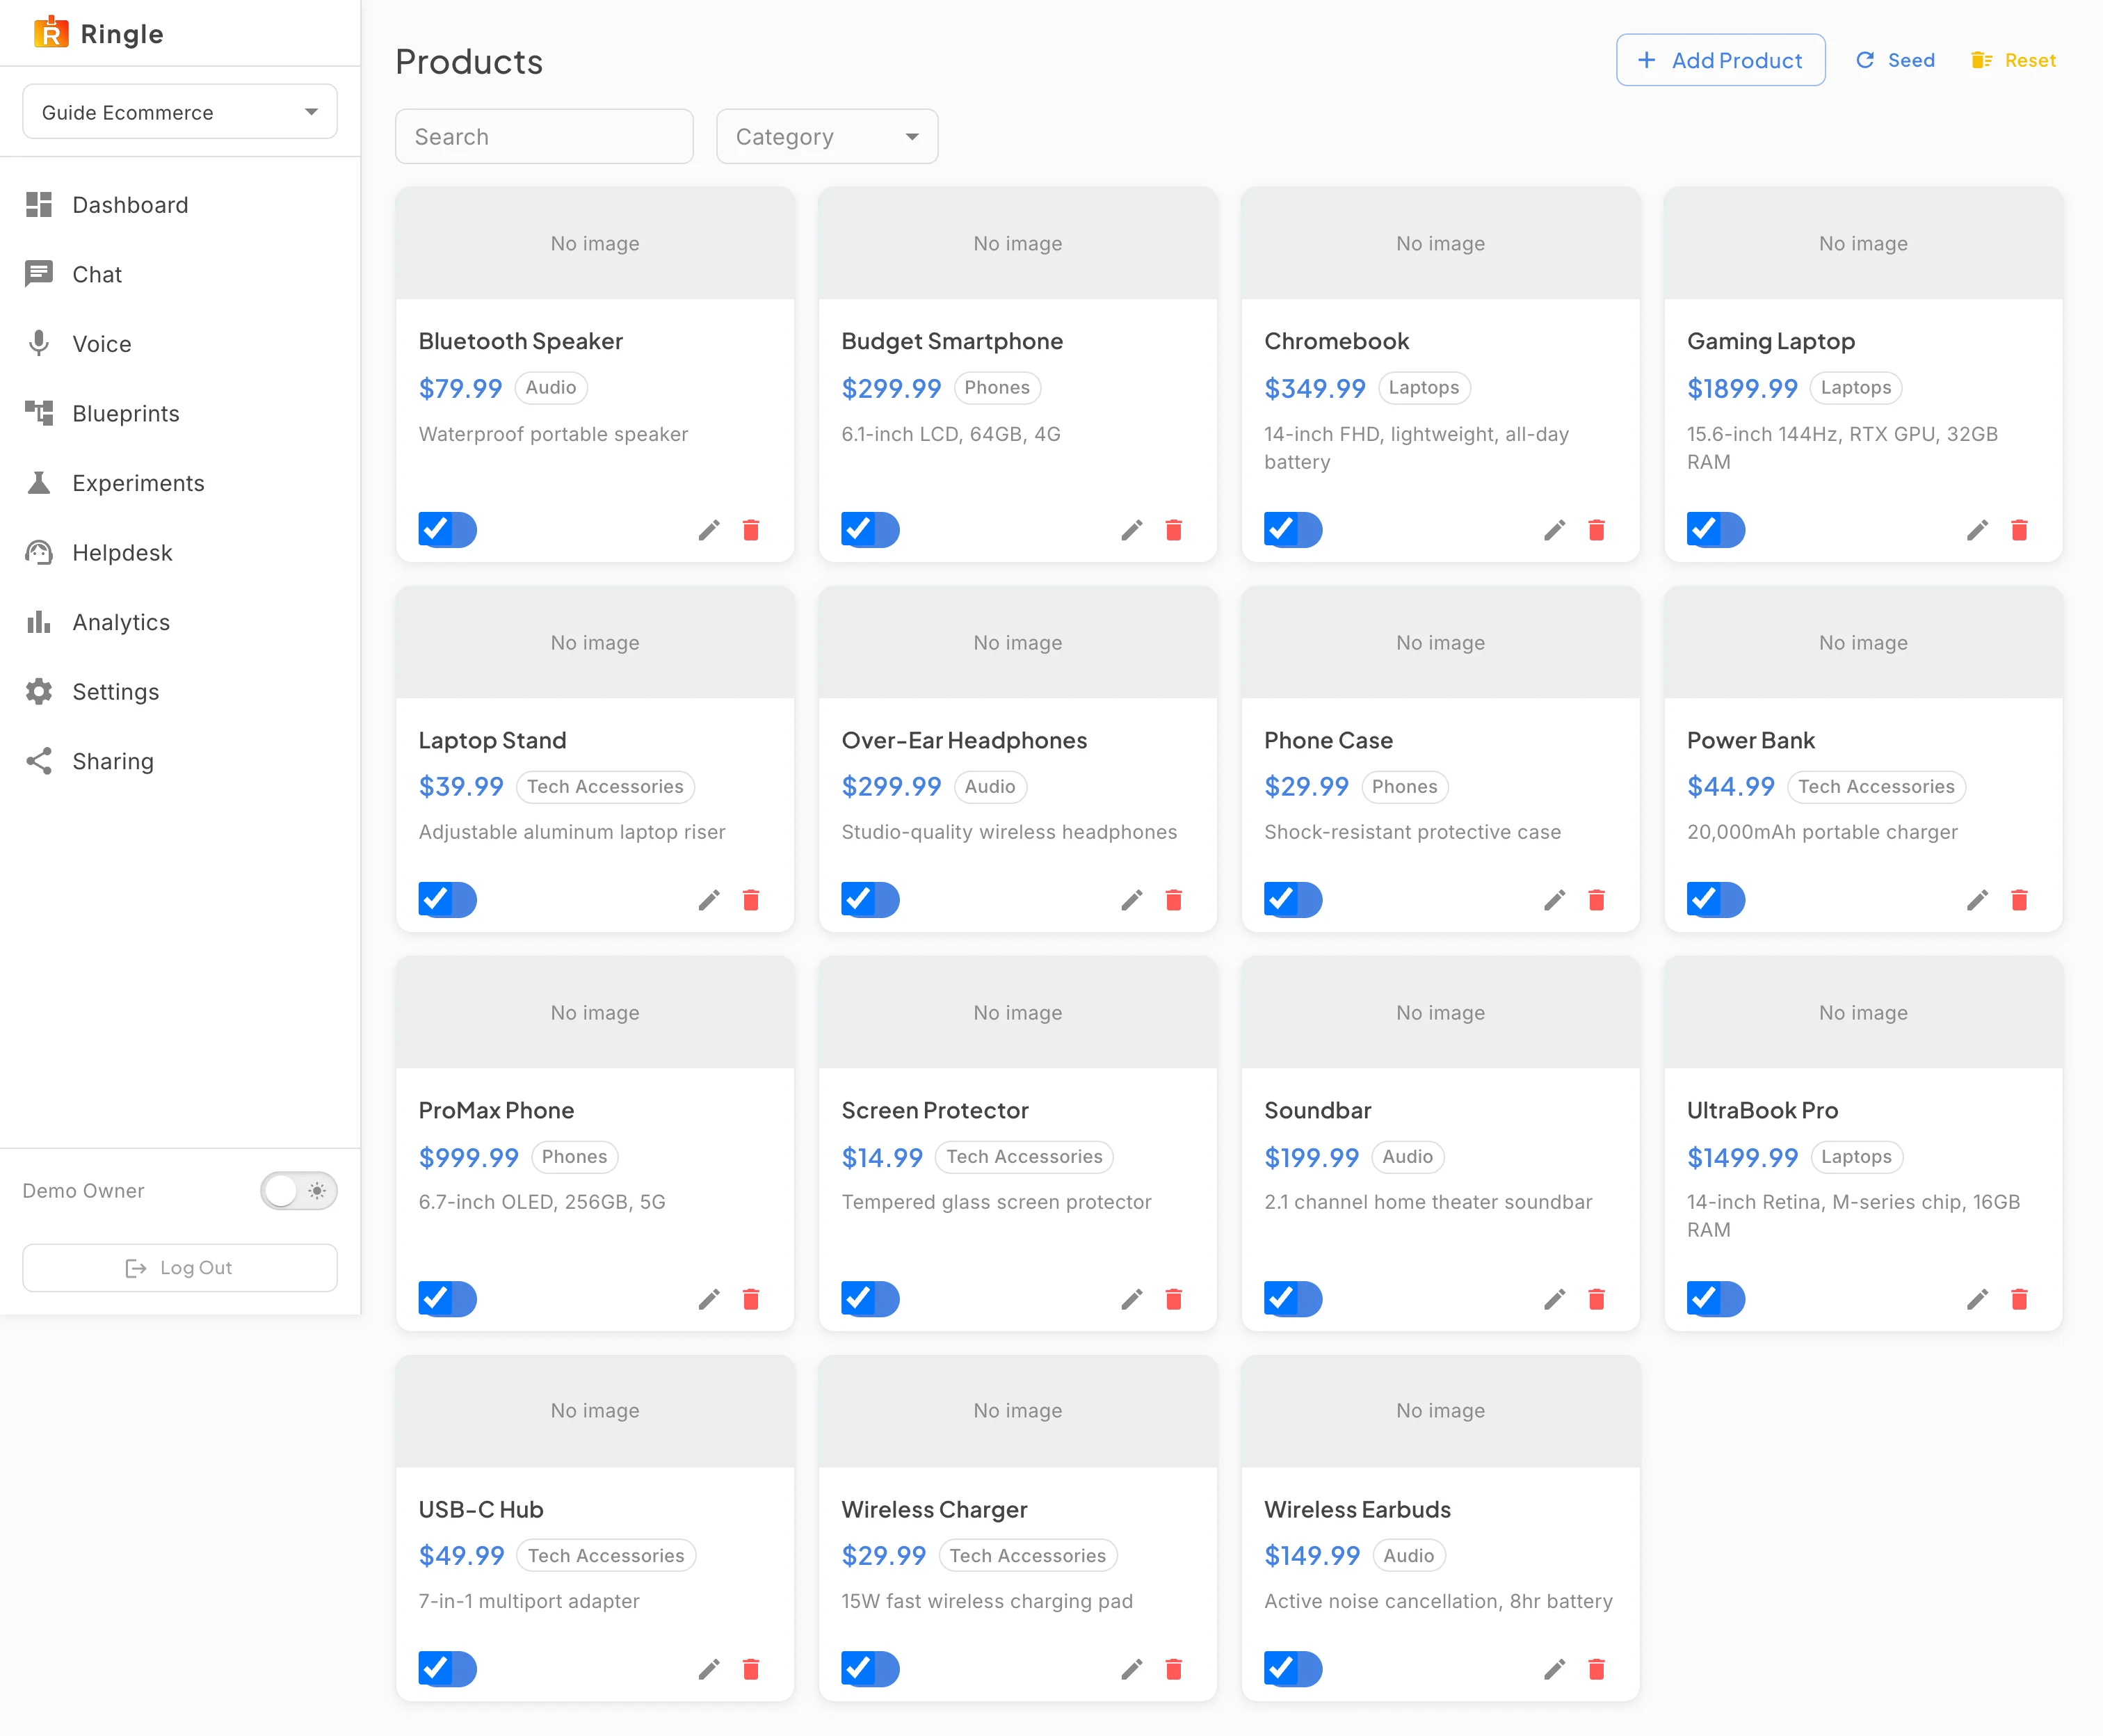
What you should see: The catalog renders as a grid of product cards. Each card has the product name, price, category chip, short description, an availability toggle, and pencil (edit) and trash (delete) icons. The header has Add Product, Seed, and Reset buttons. The list can be narrowed with the Search box or the Category filter. This is the same catalog the assistant quotes from in chat and voice conversations.
Action: Click the pencil icon on any product card to open the editor. Look around. Then click Cancel to close it without saving.
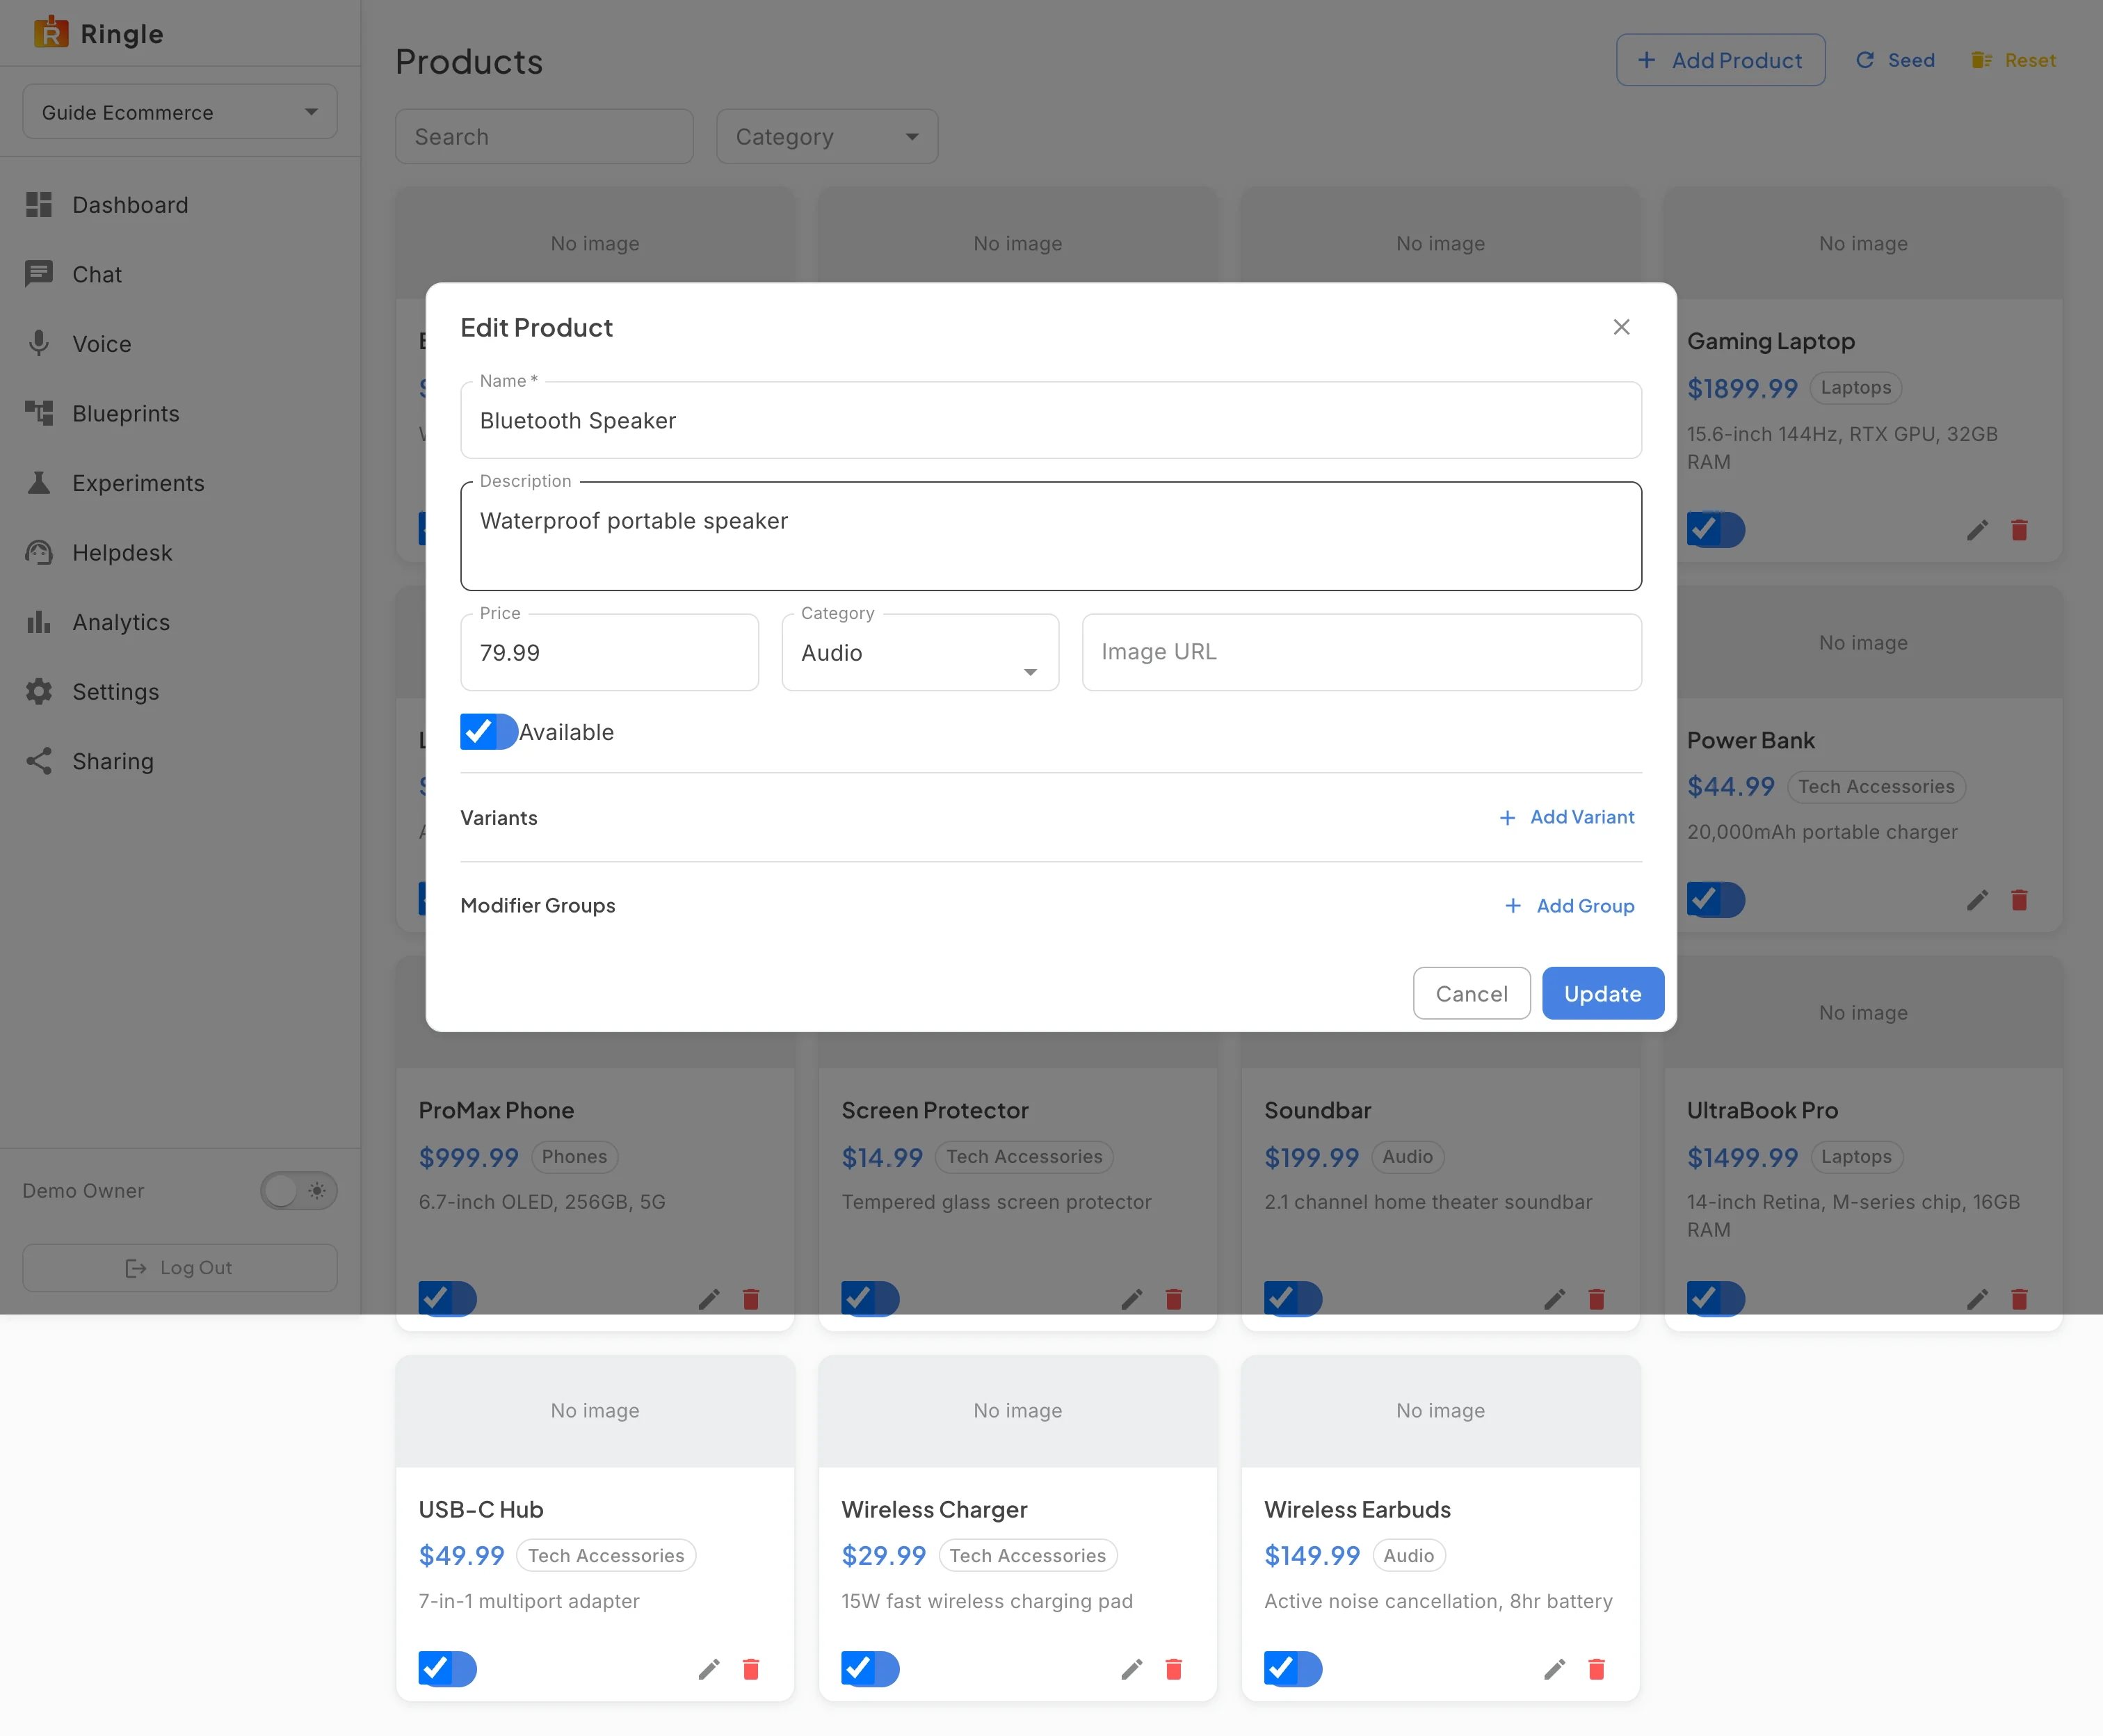
What you should see: The Edit Product dialog shows the product’s Name (required), Description, Price, Category, and Image URL fields plus an Available switch. Below a divider are two optional sections: Variants and Modifier Groups. Add Variant creates a row with name, price, and SKU. Add Group creates a named group of single- or multiple-choice modifiers with extra prices. Cancel discards everything. Update (or Create, for a new product) saves. Adding a product uses the same dialog via the Add Product button.
/demos/:demoWorkspaceId/orders (an order can
also be deep-linked as
/demos/:demoWorkspaceId/orders/:orderId) and
/demos/:demoWorkspaceId/products. Neither page appears in
the workspace sidebar. They are reached by URL.pages/demo-workspace/DemoWorkspaceOrders.jsx (list plus the
inline detail panel),
pages/demo-workspace/DemoWorkspaceProducts.jsx, and the
shared pages/mock/ProductEditorDialog.jsx in the portal
app.