Create a personalized demo workspace from the onboarding form: name it, pick a business sector, choose the assistant’s tone and brand vibe, and select the languages it should speak.
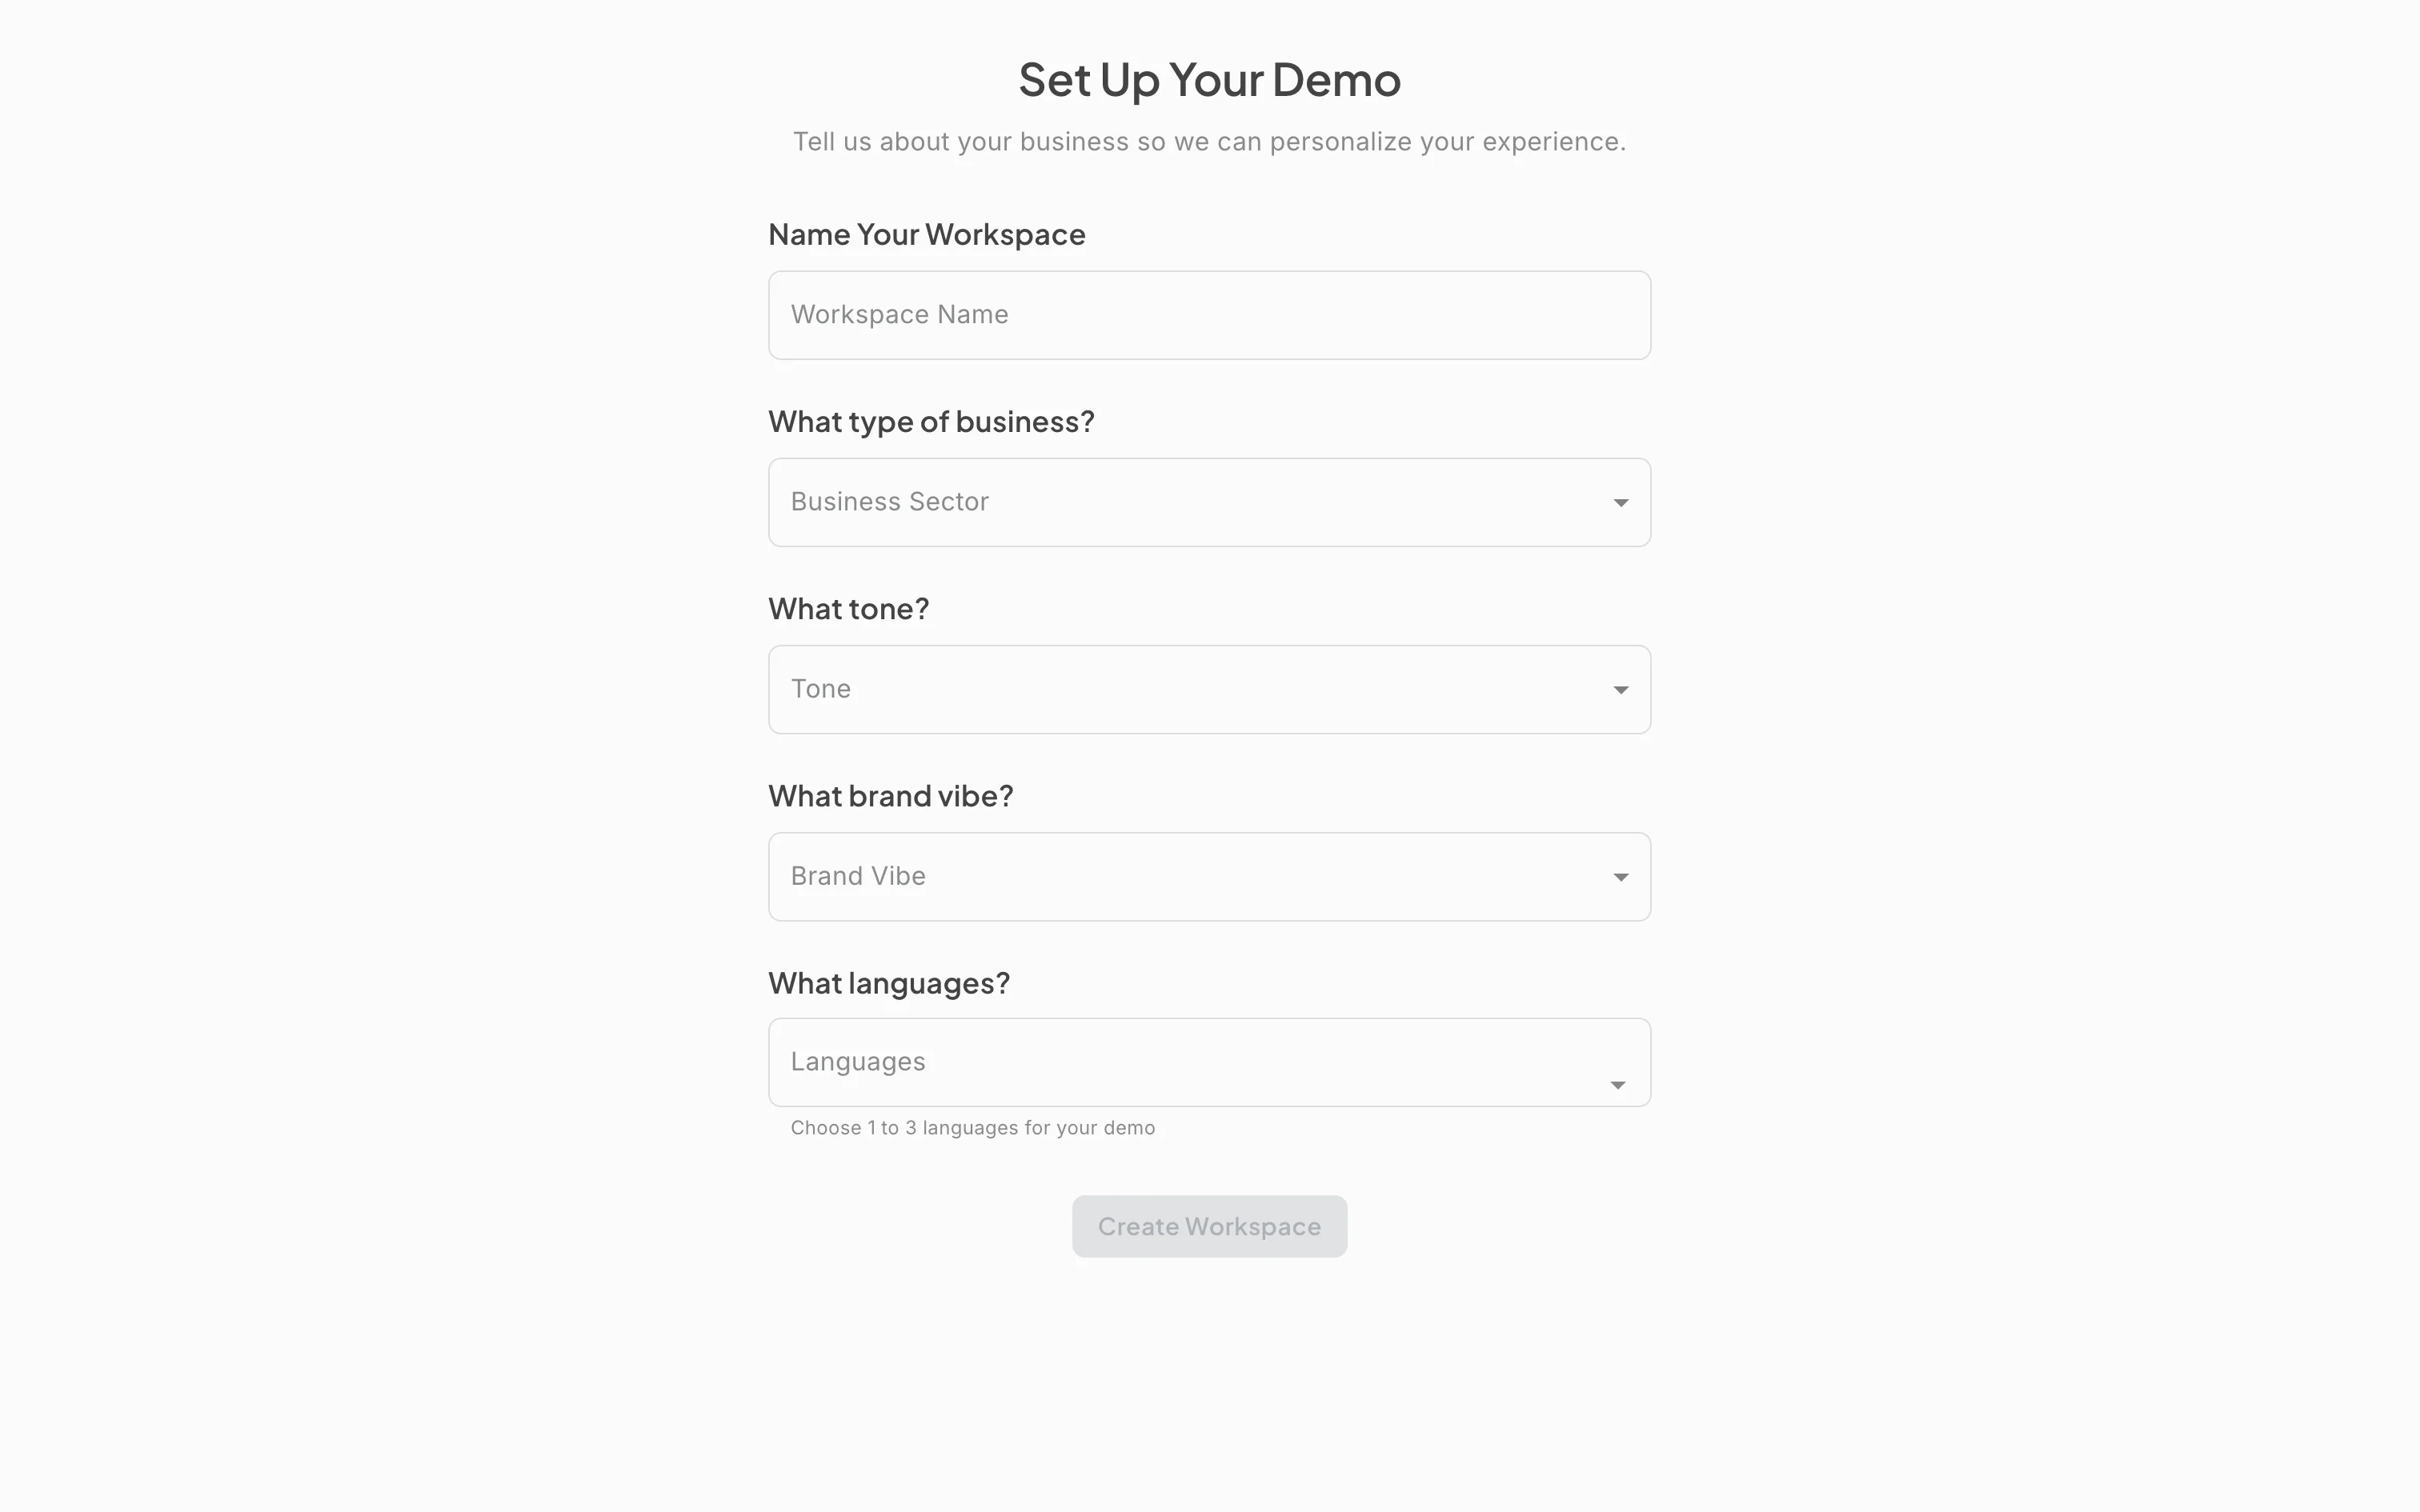
Action: Go to https://portal.getringle.com/demos/new, or click Try the demo on the marketing site.
What you should see: The “Set Up Your Demo” form loads with five sections: Name Your Workspace, What type of business?, What tone?, What brand vibe?, and What languages?. The Create Workspace button is disabled until every field is filled in.
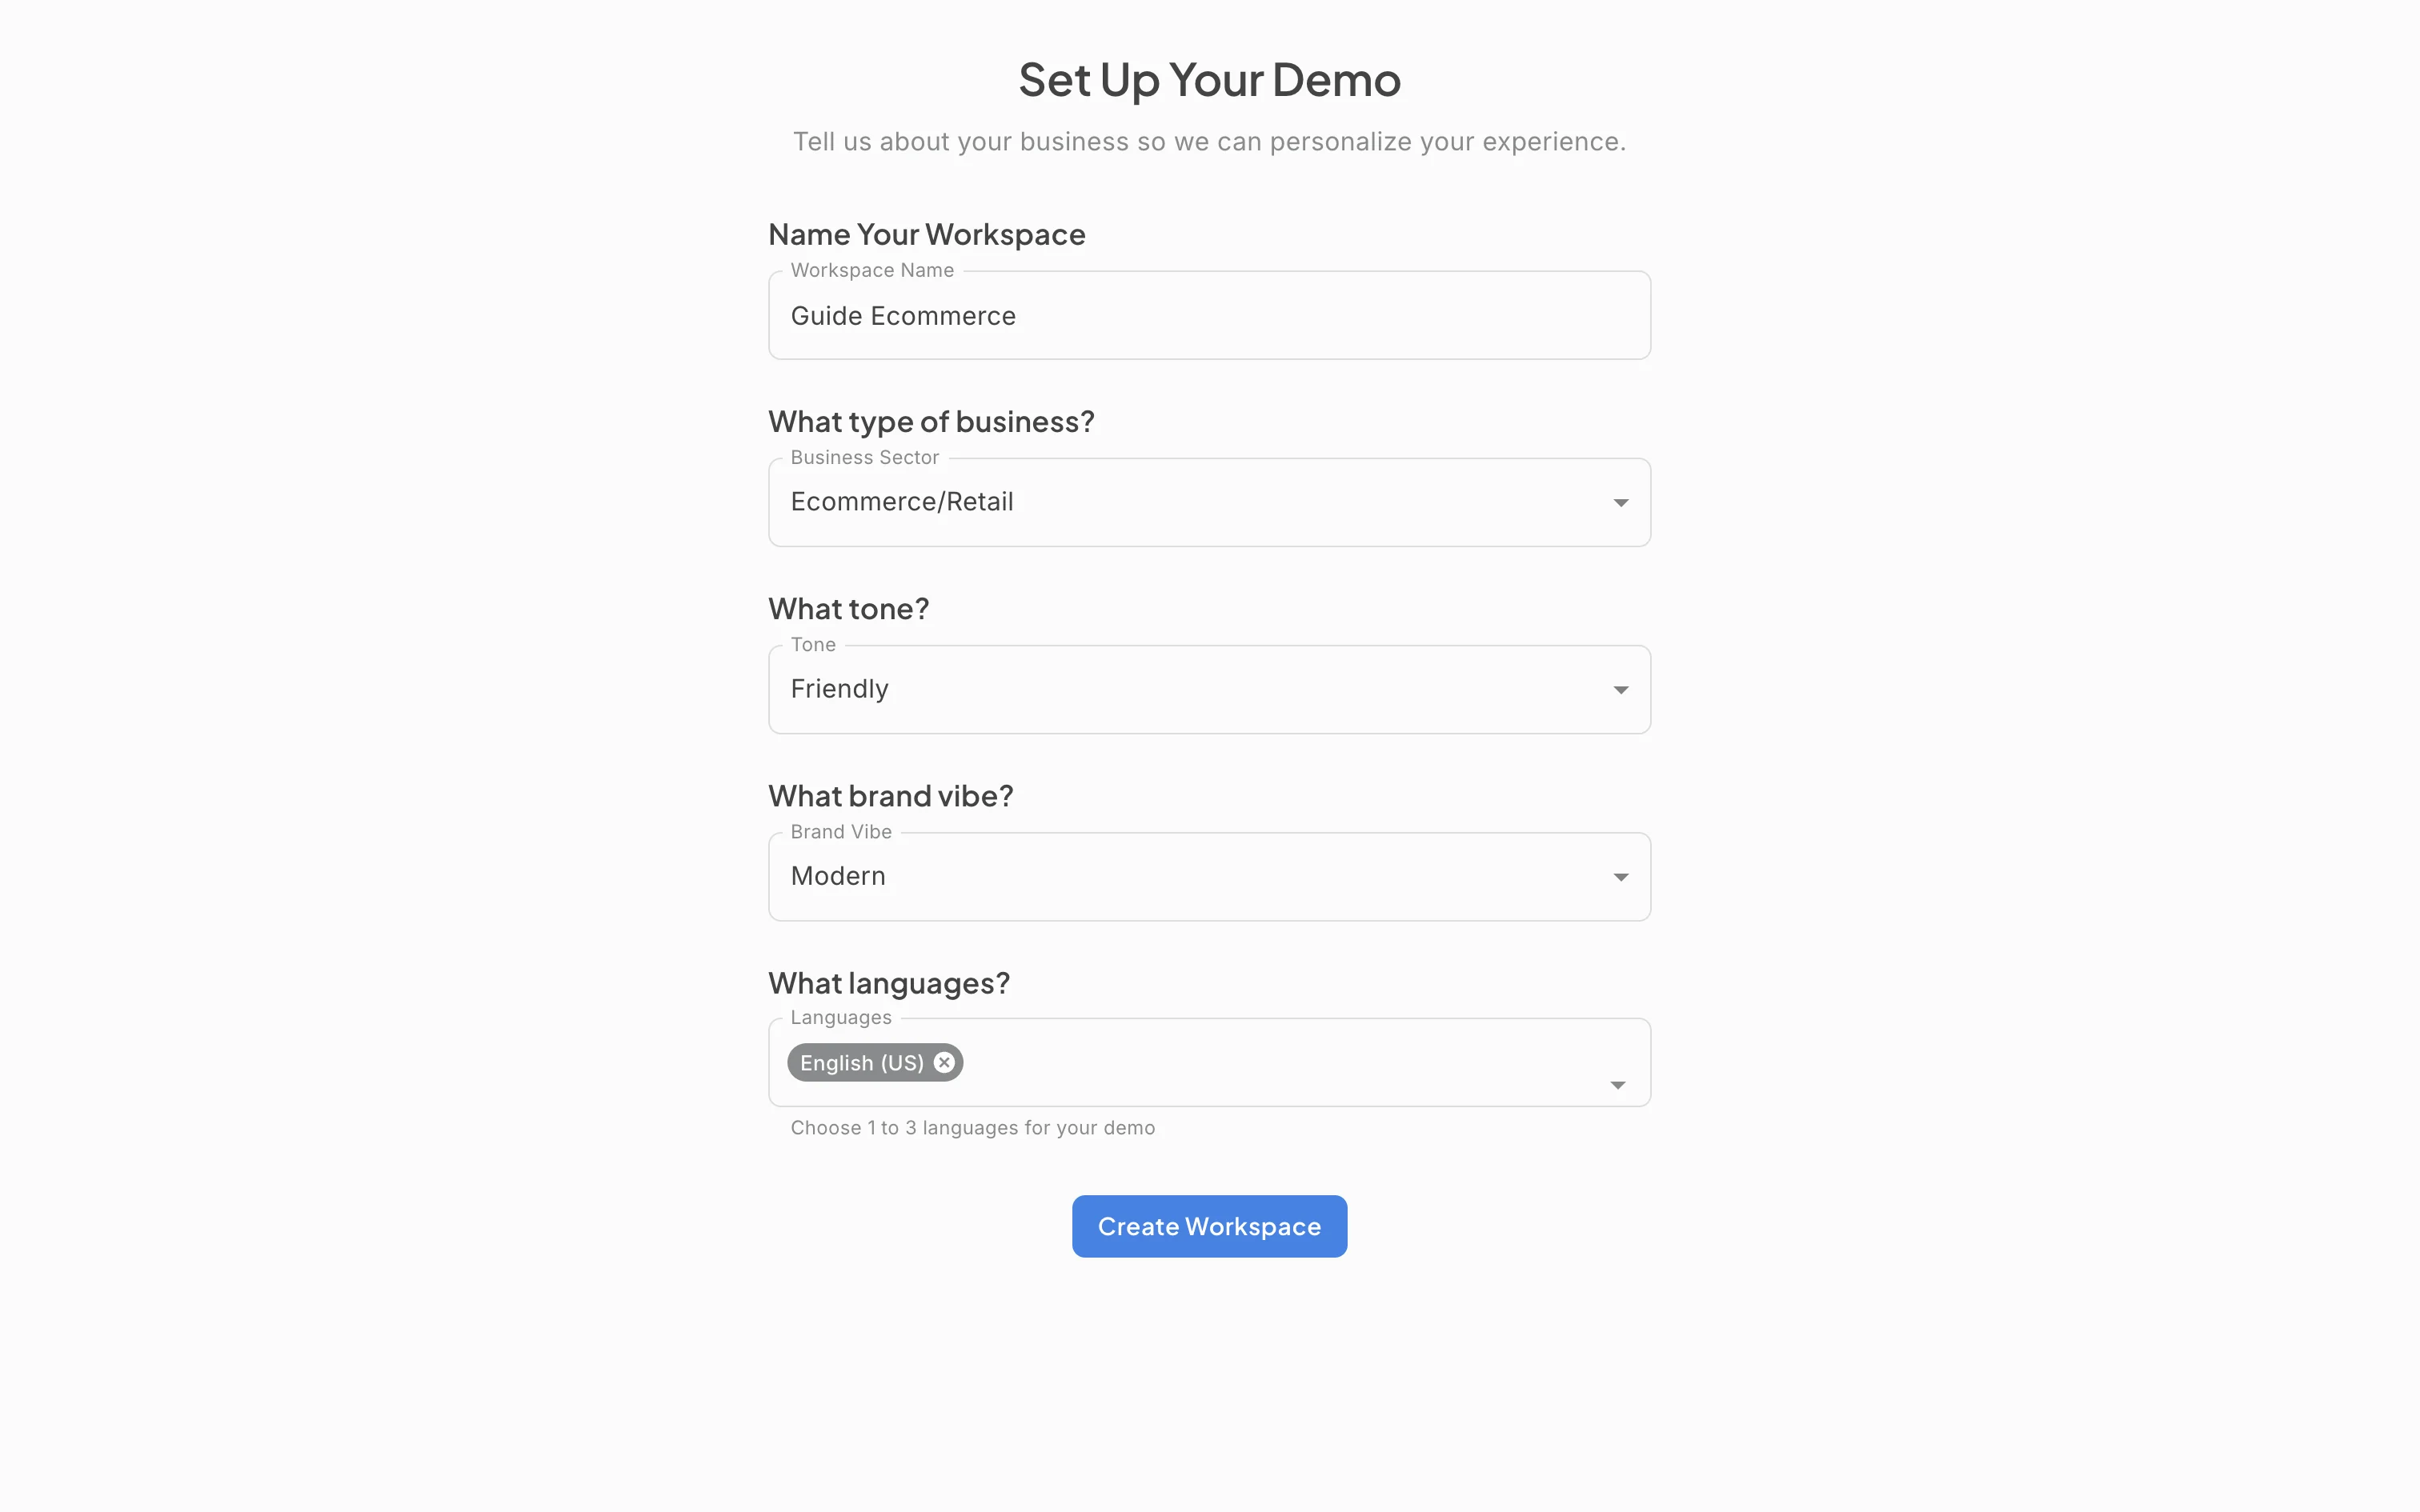
Action: Type a workspace name. Then pick a Business Sector. The sectors offered are Restaurant, Ecommerce/Retail, and Auto Shop.
What you should see: The name and sector show in the form. The sector decides what kind of demo data you get and which order panel appears next to conversations. Pick the one closest to your business (this guide uses Ecommerce/Retail).
Action: Pick a Tone: Warm, Professional, Friendly, Confident, Playful, Luxury / Refined, Reassuring, or Direct. Then pick a Brand Vibe: Modern, Corporate, Luxury, Bohemian, Punk / Edgy, Hipster, Minimalist, Techy, Family-Friendly, Wellness / Calming, or Other.
What you should see: Both dropdowns show your choices. These shape how the assistant phrases its replies in this workspace.
Action: Open the Languages field. Pick one to three languages. Each choice appears as a removable chip.
What you should see: The helper text under the field reads “Choose 1 to 3 languages for your demo”. Once three are picked, the remaining options are disabled. With every field filled, the Create Workspace button becomes active.
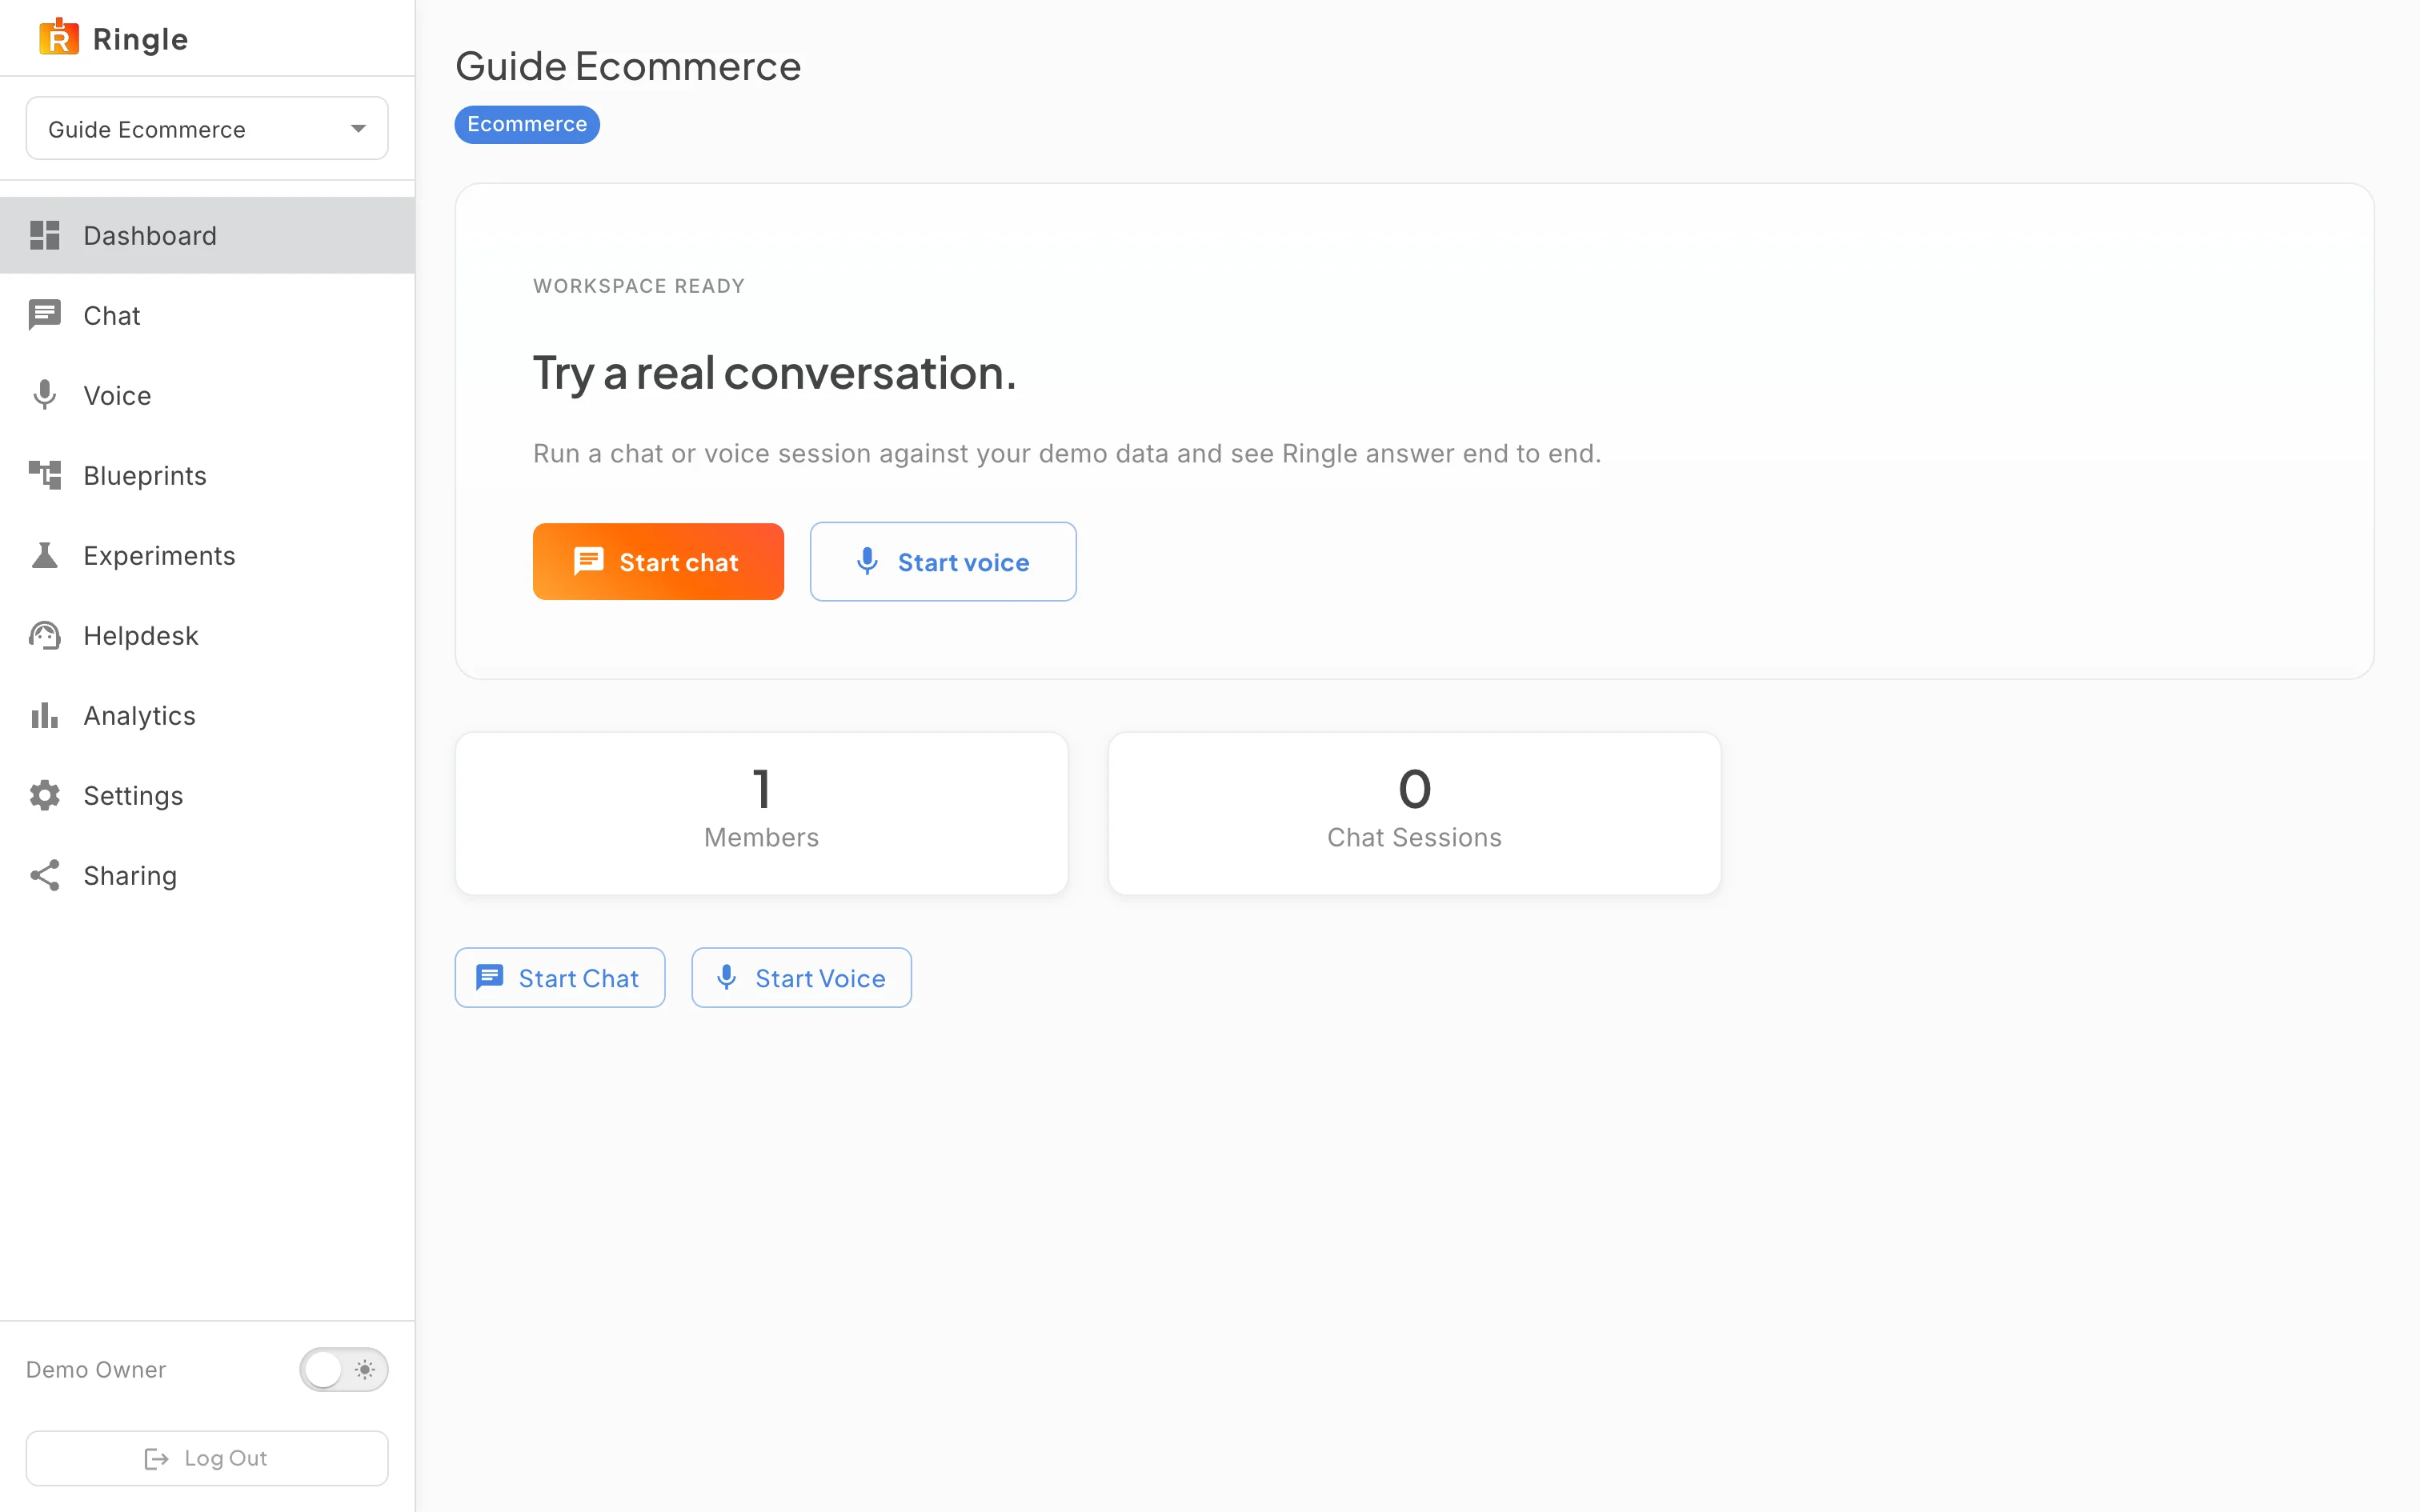
Action: Click Create Workspace.
What you should see: The button shows a brief creating state. Then you land on the new workspace’s dashboard. The workspace name and a sector chip appear at the top, and the sidebar shows the workspace navigation. Demo data (orders, subscriptions) is seeded for you in the background.
/demos/new.pages/demo-onboarding/DemoOnboardingPage.jsx in the portal
app./demos/<workspace-id>.
The name, sector, and voice can all be changed later on the workspace’s
Settings page.